> ## Documentation Index
> Fetch the complete documentation index at: https://dragonwingdocs.qualcomm.com/llms.txt
> Use this file to discover all available pages before exploring further.

# Model porting best practices

> Export and quantize a custom YOLOv8 model using the Qualcomm AI Runtime (QAIRT) SDK and run it on a Qualcomm evaluation kit.

## Export a custom YOLOv8 model using the QAIRT SDK

### Prerequisites

Install the Qualcomm AI Runtime SDK on a host computer with `Python >= 3.10` and `PyTorch >=1.8`.

For more details, follow [Install Qualcomm AI Runtime SDK](../topic/qairt-install).

Run the following commands on the host computer.

<Steps>
  <Step title="Activate your virtual environment">
    ```shell theme={null}
    source <venv_path>/bin/activate
    ```
  </Step>

  <Step title="Install the Ultralytics package and export the ONNX model">
    ```shell theme={null}
    pip install ultralytics
    ```

    ```shell theme={null}
    yolo export model=yolov8s.pt imgsz=320 format=onnx opset=11 optimize=True simplify=true
    ```
  </Step>
</Steps>

### Procedure

<Steps>
  <Step title="Convert the ONNX model to DLC">
    ```shell theme={null}
    snpe-onnx-to-dlc -i yolov8s.onnx
    ```
  </Step>

  <Step title="Generate quantized DLC">
    <Steps>
      <Step title="Prepare the calibration data set" />

      <Step title="Gather 5-10 images that used during training and save these images in the input directory" />

      <Step title="Use the preprocess.py script to convert .jpg images into the RAW files required for quantization">
        <Note>
          In this example, the model uses an input dimension of 320x320.
        </Note>

        <Steps>
          <Step title="Download the script">
            ```shell theme={null}
            wget https://raw.githubusercontent.com/qualcomm/sample-apps-for-qualcomm-linux/refs/heads/main/qualcomm-linux/scripts/preprocess.py
            ```
          </Step>

          <Step title="Run the script with the following options">
            ```shell theme={null}
            python preprocess.py <INPUT PATH> <OUTPUT PATH> 1 0
            ```

            * `<INPUT PATH>`: Folder containing the original images
            * `<OUTPUT PATH>`: Folder where the RAW files will be generated
          </Step>
        </Steps>
      </Step>

      <Step title="Create an input.txt file containing the paths to all generated RAW files">
        The quantization process needs this file.
      </Step>
    </Steps>
  </Step>

  <Step title="Quantize the model">
    Use `snpe-dlc-quantize` to convert the model to quantized DLC.

    ```shell theme={null}
    snpe-dlc-quantize --input_dlc yolov8s.dlc --input_list input.txt
    ```
  </Step>
</Steps>

## Run the demo

<Steps>
  <Step title="Download the labels file">
    See [Download model and label files](../topic/classify-objects-with-default-model#download-model-and-label-files).
  </Step>

  <Step title="On the host computer, set the user environment variable">
    ```shell theme={null}
    export USER=ubuntu
    ```
  </Step>

  <Step title="Push the test video file to /etc/media on the device">
    ```shell theme={null}
    scp <video file> $USER@<IP address of target device>:/home/ubuntu/
    ssh ubuntu<ip-address>
    cp /home/ubuntu/<video file> /etc/media/
    exit
    ```
  </Step>

  <Step title="Push the quantized YoloV8 model to the device">
    ```shell theme={null}
    scp <model file> $USER@<IP address of target device>:/home/ubuntu/
    ssh ubuntu<ip-address>
    cp /home/ubuntu/<model file> /etc/models/
    exit
    ```
  </Step>

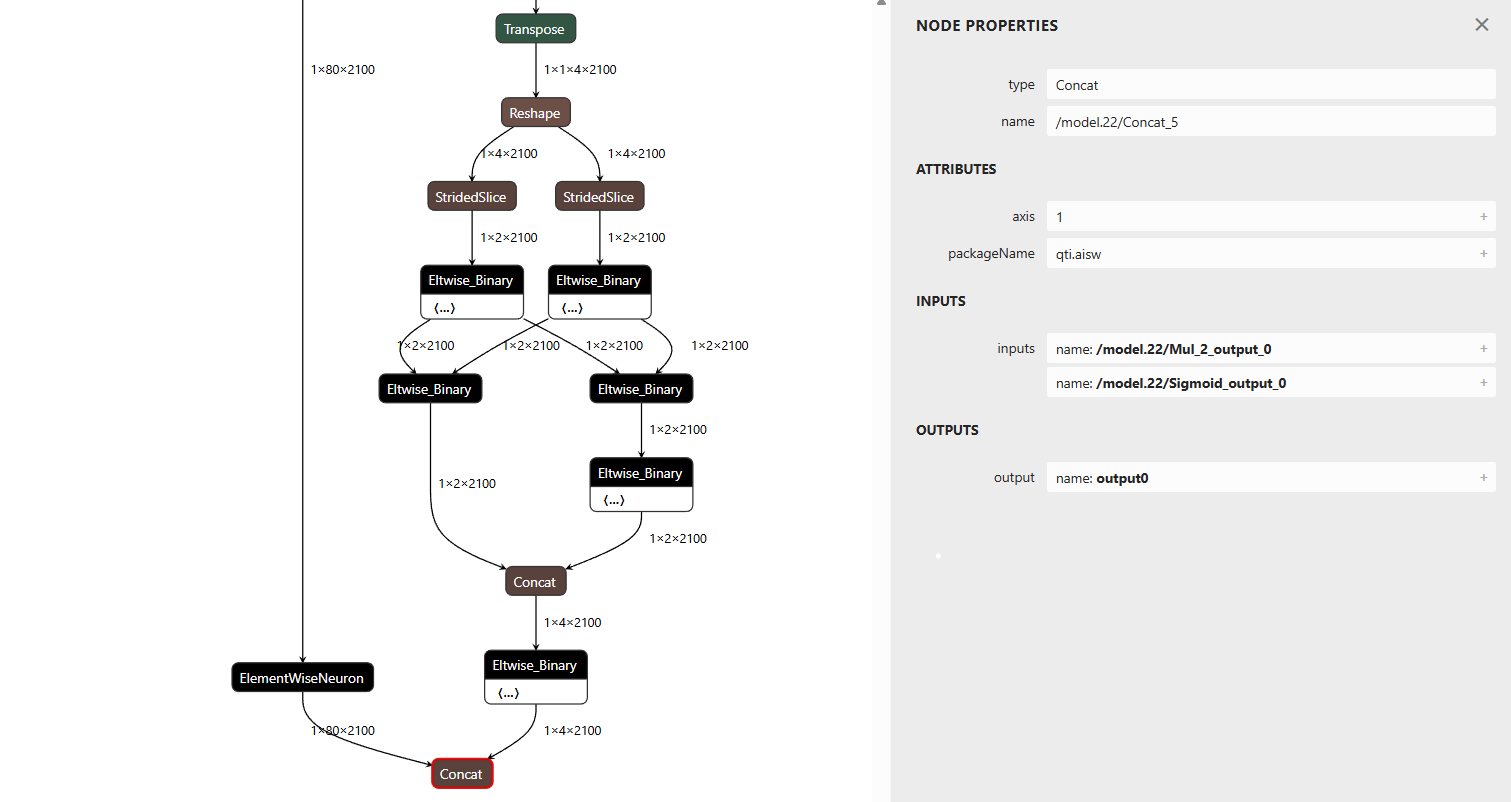
  <Step title="Retrieve the output tensor of the model, for example output0">
    <img src="https://mintcdn.com/qualcomm-prod/PpKFrrqBJ7iBLtKw/AI-Developer-Workflow-Ubuntu/_images/node-output0.png?fit=max&auto=format&n=PpKFrrqBJ7iBLtKw&q=85&s=b925679d321b9863a7d62843ab9c597d" alt="Model output tensor name in Netron graph viewer" width="1511" height="802" data-path="AI-Developer-Workflow-Ubuntu/_images/node-output0.png" />
  </Step>

  <Step title="Sign in to the device using SSH">
    ```shell theme={null}
    ssh $USER@<IP_ADDRESS_OF_TARGET_DEVICE>
    ```
  </Step>

  <Step title="In the new shell, run the following command">
    ```shell theme={null}
    gst-launch-1.0 -e filesrc location=<video file path> ! qtdemux ! queue ! h264parse ! v4l2h264dec capture-io-mode=4 output-io-mode=4 ! video/x-raw,format=NV12 ! queue ! tee name=split split. ! queue ! qtivcomposer name=mixer ! queue ! waylandsink fullscreen=true sync=true split. ! queue ! qtimlvconverter ! queue ! qtimlsnpe delegate=dsp model=<model file path> tensors="<output0>" ! queue ! qtimlpostprocess settings="{\"confidence\": 51.0}" results=10 module=yolov8 labels=<label file path> ! video/x-raw,width=640,height=360 ! queue ! mixer.
    ```

    <Note>
      Replace the following placeholders with the appropriate file paths:<br />
      `<video file path>`: Path to the input video file<br />
      `<model file path>`: Path to the YOLOv8 DLC model file<br />
      `<label file path>`: Path to the YOLOv8 label file<br /><br />
      For example:

      ```shell theme={null}
      gst-launch-1.0 -e filesrc location=/etc/media/video.mp4 ! qtdemux ! queue ! h264parse ! v4l2h264dec capture-io-mode=4 output-io-mode=4 ! video/x-raw,format=NV12 ! queue ! tee name=split split. ! queue ! qtivcomposer name=mixer ! queue ! waylandsink fullscreen=true sync=true split. ! queue ! qtimlvconverter ! queue ! qtimlsnpe delegate=dsp model=/etc/models/yolov8s_quantized.dlc tensors="<output0>" ! queue ! qtimlpostprocess settings="{\"confidence\": 51.0}" results=10 module=yolov8 labels=/etc/labels/yolov8.json ! video/x-raw,width=640,height=360 ! queue ! mixer.
      ```
    </Note>
  </Step>
</Steps>