> ## Documentation Index
> Fetch the complete documentation index at: https://dragonwingdocs.qualcomm.com/llms.txt
> Use this file to discover all available pages before exploring further.
# Boot your device
## Introduction
Describes how to access your device after it has been flashed. You can use either of the following two connection methods:
* UART for low-level serial console access
* ADB for standard shell access
## Connect using UART
### Install Minicom
Minicom is a lightweight, terminal-based serial communication program used on Linux systems
to interact with devices over a UART (serial) connection. It allows you to access the device’s
console, view boot logs, and send commands directly to the system at a low level.
Install Minicom on the host system:
```bash theme={null}
sudo apt install minicom
```
### Connect
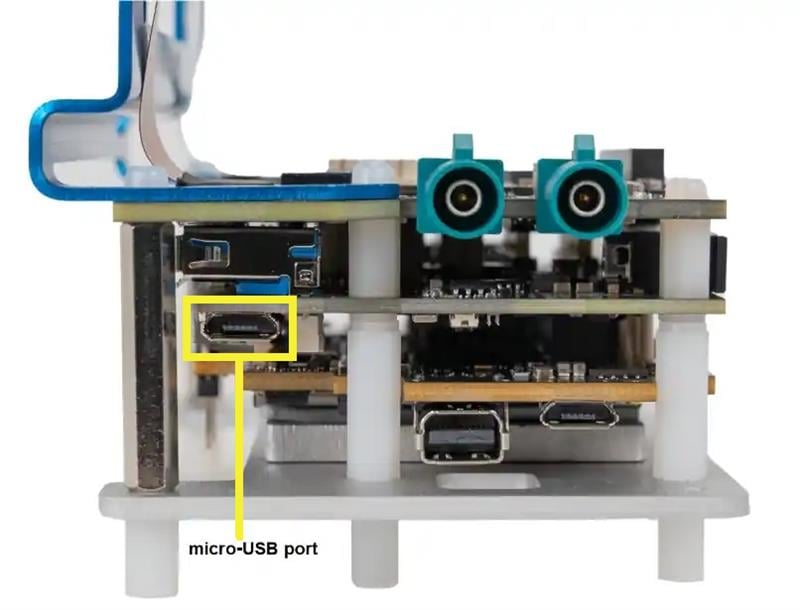
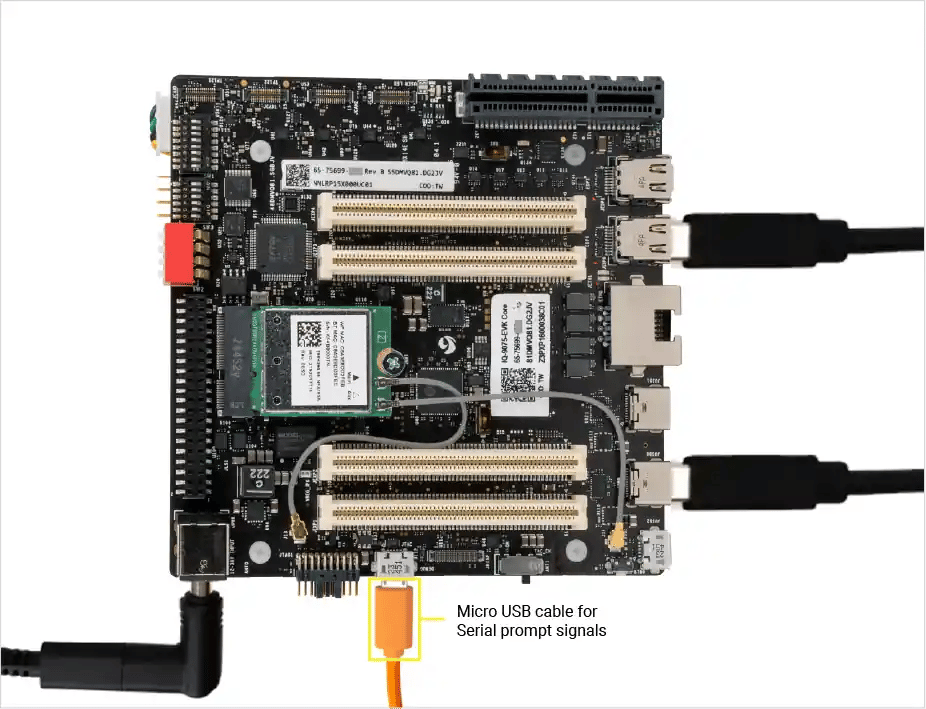
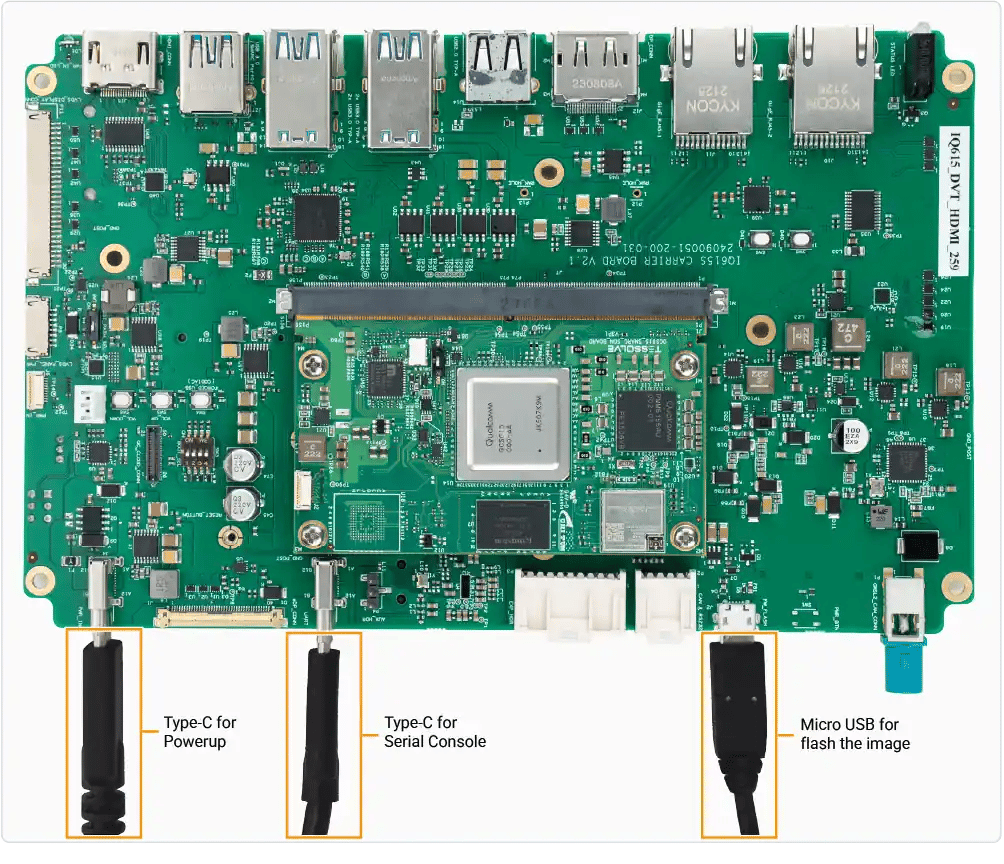
* To set up the debug UART connection and view the diagnostic messages, connect the micro-USB cable from the micro-USB port on the device to the Linux host.

 * Check if the USB port is detected:
```bash theme={null}
ls /dev/ttyUSB*
```
```text Sample output theme={null}
/dev/ttyUSB0
```
* Open Minicom:
```bash theme={null}
sudo minicom -s
```
* Use the Down arrow key to select the **Serial port setup** option. Use the Up and Down arrow keys to navigate through the menu.
* Check if the USB port is detected:
```bash theme={null}
ls /dev/ttyUSB*
```
```text Sample output theme={null}
/dev/ttyUSB0
```
* Open Minicom:
```bash theme={null}
sudo minicom -s
```
* Use the Down arrow key to select the **Serial port setup** option. Use the Up and Down arrow keys to navigate through the menu.
 * Set up the serial device configuration:
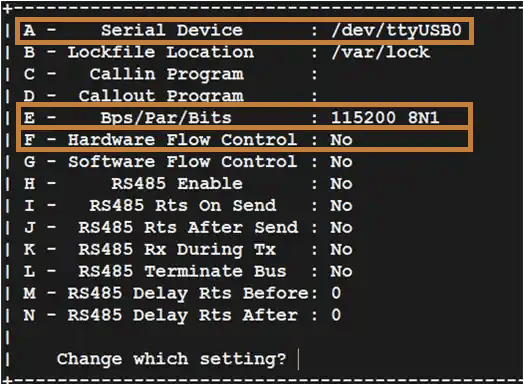
* Select **A** on your keyboard to set up the serial device name such as `/dev/ttyUSB0`.
* Select **Enter** to save the changes.
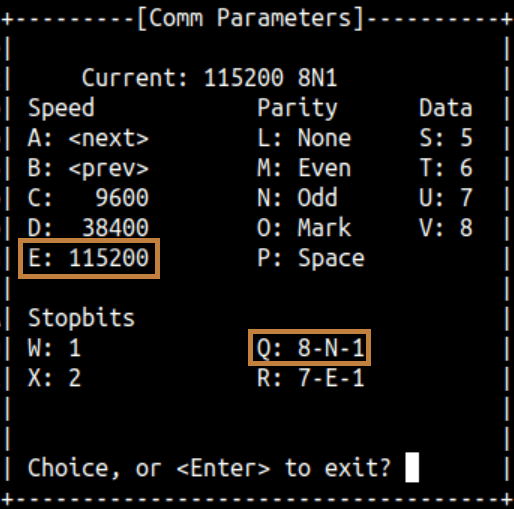
* Select **E** on your keyboard to set the baud rate and 8N1 configuration:
* Select the **E** key again if the baud rate isn’t set to **115200**.
* Select the **Q** key if the configuration isn’t set to **8N1**.
* Set up the serial device configuration:
* Select **A** on your keyboard to set up the serial device name such as `/dev/ttyUSB0`.
* Select **Enter** to save the changes.
* Select **E** on your keyboard to set the baud rate and 8N1 configuration:
* Select the **E** key again if the baud rate isn’t set to **115200**.
* Select the **Q** key if the configuration isn’t set to **8N1**.
 * Select **Enter** to save the changes.
* Select **F** on your keyboard to set the **Hardware Flow Control** to `No`.
* Select **Enter** to save the changes.
* Select **F** on your keyboard to set the **Hardware Flow Control** to `No`.
 * Select **Enter** to save the changes.
* Select the **Save setup as dfl** option and then select **Enter**.
* Select **Enter** to save the changes.
* Select the **Save setup as dfl** option and then select **Enter**.
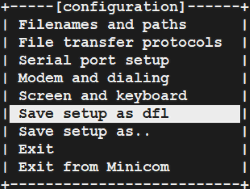 * Select **EXIT** to open the UART console and then select **Enter**.
* Sign in to the UART console:
* Login: `root`
* Password: `oelinux123`
If the sign in console doesn't display as expected, verify the USB connection. If the issue persists, disconnect and then reconnect the micro-USB.
## Connect using ADB
`adbd` is disabled on the device by default and must be explicitly enabled before use.
### Install ADB
ADB is used to communicate with a running device and is required to trigger a reboot
into EDL mode from the operating system. It provides a convenient way to transition
the device into the correct state for flashing without manual intervention.
* Install `adb` on your host system using the system package manager:
```bash theme={null}
sudo apt install android-tools-adb android-tools-fastboot
```
* Verify if `adb` is installed on your system:
```bash theme={null}
adb --version
```
```text Sample output theme={null}
Android Debug Bridge version 1.0.39
Version 1:8.1.0+r23-5ubuntu2
```
* The `adbd` service is disabled by default. A one-time setup is required to
enable the service before `adb` can be used.
* Connect to the device by following the
[Connect via UART](/Key-Documents/Flash-Guide/boot-up#connect-via-uart) guide.
* Create the file `/etc/usb-debugging-enabled` to enable `adbd`.
```bash theme={null}
touch /etc/usb-debugging-enabled
```
* Configure the `adbd` service to start automatically.
```bash theme={null}
systemctl enable --now android-tools-adbd
```
### Connect
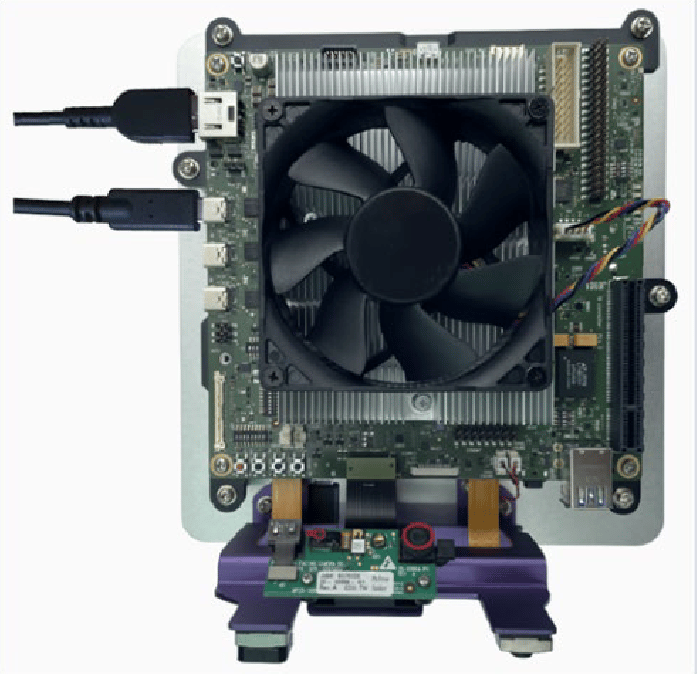
* Connect the device using the USB Type-C cable to the host computer.
* Ensure that the device is recognized as a device by `adb`:
```bash theme={null}
adb devices
```
```text Sample output theme={null}
List of devices attached
68f592a device
```
* Connect to an `adb` shell:
```bash theme={null}
adb shell
```
* Select **EXIT** to open the UART console and then select **Enter**.
* Sign in to the UART console:
* Login: `root`
* Password: `oelinux123`
If the sign in console doesn't display as expected, verify the USB connection. If the issue persists, disconnect and then reconnect the micro-USB.
## Connect using ADB
`adbd` is disabled on the device by default and must be explicitly enabled before use.
### Install ADB
ADB is used to communicate with a running device and is required to trigger a reboot
into EDL mode from the operating system. It provides a convenient way to transition
the device into the correct state for flashing without manual intervention.
* Install `adb` on your host system using the system package manager:
```bash theme={null}
sudo apt install android-tools-adb android-tools-fastboot
```
* Verify if `adb` is installed on your system:
```bash theme={null}
adb --version
```
```text Sample output theme={null}
Android Debug Bridge version 1.0.39
Version 1:8.1.0+r23-5ubuntu2
```
* The `adbd` service is disabled by default. A one-time setup is required to
enable the service before `adb` can be used.
* Connect to the device by following the
[Connect via UART](/Key-Documents/Flash-Guide/boot-up#connect-via-uart) guide.
* Create the file `/etc/usb-debugging-enabled` to enable `adbd`.
```bash theme={null}
touch /etc/usb-debugging-enabled
```
* Configure the `adbd` service to start automatically.
```bash theme={null}
systemctl enable --now android-tools-adbd
```
### Connect
* Connect the device using the USB Type-C cable to the host computer.
* Ensure that the device is recognized as a device by `adb`:
```bash theme={null}
adb devices
```
```text Sample output theme={null}
List of devices attached
68f592a device
```
* Connect to an `adb` shell:
```bash theme={null}
adb shell
```