

Introduction
Flashing using PCAT is an alternative to QDL that provides a more integrated and user-friendly flashing experience. You can use this procedure if you are a registered user having access to Qualcomm’s partner tools. To flash a prebuilt image using PCAT, the following steps are required:- Install the packages required for flashing the image – Install Required Packages
- Obtain a flashable image – Obtain Flashable Image
- Identify the correct storage configuration for your device – Identify Storage Configuration
- Select the appropriate CDT based on the reference kit – Configure CDT
- Switch the device into Emergency Download (EDL) mode – Switch device to EDL Mode
- Flash the software using PCAT – Flash software image
Install Required Packages
qsc-cli is a command-line tool provided by Qualcomm that offers an end-to-end workflow
for accessing, managing, and building Qualcomm software. Follow these steps to install
qsc-cli on your system:
- Register your Qualcomm email ID by visiting the Qualcomm Support Page.
-
Download the Debian package for
qsc-cli: -
Install the
qsc-cliDebian package: -
Sign in to
qsc-cliusing your registered email ID:
pcat is a Qualcomm-provided flashing tool that offers a guided and integrated
interface for programming software images onto Qualcomm devices. Follow these
steps to install pcat on your system:
-
Install the following tools on the host computer:
If you encounter issues while installing QUD that require enrolling a public key on your Linux host, see the instructions in the README file located at
/opt/QTI/sign/signReadme.txt. -
Confirm if the
QTI_HS-USB_QDLoaderdriver is available in the installed directory:Sample output
Obtain Flashable Image
Before flashing, you need a flashable image directory on your host machine. Depending on how you obtained your image, choose one of the following paths.- Prebuilt Image
- Compiled Image
Prebuilt images are distributed as compressed archives. Download the archive for your
device from the Obtain Prebuilt Images
section, extract the archive, and go to the extracted directory.
-
Extract the archive:
-
Go to the extracted directory:
Identify Storage Configuration
Machine configurations come with either UFS or eMMC storage enabled by default, and these settings are reflected in the prebuilt images. If you need to modify the storage type, you must update the configuration and rebuild the image, as this cannot be changed in prebuilt binaries. The default storage configurations for supported platforms are| Machine | Storage Type |
|---|---|
| IQ-9075-EVK | UFS |
| IQ-8275-EVK | UFS |
| QCS6490 | UFS |
| IQ-615-EVK | EMMC |
| IQ-X7181-EVK | UFS/SPINOR |
| IQ-X5121-EVK | UFS/SPINOR |
Configure CDT
The configuration data table (CDT) contains device-specific information required for proper platform initialization. You need to select the correct CDT file based on your reference kit before flashing.- IQ-X7181/IQ-X5121
- Other Kits
-
Download the CDT binary from CodeLinaro:
-
Extract the tarball archive:
-
Go to the extracted directory:
-
Flash the CDT:
Switch device to EDL Mode
The device must be in the EDL mode before you flash the software image. The Qualcomm supported device by default enters EDL mode if there is no image on the device after power up or if it’s corrupted. Follow these steps to force the device into EDL mode.- QCS6490/QCS5430
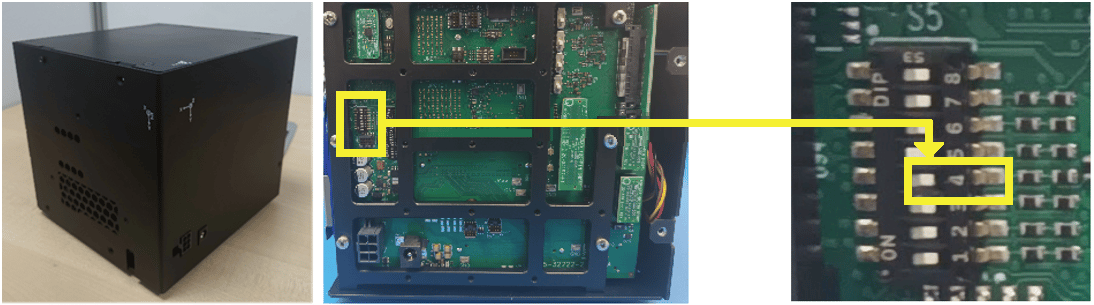
- IQ-9075
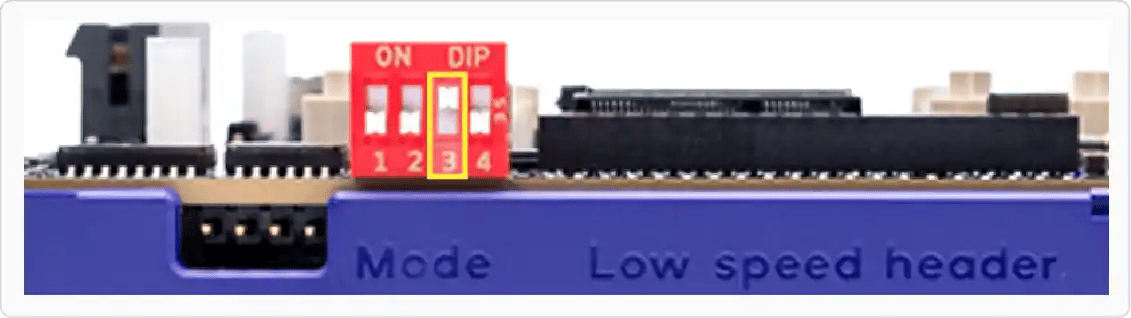
- IQ-8275
- IQ-615
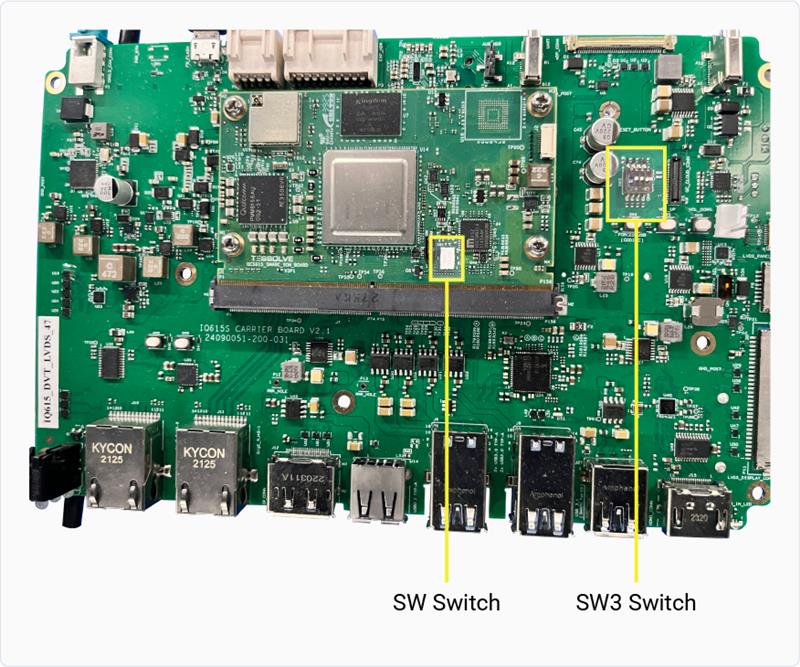
- IQ-X7181/IQ-X5121
- Press and hold the F_DL button.
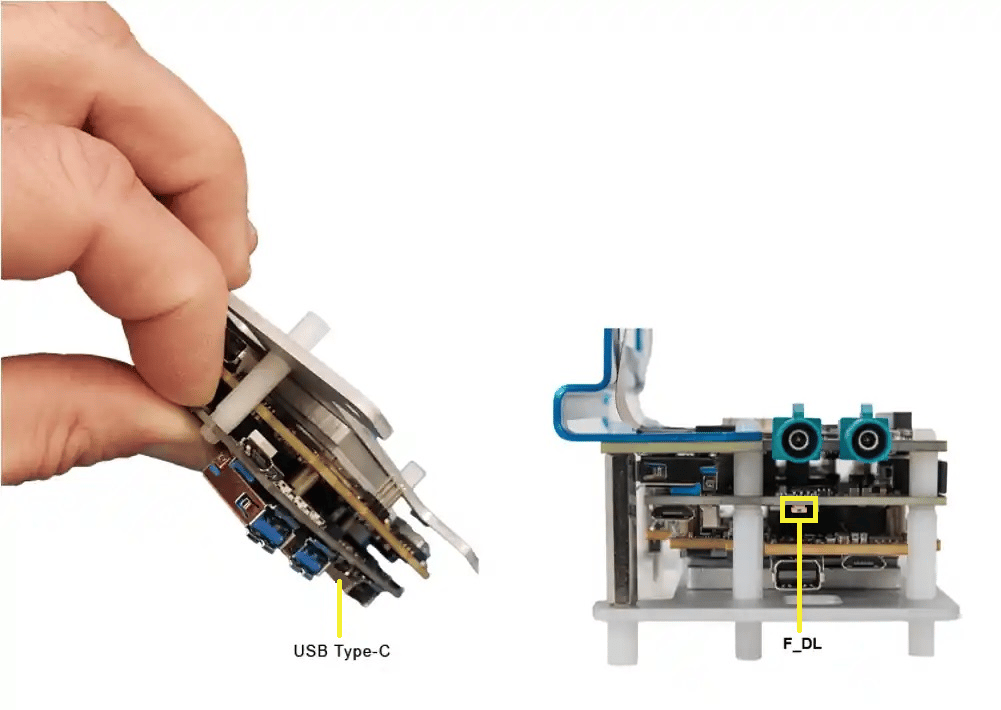
- Connect the device to a +12 V wall power supply.
- Connect the device to the host system using a Type-C cable through the USB Type-C connector.
- Release the F_DL button. The device is now in EDL mode.
- Unplug the power cable once the entire flashing process is complete to exit EDL mode.
Expected output
Flash software image
-
Check if PCAT recognizes the device:
Sample output
-
Flash the software image using PCAT by selecting the appropriate storage option:
-
Flashing is successful if you see the following message in the terminal window:
Sample output
-
After a successful flashing operation, run the
lsusbcommand to see the device information on the terminal window as shown in the following message:Sample output for QCS6490