> ## Documentation Index
> Fetch the complete documentation index at: https://dragonwingdocs.qualcomm.com/llms.txt
> Use this file to discover all available pages before exploring further.
# Devices
> Connect and manage Qualcomm® dev kits — activate, flash, and communicate via ADB or SSH.
## Connecting a Device
The extension supports two connection protocols:
Standard Android Debug Bridge connection over USB. Device must be connected
and [udev rules](../setup/udev-rules) must be configured.
Network-based connection. Supported on both Qualcomm Linux and Ubuntu. Add
any device by IP address — useful for headless setups or devices on the same
network.
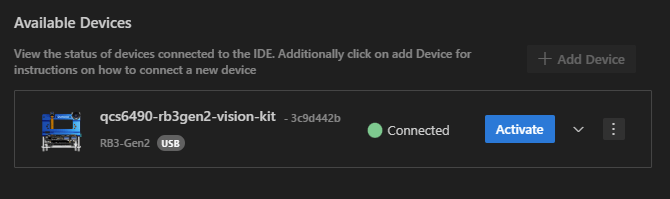
## Available Devices
When a device is plugged into the host, it appears in the **Available Devices** section along with metadata such as dev kit type, serial number, connection status, and mode (USB, WiFi, etc.).
 ## Activating a Device
1. Open the **Dashboard → Devices** section.
2. Locate your device in the **Available Devices** list.
3. Click **Activate**.
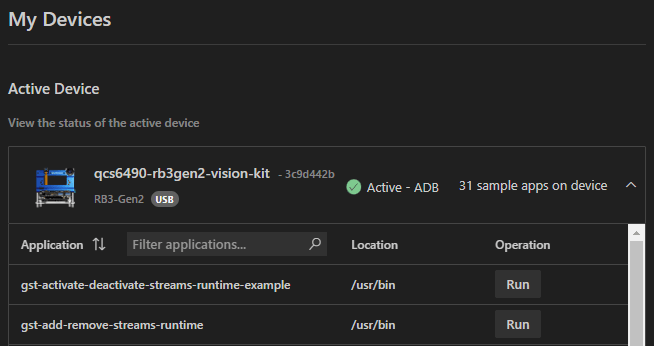
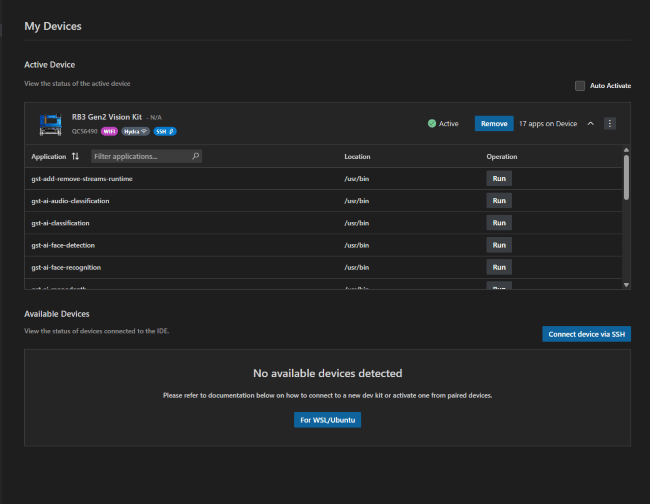
The activated device becomes the **Active Device** — the target for builds, deploys, flashes, and debug sessions. It shows connection mode (ADB or EDL) and available sample applications.
## Activating a Device
1. Open the **Dashboard → Devices** section.
2. Locate your device in the **Available Devices** list.
3. Click **Activate**.
The activated device becomes the **Active Device** — the target for builds, deploys, flashes, and debug sessions. It shows connection mode (ADB or EDL) and available sample applications.
 Only one device can be active at a time. Switching the active device
automatically retargets all build and deploy operations.
## Device Connectivity — WiFi
To connect a device to WiFi, open the connectivity options menu from the active device pane.
Only one device can be active at a time. Switching the active device
automatically retargets all build and deploy operations.
## Device Connectivity — WiFi
To connect a device to WiFi, open the connectivity options menu from the active device pane.
 The extension lists available WiFi networks sorted by signal strength.
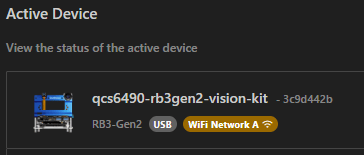
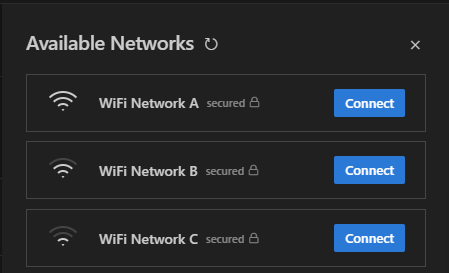 Select a network and enter the credentials. Once connected, the connectivity status appears next to the device.
 ## Adding a Device by IP Address (SSH)
1. In the Devices section, click **Add Device**.
2. Enter the device IP address.
3. Select **SSH** as the connection method.
4. Click **Connect**.
## SSH Setup
SSH connections are supported for both Ubuntu and Qualcomm Linux devices. You will need:
* Target device powered on and accessible on the network
* SSH client installed on the host
* Both machines on the same network
### Device Setup
Get the device's IP address and username:
```bash theme={null}
ip addr show # Ubuntu devices via UART
adb shell ip addr show # QLI devices via ADB
```
Default usernames: **ubuntu** (Ubuntu OS) or **root** (Qualcomm Linux).
### Extension Configuration
Navigate to the Devices page and click the **Connect device via SSH** button to open the dialog.
## Adding a Device by IP Address (SSH)
1. In the Devices section, click **Add Device**.
2. Enter the device IP address.
3. Select **SSH** as the connection method.
4. Click **Connect**.
## SSH Setup
SSH connections are supported for both Ubuntu and Qualcomm Linux devices. You will need:
* Target device powered on and accessible on the network
* SSH client installed on the host
* Both machines on the same network
### Device Setup
Get the device's IP address and username:
```bash theme={null}
ip addr show # Ubuntu devices via UART
adb shell ip addr show # QLI devices via ADB
```
Default usernames: **ubuntu** (Ubuntu OS) or **root** (Qualcomm Linux).
### Extension Configuration
Navigate to the Devices page and click the **Connect device via SSH** button to open the dialog.
 There are two tabs:
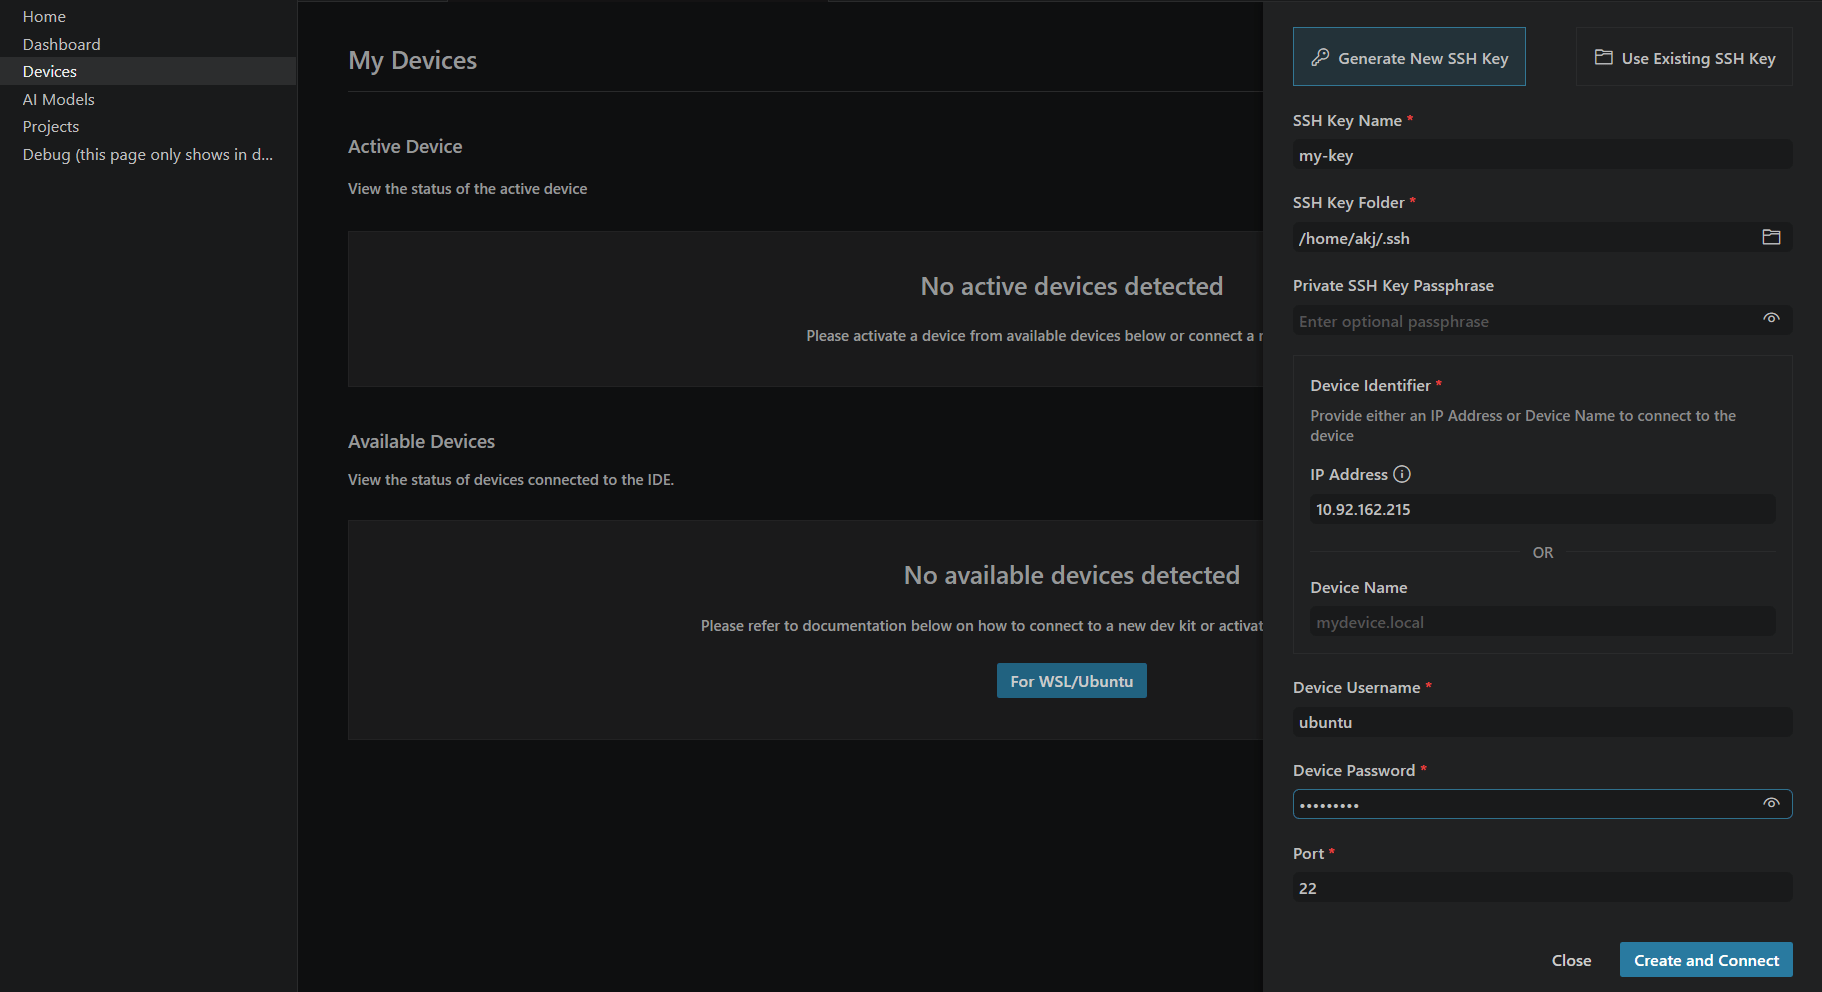 **Generate New SSH Key** — creates a new key pair on the host:
* **SSH Key Name** — name for the generated key file
* **SSH Key Folder** — directory to save the key (defaults to `~/.ssh`)
* **Private SSH Key Passphrase** — optional passphrase
* **Device Identifier** — enter either an IP Address (e.g. `10.92.162.215`) or Device Name (e.g. `mydevice.local`)
* **Device Username** — username on the device (e.g. `ubuntu`)
* **Device Password** — device password (used to copy the public key)
* **Port** — `22` (default)
Click **Create and Connect** to generate the key, copy it to the device, and connect.
**Generate New SSH Key** — creates a new key pair on the host:
* **SSH Key Name** — name for the generated key file
* **SSH Key Folder** — directory to save the key (defaults to `~/.ssh`)
* **Private SSH Key Passphrase** — optional passphrase
* **Device Identifier** — enter either an IP Address (e.g. `10.92.162.215`) or Device Name (e.g. `mydevice.local`)
* **Device Username** — username on the device (e.g. `ubuntu`)
* **Device Password** — device password (used to copy the public key)
* **Port** — `22` (default)
Click **Create and Connect** to generate the key, copy it to the device, and connect.
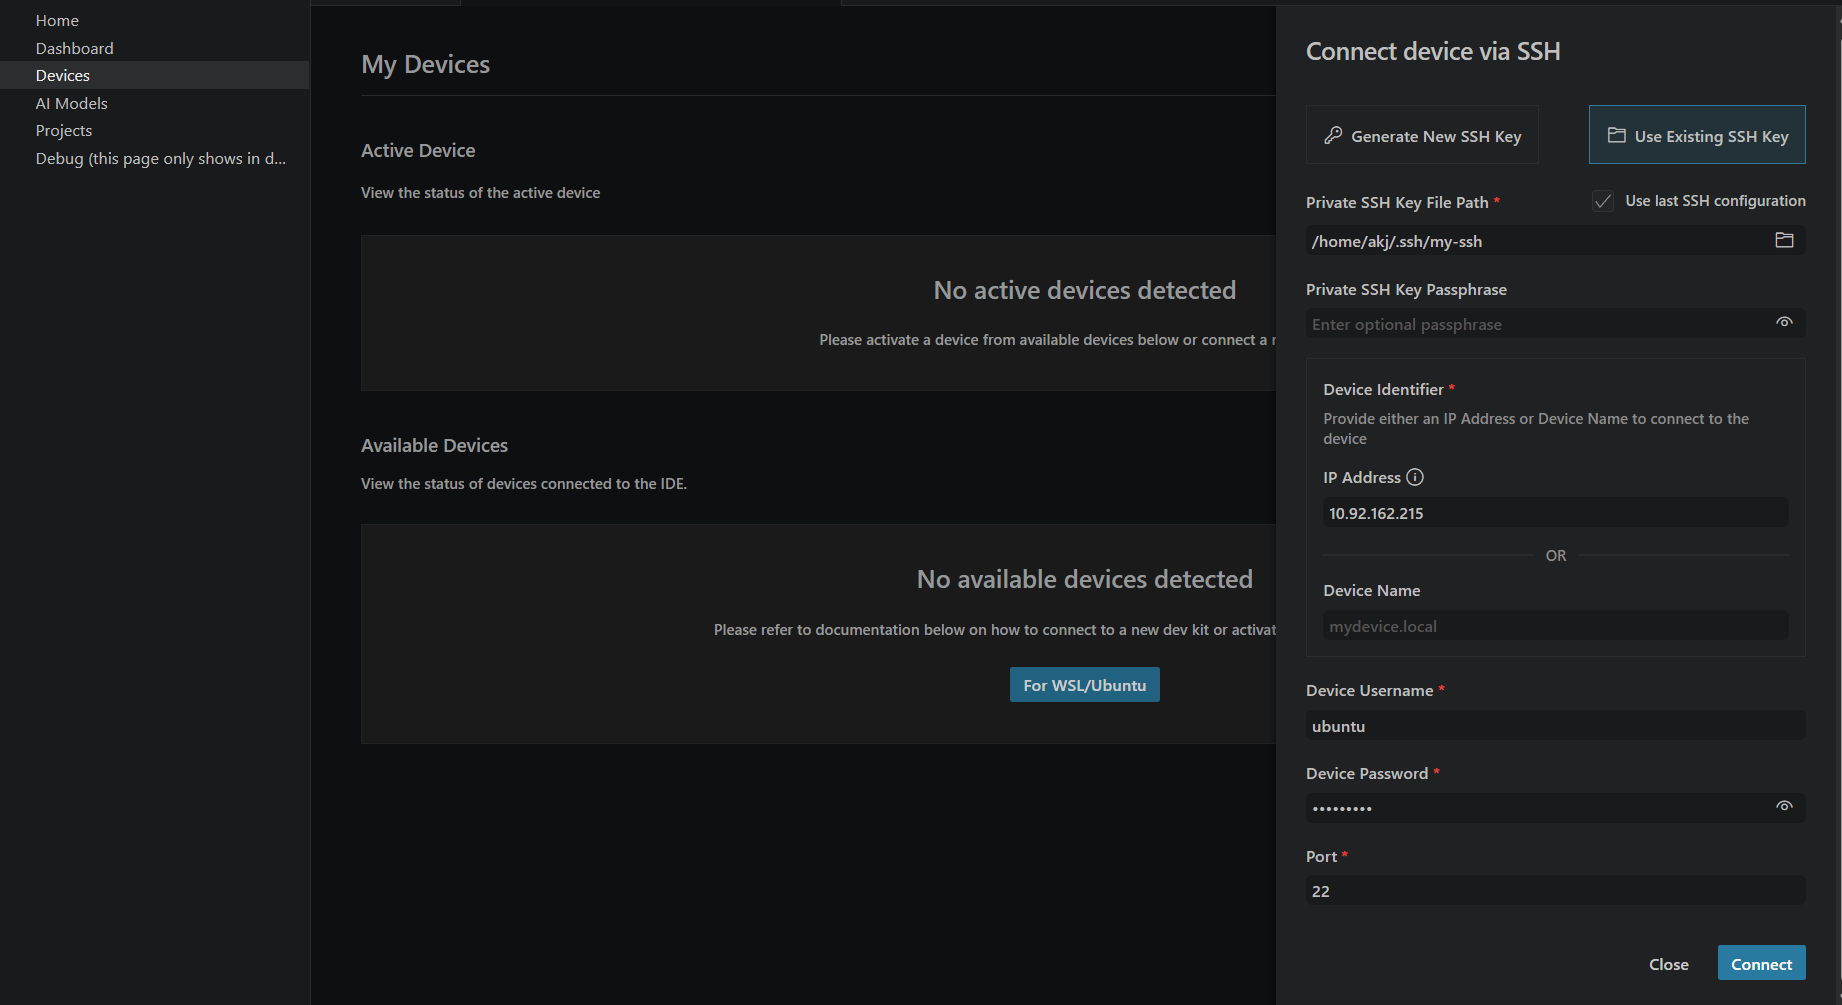 **Use Existing SSH Key** — connects with a key already on the host:
* **Private SSH Key File Path** — path to your existing private key (e.g. `~/.ssh/my-ssh`)
* **Private SSH Key Passphrase** — optional passphrase
* **Device Identifier** — IP Address or Device Name
* **Device Username** — username on the device
* **Device Password** — device password
* **Port** — `22` (default)
Click **Connect** to establish the SSH connection.
A successful connection looks like this:
**Use Existing SSH Key** — connects with a key already on the host:
* **Private SSH Key File Path** — path to your existing private key (e.g. `~/.ssh/my-ssh`)
* **Private SSH Key Passphrase** — optional passphrase
* **Device Identifier** — IP Address or Device Name
* **Device Username** — username on the device
* **Device Password** — device password
* **Port** — `22` (default)
Click **Connect** to establish the SSH connection.
A successful connection looks like this:
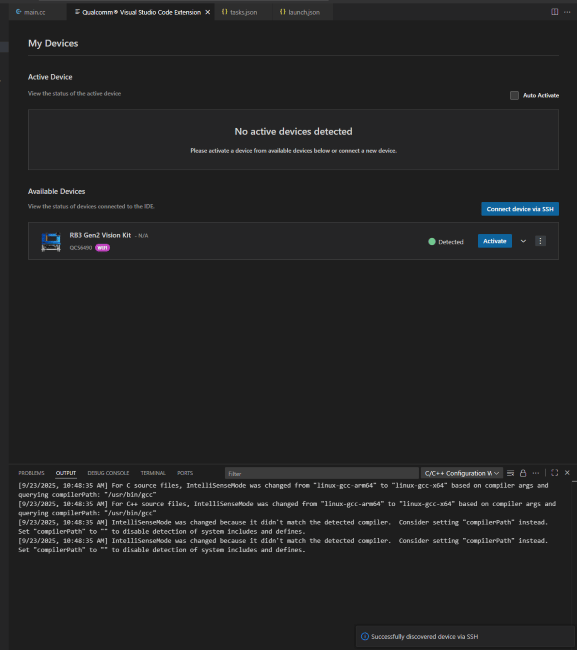 Activate the device to set it as the active target:
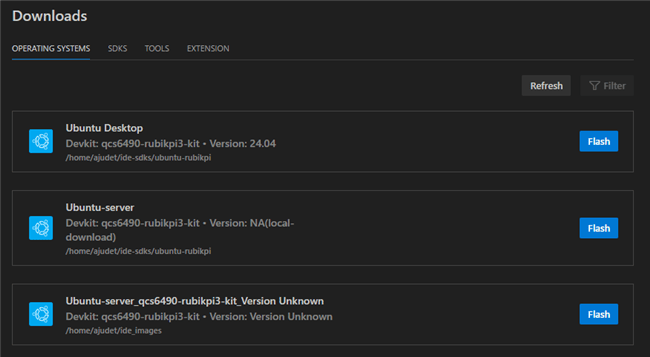
 ## Flashing Device Software
Go to **Dashboard → Downloads → Device Software tab**.
Choose the firmware image that matches your dev kit and OS.
Click the **Flash** button next to the image.
**Do not disconnect the device during flashing.** An interrupted flash can destabilize the device. Recovery may require multiple power-cycle + manual EDL + reflash cycles.
If flashing fails, verify the device is in EDL mode:
```bash theme={null}
lsusb
```
Look for:
```text theme={null}
Bus 002 Device 002: ID 05c6:9008 Qualcomm, Inc. Gobi Wireless Modem (QDL mode)
```
## Ubuntu Device Setup
For Rubik Pi and IQ-9075 EVK devices with Ubuntu OS, follow these steps after flashing:
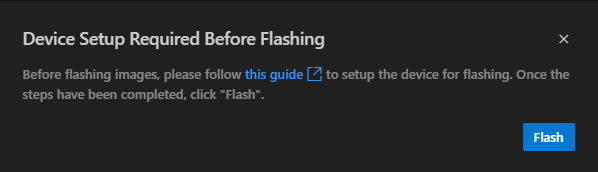
1. From the Dashboard, navigate to the **Operating Systems** tab and click **Flash** to begin flashing the OS image. A dialog will direct you to EDL mode instructions.
## Flashing Device Software
Go to **Dashboard → Downloads → Device Software tab**.
Choose the firmware image that matches your dev kit and OS.
Click the **Flash** button next to the image.
**Do not disconnect the device during flashing.** An interrupted flash can destabilize the device. Recovery may require multiple power-cycle + manual EDL + reflash cycles.
If flashing fails, verify the device is in EDL mode:
```bash theme={null}
lsusb
```
Look for:
```text theme={null}
Bus 002 Device 002: ID 05c6:9008 Qualcomm, Inc. Gobi Wireless Modem (QDL mode)
```
## Ubuntu Device Setup
For Rubik Pi and IQ-9075 EVK devices with Ubuntu OS, follow these steps after flashing:
1. From the Dashboard, navigate to the **Operating Systems** tab and click **Flash** to begin flashing the OS image. A dialog will direct you to EDL mode instructions.
 2. Once the device enters EDL mode, it appears in the Available Devices section. Activate it, then go back to Dashboard and click **Flash**.
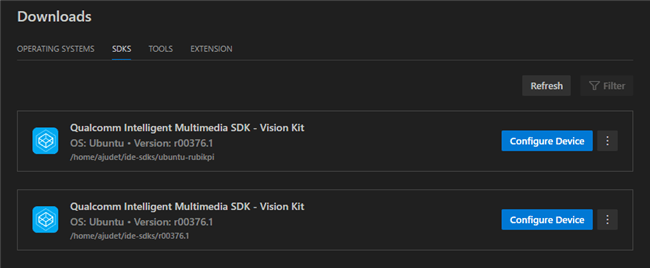
 3. After flashing completes and the device shows as **Active**, click the **SDKs** tab in the Downloads section to configure the device with all required packages (approximately 15–20 minutes).
 If flashing fails, the device may need to be recovered. Do not disconnect the
device during flashing.
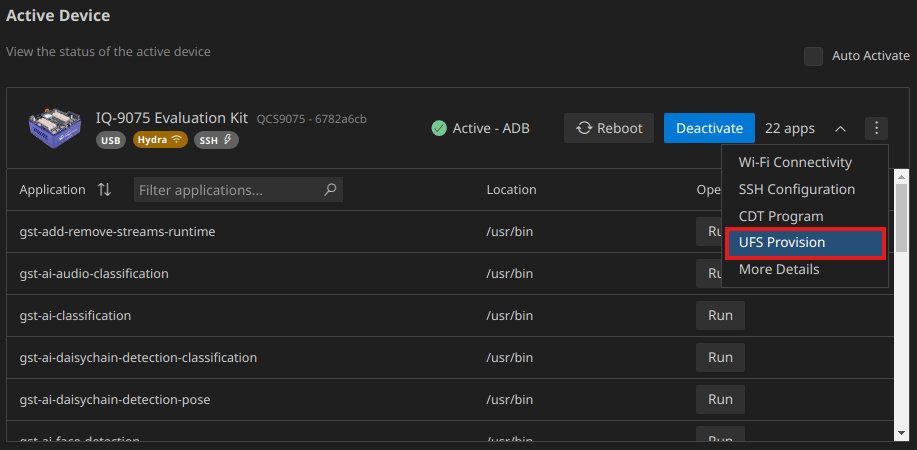
### UFS Provisioning
If you encounter UFS-related issues, consult the provisioning guide for your specific hardware:
If flashing fails, the device may need to be recovered. Do not disconnect the
device during flashing.
### UFS Provisioning
If you encounter UFS-related issues, consult the provisioning guide for your specific hardware:
 ### CDT Configuration
Custom Device Tree (CDT) configuration may be required for some hardware setups:
### CDT Configuration
Custom Device Tree (CDT) configuration may be required for some hardware setups:
 ## Change Overlay Configuration
The **Change Overlay Configuration** feature lets you switch the software overlay stack on your active device between Qualcomm Open Source and Qualcomm Proprietary implementations for individual hardware subsystems. This is useful when evaluating open-source drivers, testing proprietary optimized stacks, or reproducing issues specific to one software path.
Supported only on devices running **Qualcomm Linux 2.0**. Operates on the
currently **active** device only. Ensure the correct device is set as active
before applying changes.
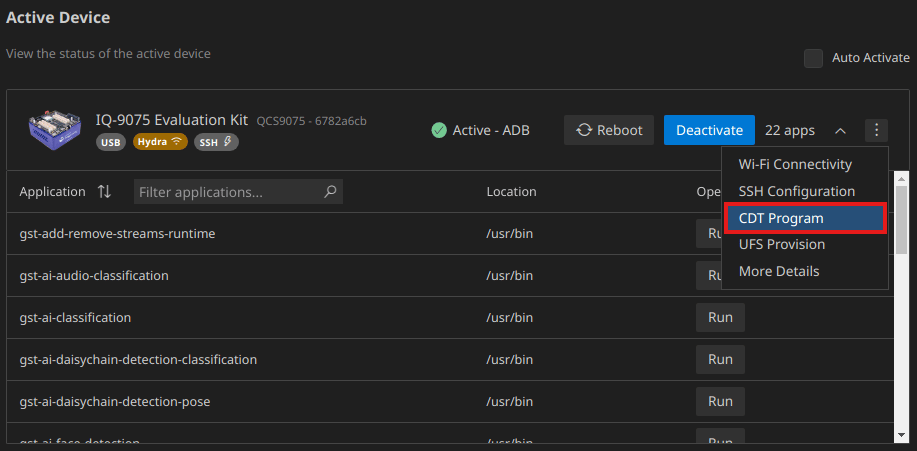
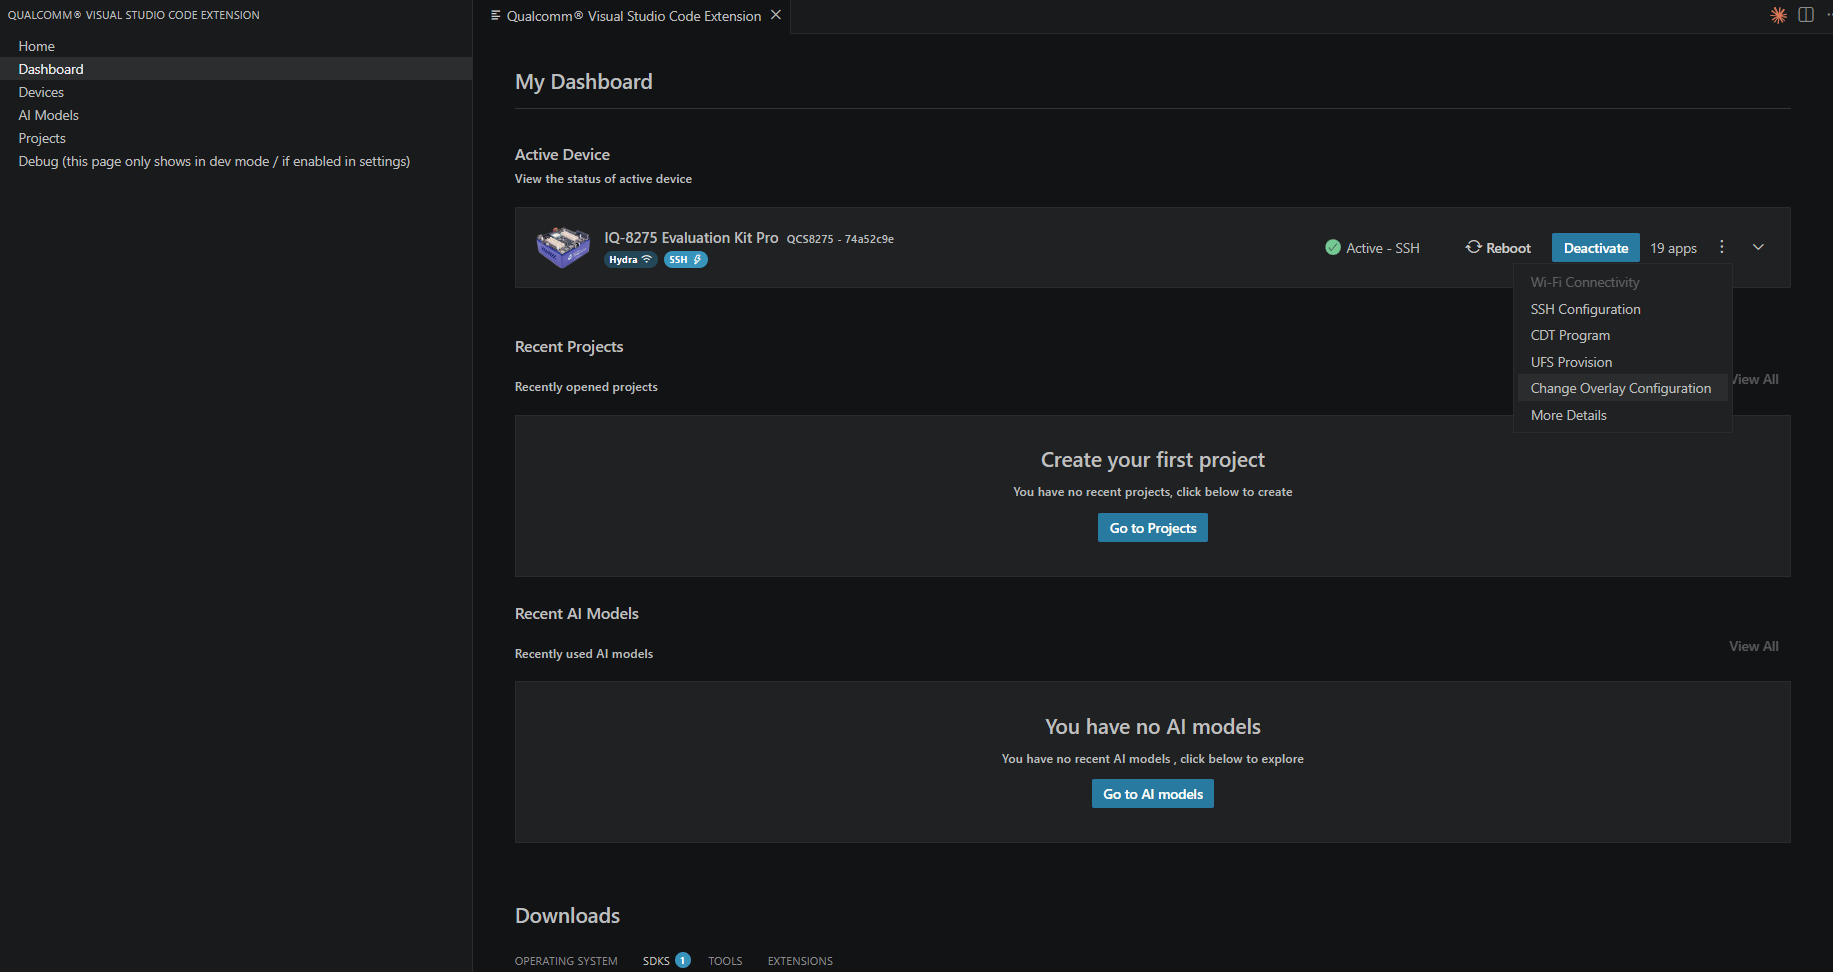
### Accessing the Feature
The **Change Overlay Configuration** option is in the three-dot overflow menu (⋮) on the active device card in the Dashboard.
1. Open the **Dashboard** and locate the **Active Device** section.
2. Click the **⋮** (More options) button on the right side of the active device card.
3. Select **Change Overlay Configuration** from the dropdown.
## Change Overlay Configuration
The **Change Overlay Configuration** feature lets you switch the software overlay stack on your active device between Qualcomm Open Source and Qualcomm Proprietary implementations for individual hardware subsystems. This is useful when evaluating open-source drivers, testing proprietary optimized stacks, or reproducing issues specific to one software path.
Supported only on devices running **Qualcomm Linux 2.0**. Operates on the
currently **active** device only. Ensure the correct device is set as active
before applying changes.
### Accessing the Feature
The **Change Overlay Configuration** option is in the three-dot overflow menu (⋮) on the active device card in the Dashboard.
1. Open the **Dashboard** and locate the **Active Device** section.
2. Click the **⋮** (More options) button on the right side of the active device card.
3. Select **Change Overlay Configuration** from the dropdown.
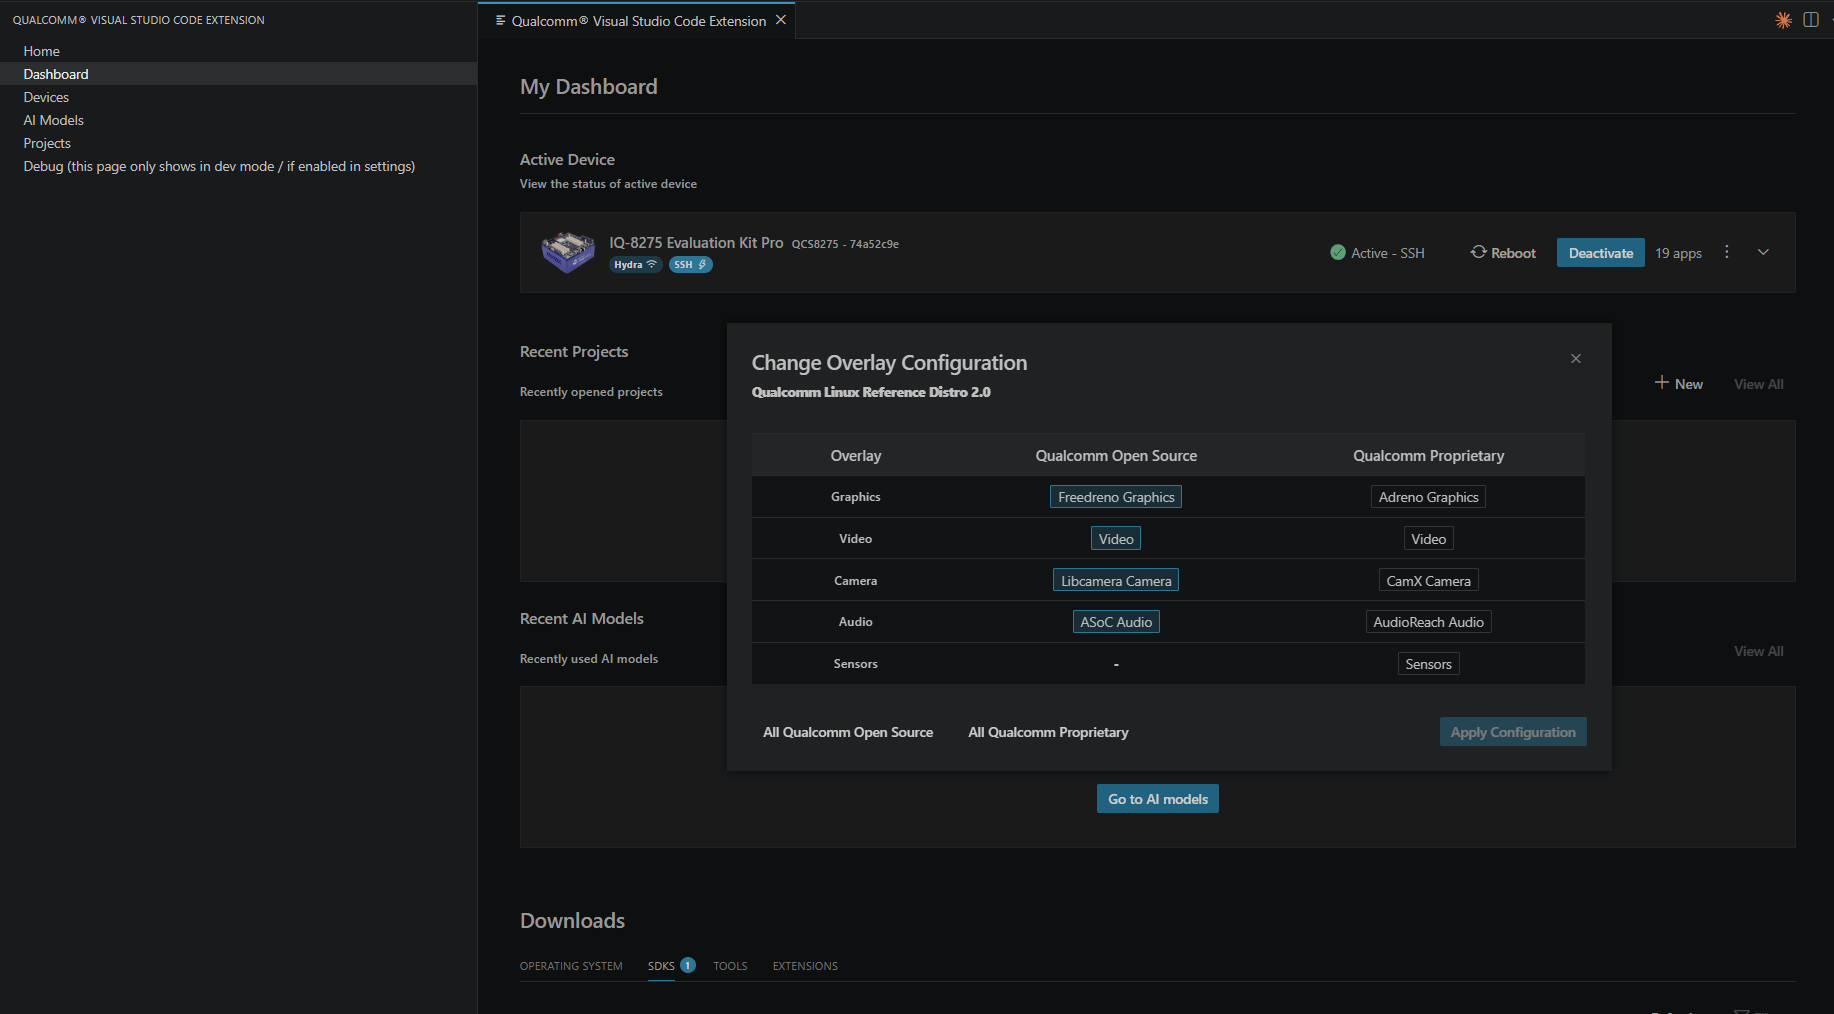
 ### The Configuration Dialog
The dialog shows the currently running OS and a table with three columns:
### The Configuration Dialog
The dialog shows the currently running OS and a table with three columns:
 | Column | Description | Example values |
| ------------------------ | --------------------------------------------------------------------------- | -------------------------------------------------------------- |
| **Overlay** | The hardware subsystem being configured | Graphics, Video, Camera, Audio, Sensors |
| **Qualcomm Open Source** | Open-source driver/stack. Click to select. A dash (–) means none available. | Freedreno Graphics, Video, Libcamera Camera, ASoC Audio |
| **Qualcomm Proprietary** | Qualcomm-optimized proprietary stack. Click to select. | Adreno Graphics, Video, CamX Camera, AudioReach Audio, Sensors |
The currently active selection for each row is visually highlighted.
**Available overlay rows:**
* **Graphics** — *Freedreno* (open-source Mesa/DRM) vs. *Adreno* (Qualcomm proprietary GPU driver)
* **Video** — Open-source vs. Qualcomm proprietary video stack
* **Camera** — *Libcamera* (open-source) vs. *CamX* (Qualcomm proprietary pipeline)
* **Audio** — *ASoC* (Linux ALSA/ASoC) vs. *AudioReach* (Qualcomm proprietary audio)
* **Sensors** — No open-source option (shown as –); Qualcomm proprietary stack only
**Bulk selection shortcuts** at the bottom of the table:
* **All Qualcomm Open Source** — Sets every configurable overlay to its open-source variant
* **All Qualcomm Proprietary** — Sets every configurable overlay to its Qualcomm proprietary variant
### Applying the Configuration
After making your selections, click **Apply Configuration** in the bottom-right corner. The dialog closes and the extension begins applying the overlays to the device.
The active device card immediately shows a progress bar:
| Column | Description | Example values |
| ------------------------ | --------------------------------------------------------------------------- | -------------------------------------------------------------- |
| **Overlay** | The hardware subsystem being configured | Graphics, Video, Camera, Audio, Sensors |
| **Qualcomm Open Source** | Open-source driver/stack. Click to select. A dash (–) means none available. | Freedreno Graphics, Video, Libcamera Camera, ASoC Audio |
| **Qualcomm Proprietary** | Qualcomm-optimized proprietary stack. Click to select. | Adreno Graphics, Video, CamX Camera, AudioReach Audio, Sensors |
The currently active selection for each row is visually highlighted.
**Available overlay rows:**
* **Graphics** — *Freedreno* (open-source Mesa/DRM) vs. *Adreno* (Qualcomm proprietary GPU driver)
* **Video** — Open-source vs. Qualcomm proprietary video stack
* **Camera** — *Libcamera* (open-source) vs. *CamX* (Qualcomm proprietary pipeline)
* **Audio** — *ASoC* (Linux ALSA/ASoC) vs. *AudioReach* (Qualcomm proprietary audio)
* **Sensors** — No open-source option (shown as –); Qualcomm proprietary stack only
**Bulk selection shortcuts** at the bottom of the table:
* **All Qualcomm Open Source** — Sets every configurable overlay to its open-source variant
* **All Qualcomm Proprietary** — Sets every configurable overlay to its Qualcomm proprietary variant
### Applying the Configuration
After making your selections, click **Apply Configuration** in the bottom-right corner. The dialog closes and the extension begins applying the overlays to the device.
The active device card immediately shows a progress bar:
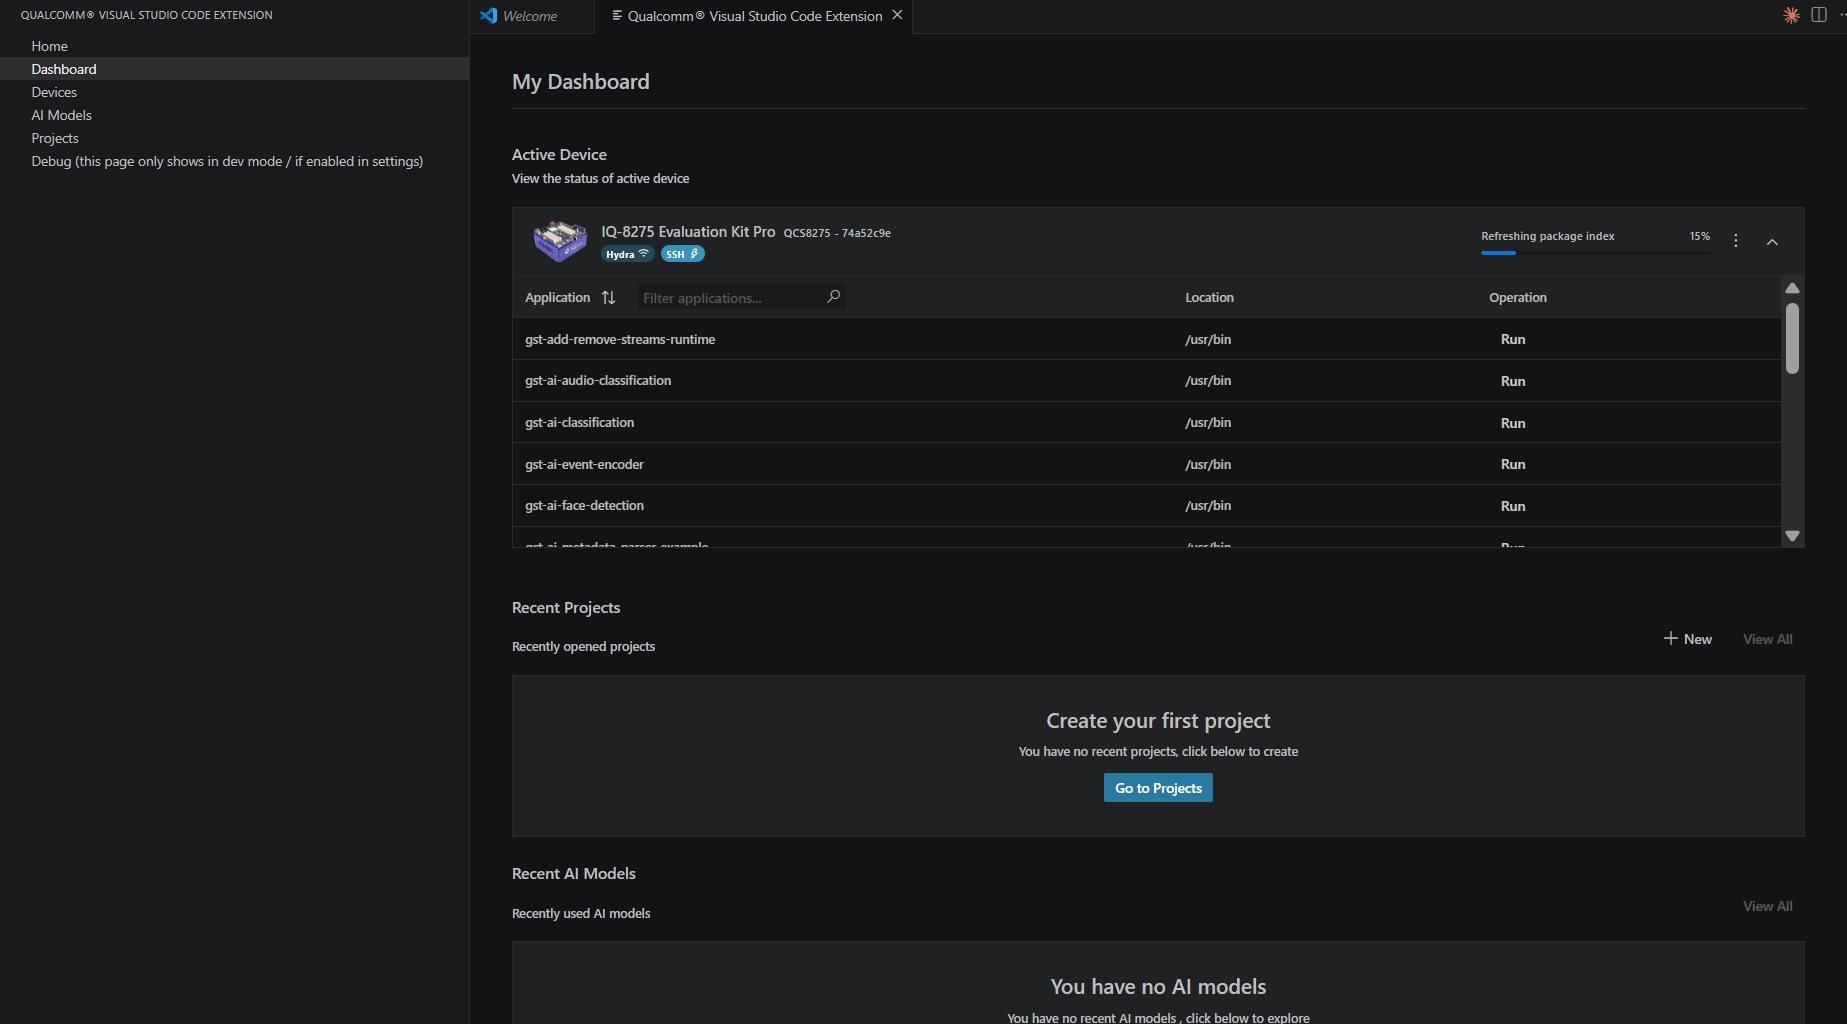 Do not disconnect the device or close VS Code while this step is in progress.
Depending on the number of overlays changed and network conditions, this may take several minutes.
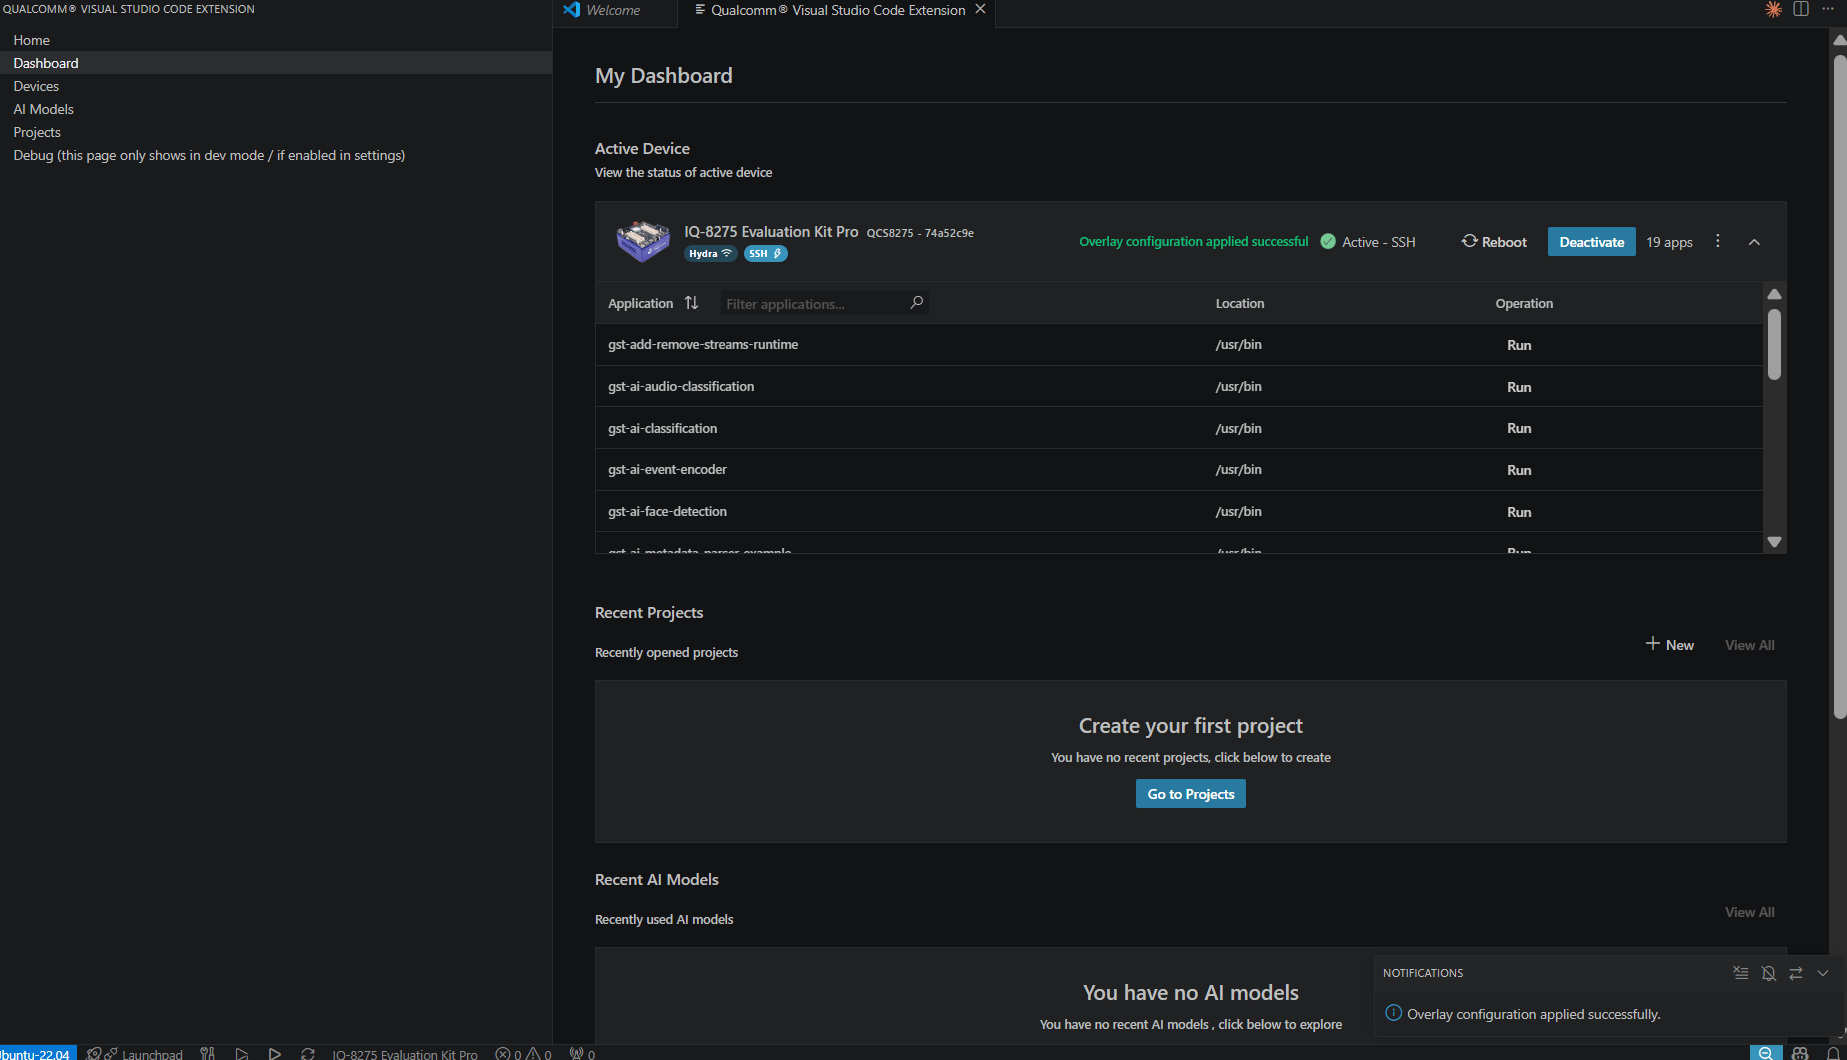
### Post-Apply Status
**Success:** The device card shows **Overlay configuration applied successful** in green and returns to **Active – SSH** (or **Active – ADB**) status. A notification confirms: *Overlay configuration applied successfully.*
Do not disconnect the device or close VS Code while this step is in progress.
Depending on the number of overlays changed and network conditions, this may take several minutes.
### Post-Apply Status
**Success:** The device card shows **Overlay configuration applied successful** in green and returns to **Active – SSH** (or **Active – ADB**) status. A notification confirms: *Overlay configuration applied successfully.*
 The device may reboot automatically after a successful overlay application. If
it does, the device disappears from the Active Device card. Reconnect via SSH
and reactivate it from the Available Devices section. To verify which overlays
are applied, reopen the **Change Overlay Configuration** dialog from the ⋮
menu.
**Failed application:** If the overlay could not be verified after installation, the device card shows **Overlay apply failed** in red:
The device may reboot automatically after a successful overlay application. If
it does, the device disappears from the Active Device card. Reconnect via SSH
and reactivate it from the Available Devices section. To verify which overlays
are applied, reopen the **Change Overlay Configuration** dialog from the ⋮
menu.
**Failed application:** If the overlay could not be verified after installation, the device card shows **Overlay apply failed** in red:
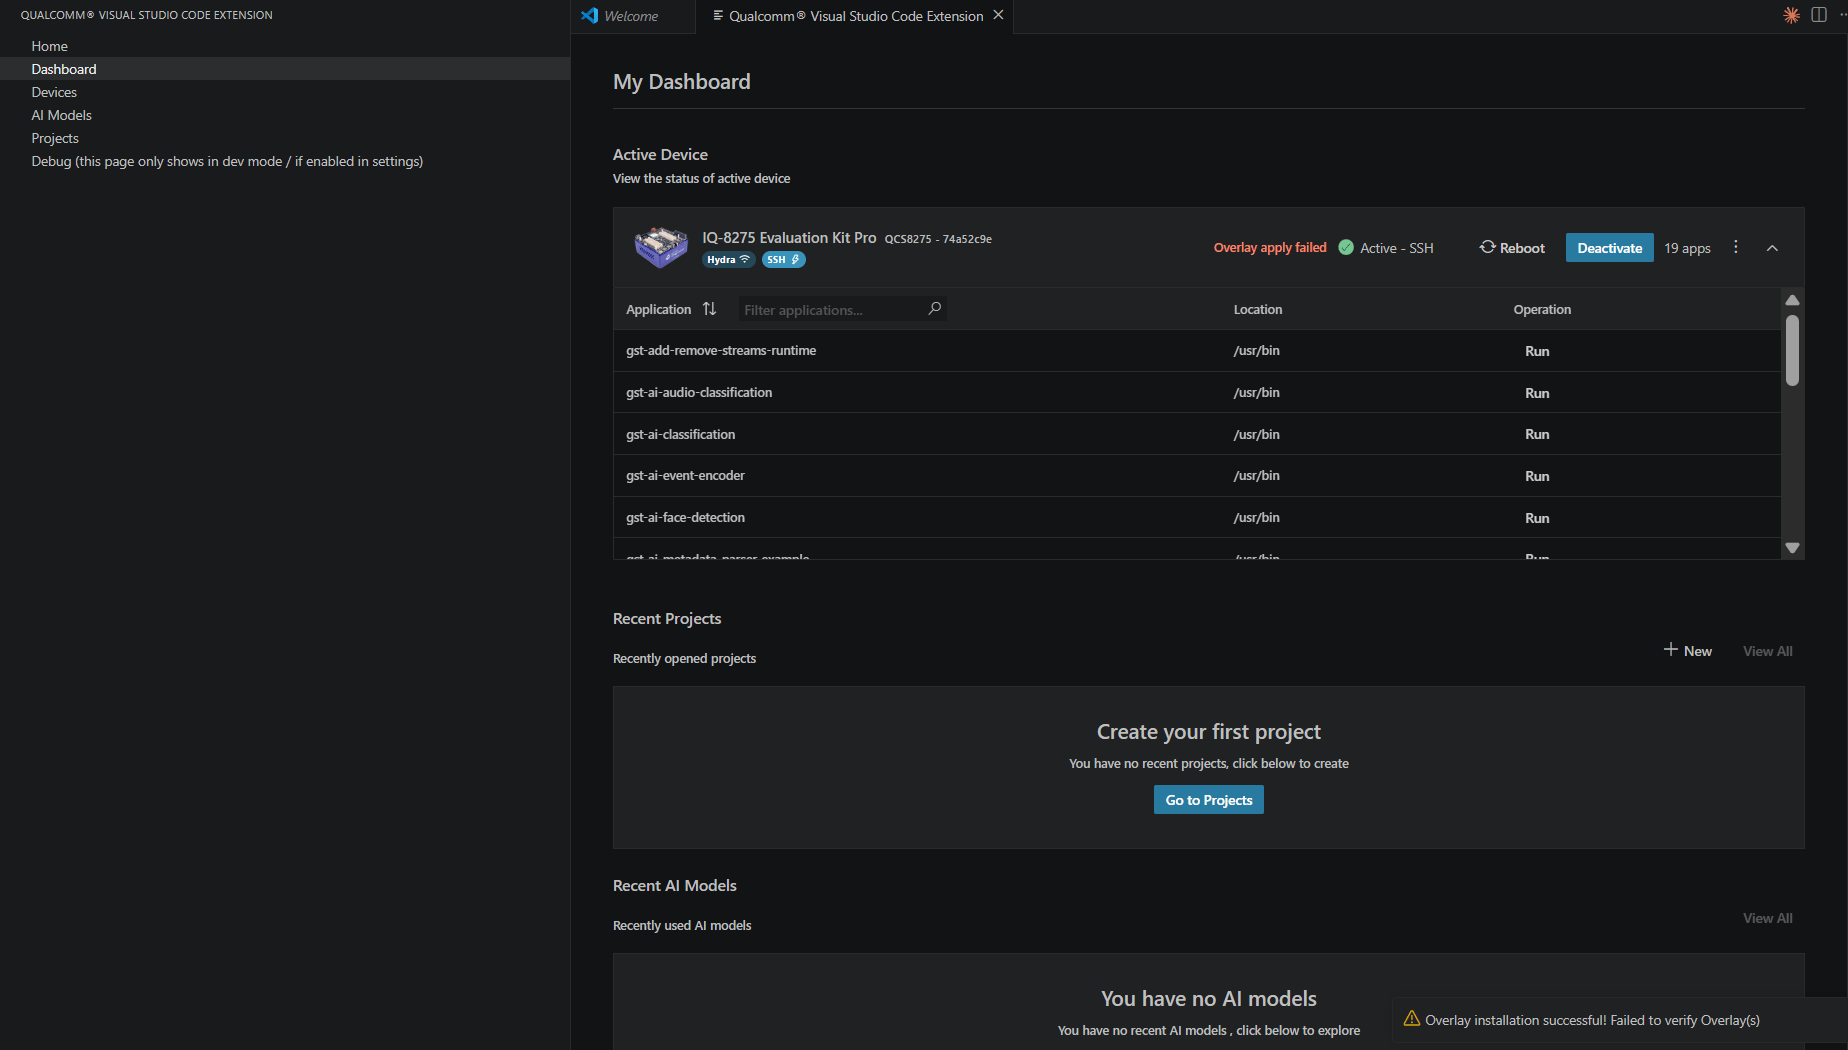 A notification toast provides additional detail: *Overlay installation successful! Failed to verify Overlay(s).*
## Verify Device in EDL mode
```bash theme={null}
lsusb
```
Expected output when in EDL / QDL mode:
```text theme={null}
Bus 002 Device 002: ID 05c6:9008 Qualcomm, Inc. Gobi Wireless Modem (QDL mode)
```
A notification toast provides additional detail: *Overlay installation successful! Failed to verify Overlay(s).*
## Verify Device in EDL mode
```bash theme={null}
lsusb
```
Expected output when in EDL / QDL mode:
```text theme={null}
Bus 002 Device 002: ID 05c6:9008 Qualcomm, Inc. Gobi Wireless Modem (QDL mode)
```