

Qualcomm Linux · OTA
So here’s a thing that used to scare me: pushing a software update to a device sitting on a shelf somewhere, with no keyboard, no monitor, and nobody around to plug in a USB cable if it goes sideways. One bad update and that device is a brick. Multiply that by a fleet and you can see why people lose sleep over it. The good news is that Qualcomm Linux 2.0 already ships with a really solid answer to this, built on OSTree. And once I actually sat down and used it on an IQ-8275 EVK, the thing that surprised me most was how little I had to build myself. Most of the hard parts were already done. This is a hands-on tutorial. The commands are right here in the text, so you can read it straight through or follow it on real hardware and end up with a device that updates itself over the network. Everything shown was actually run, and where I quote a number it came off the real board. One thing up front so nobody ships this to customers by accident: this is a lab proof of concept. It uses plain HTTP and turns off signature checking so you can actually see the gears turn. That is great for learning and terrible for production. I’ll talk about the grown-up version at the end.
What we’re actually going to do
The plan is small and the payoff is fun. We build two versions of the same image, flash the first one onto the board, then move the live device to the second over the air, no second flash.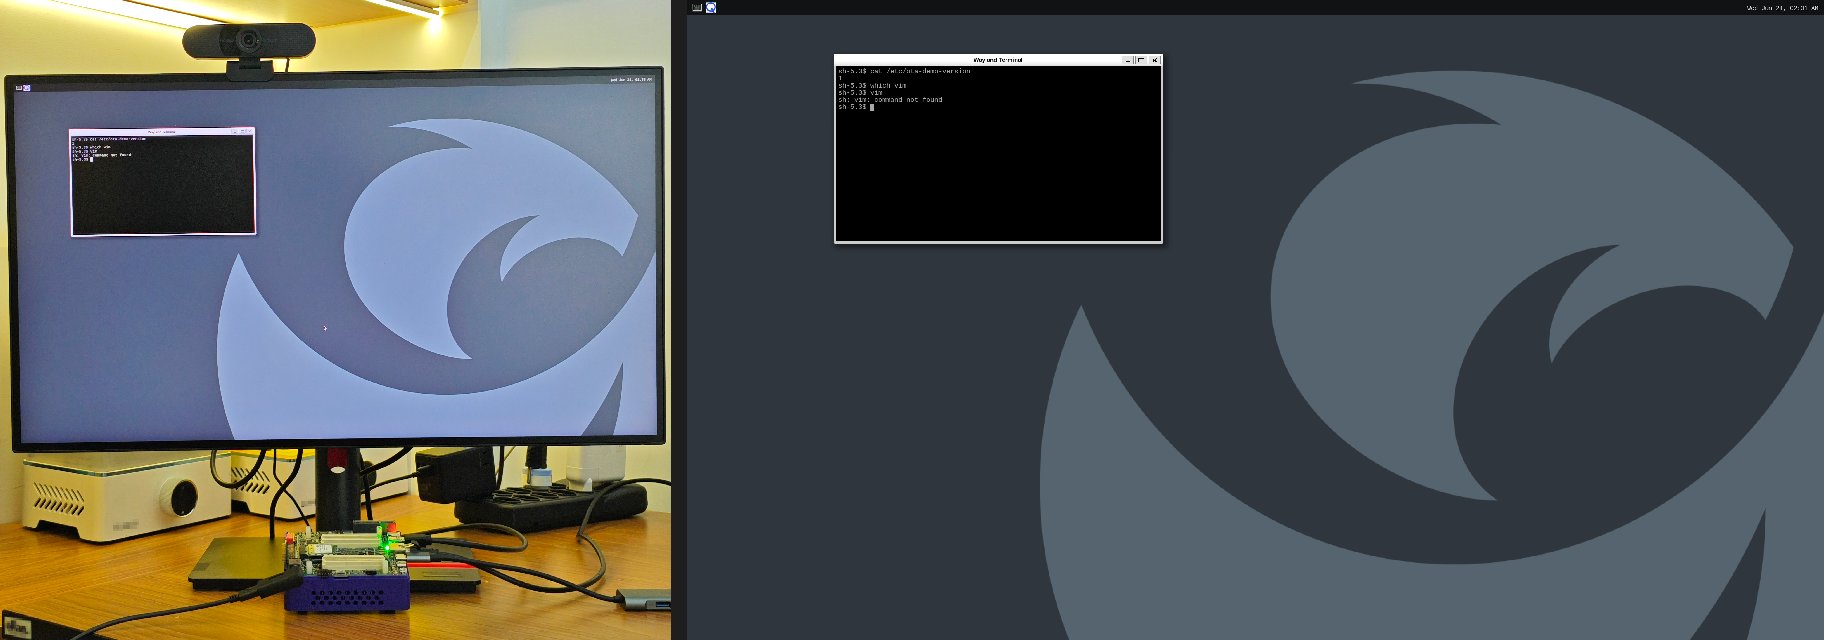
| Version | /etc/ota-demo-version | Wallpaper | Vim |
|---|---|---|---|
| v1 | 1 | grey Qualcomm logo | not installed |
| v2 | 2 | purple Supergraphic | installed |
- Flash the device once with v1, because there’s no OTA before the first SOTA image.
- Stand up a dead-simple update server.
- Build v2, and push it onto the running device using the device’s own little web page (the way a real user would), no reflash.
- Watch the old version stick around as a rollback the whole time.
- Measure how little the actual change is.
The part where Qualcomm did the heavy lifting
Let me be upfront, since I work here: the reason this was easy is the work was already in the layers. The distro is shipped bymeta-qcom-distro (meta-qcom itself is just the BSP), and it comes in two flavors. The default, qcom-distro, is your normal package managed root filesystem. The interesting one is qcom-distro-sota. SOTA means software over the air, and picking that distro flips on the whole update stack for you.
What does “the whole stack” mean? When you build with qcom-distro-sota, you get OSTree baked into the image, an initramfs that knows how to boot an OSTree deployment, and the build drops an ostree_repo next to your normal flashable image. That repo is what devices pull updates from. You didn’t write any of it. You just chose a different distro. From here on I’ll call the result a SOTA image: an ordinary flashable image that happens to have the OTA stack baked in.
The build command is honestly almost boring, which for a build command is the highest praise I have:
qcom-distro-sota.yml one is doing all the magic. Swap it for qcom-distro.yml and you get a normal image with no OTA. Same machine, same recipes, one fragment of difference. I really like that the OTA story is a build time switch and not a giant separate project you bolt on. (Later, when we build v1 and v2, you’ll see one more fragment on that line, ota-demo.yml. That one isn’t a stock Qualcomm fragment, it’s the little demo layer we add ourselves, and we’ll create it in a minute.)
One thing worth knowing up front: OTA only works once the device already has the OSTree stack on it, and a plain qcom-distro image doesn’t. So you flash a SOTA image once, over USB, and from then on you update over the air.
OSTree in two minutes
People call OSTree “git for your root filesystem” and honestly that’s a good enough mental model to start. It stores complete snapshots of your filesystem as commits in a repository. Each commit is content addressed, so identical files are stored once and shared. A device pulls a new commit, builds a new deployment from it, and boots into that deployment on the next reboot. The old one stays right where it was. That last sentence is the entire safety story. Your running system is never edited in place. The new version is assembled completely off to the side, and the switch only happens on a clean reboot. If the new deployment never shows up, you’re still on the old one, untouched. Here’s what that looks like on the device once an update has landed. The star is what you booted, the second line is your safety net:/usr, the actual OS content, is mounted read only, so nothing can quietly scribble on it:
/etc, /var, and /home; those runtime areas are meant to carry across updates instead of getting wiped. That’s a design rule, not magic for anything you happen to drop there at build time, and we’ll come back to that distinction near the end with a little file.
OSTree or A/B, and why I went with OSTree
This is the question everyone asks, so let me actually answer it. A/B updates, also called dual bank, are the approach where you carve storage into two full copies of the system, slot A and slot B. You run from A, write the entire new image into B, flip a flag, and boot B next time. It’s simple to reason about and rock solid, which is why phones have done it forever. But A/B has two costs that are easy to gloss over. First is space. You permanently give up enough flash for two complete copies of the OS, all the time, even though you only ever run one. On a cost sensitive edge device that second slot is real money in parts. Second is bandwidth. In the simplest A/B setups an update means shipping a whole new system image, because you’re writing a whole slot. OSTree comes at it from the other direction. There aren’t two fixed slots. There’s one repository that stores deployments, and they share every file they have in common. When you update, the device only pulls the objects that actually changed. That’s where it gets fun, and I have a real number for you later that I still think is a little ridiculous. So the trade is roughly this. A/B gives you a dead simple mental model and a guaranteed known good slot, at the cost of double the flash and chunky updates. OSTree gives you tiny, bandwidth efficient updates and atomic deployments with rollback safety, without reserving a second full slot. It asks two things back: a slightly less obvious mental model, and the discipline of a read only OS, which means you have to decide up front where your writable data lives (/etc, /var, /home) rather than scattering it across a filesystem you can edit anywhere. For an edge Linux device that ships features regularly, the OSTree side of that trade is really attractive, and again, Qualcomm already wired it up.
Setting up: three machines
You need three roles. They can be three boxes or, honestly, a board plus a laptop wearing two hats.~/yocto-build, and the directory that matters most is where the build drops its output:
meta-qcom layers and kas fragments in place. It does not cover repo initialization or the first cold clone of all the layers, so it’s not a from-zero SDK setup guide. If you’re standing the tree up for the first time, do that part with the normal Qualcomm Linux getting-started flow — see Build Qualcomm Linux using Yocto — then come back here.
Tested with Qualcomm Linux 2.0,
meta-qcom / meta-qcom-distro at the qli-2.0 release tag, on an IQ-8275 EVK. This tutorial is sensitive to layer versions — if paths or package names have moved in a newer release, pin to this tag to follow along exactly.sstate-cache, and downloads between v1 and v2. Do not wipe them. With a warm cache each rebuild here took about eight minutes, not the multi hour cold build. That’s the difference between iterating and going for coffee.
The little Yocto layer that holds it together
I put everything custom into one small layer,meta-ota-demo. It has three jobs: install the update agent, write a visible version marker to /etc/ota-demo-version, and override the desktop wallpaper so updates are obvious on screen. There’s no magic in any of it, just a handful of small files. Start with the layer layout on the build host:
layer.conf, saved at meta-ota-demo/conf/layer.conf. It registers meta-ota-demo with the build.
Next, the version-marker recipe ota-demo-version.bb, saved at meta-ota-demo/recipes-ota/ota-demo-version/ota-demo-version.bb. Bumping OTA_DEMO_VERSION is “knob 1” later; it just writes the value to /etc/ota-demo-version, shipped as a conffile so it survives updates.
Then the wallpaper override weston-init.bbappend, saved at meta-ota-demo/recipes-graphics/wayland/weston-init.bbappend. It prepends our file path so our qcom-background.png wins over the stock one (“knob 2”).
The agent recipe ota-agent_1.0.bb, saved at meta-ota-demo/recipes-ota/ota-agent/ota-agent_1.0.bb. Its one non-obvious part is RDEPENDS: the agent is pure Python standard library, but on a minimal Yocto image the stdlib is chopped into separate packages, so you have to name exactly the ones the agent imports (more on that in a minute).
Its systemd unit ota-agent.service, saved at meta-ota-demo/recipes-ota/ota-agent/files/ota-agent.service.
The agent’s config file ota-agent.conf, saved at meta-ota-demo/recipes-ota/ota-agent/files/ota-agent.conf.
The agent program itself, ota-agent.py, saved at meta-ota-demo/recipes-ota/ota-agent/files/ota-agent.py — it’s the one file long enough to deserve its own section, and we’ll come back to it in a moment. Last, the kas fragment ota-demo.yml, saved at meta-qcom/ci/ota-demo.yml. This one pulls the layer into the build and adds packages to the image; note it lives next to the other Qualcomm CI fragments, not inside the layer.
We’ll edit that fragment’s IMAGE_INSTALL:append line per build to add or drop Vim. That’s one of our three “knobs.”
Here’s where everything lands. Eight files go in the new meta-ota-demo layer; the ninth, ota-demo.yml, sits beside the stock Qualcomm CI fragments in meta-qcom:
weston-init/qcom-background.png file isn’t one you create by hand — each build copies wallpapers-v1.png or wallpapers-v2.png onto that path, which is how the FILESEXTRAPATHS:prepend in the bbappend picks it up. We’ll do that copy in the per-version build steps below.
While you’re here, point the agent at your server. The agent reads /etc/ota-agent.conf on the device, which comes from the file in the layer:
A quick word about the agent, because it’s almost nothing
OSTree gives you the engine. It does not hand you a button. The grown-up production answer is aktualizr-lite talking to a real backend like the SOTA stack’s TUF path, and that client is already included in the distro. But I wanted to see the gears, so I wrote the smallest possible thing: a tiny Python service, no frameworks, nothing to pip install, that serves one web page on port 8088. The page shows what’s running, checks the server for what’s available, and if there’s something new it shows a button. Under the hood the button runs exactly this:ota-agent.py on the companion files page — copy it from there rather than retyping the ~320 lines, and save it where the recipe expects it, at meta-ota-demo/recipes-ota/ota-agent/files/ota-agent.py.
If you want to skim it without leaving the page, the heart of it is small: a do_update() that registers the remote, runs ostree pull then ostree admin deploy, and reboots, wrapped in a single-page HTTP handler that renders the status card and the button. Everything else is parsing ostree admin status and formatting the page.
There’s one Yocto gotcha hiding in that recipe that’s worth calling out, because it cost me an hour. On a minimal image the Python standard library is chopped into a bunch of separate packages. So even though the agent only imports “built in” modules, the image didn’t actually have them, and the service crash looped on first boot with ModuleNotFoundError: No module named 'html', which is a deeply confusing thing to read when you’re sure you didn’t import anything fancy. The fix is to declare exactly which packages you need in the recipe:
Two wallpapers
We want the change to be visible, so we use a different wallpaper per version. The two PNGs are shown below — or use any two images of your own.
wallpapers-v1.png

wallpapers-v2.png
Drop the two PNGs in:
Build v1: marker 1, wallpaper A, no Vim
Three knobs, then build:Stand up the update server
This part is almost embarrassingly simple. The server is a static HTTP server pointed at a web root that holds two things: a copy of the build’sostree_repo (which we’ll sync over when we publish v2), and a small version.json that says “here’s the latest version and its commit.” Create the web root and start serving it:
version.json when we publish v2.
Want updates to come from the internet instead of your laptop later? Point the agent at a public URL or stick the repo behind a CDN. The device side does not change, because to OSTree a remote is just a URL.
Flash v1 onto the device
This is the one and only time we flash over USB. There’s no OTA before the first SOTA image, so v1 has to be flashed the normal way. The build dropped a flashable image next to theostree_repo:
qdl / the flat-build flashing tool you already use for this board). I’m not going to re-document EDL flashing here, it’s covered in the board’s getting-started material, and it’s the same process whether or not the image is SOTA.
Once it boots, confirm v1 is live and the agent came up on its own:
Build v2 and update the easy way
Same three knobs, different values: marker 2, wallpaper B, and this time Vim goes in.ostree_repo into the server’s web root, then write the version.json the device’s agent reads. If your build host and update server are the same machine, the copy is a local rsync; if they’re separate, the script pulls over SSH (there’s a commented line in it for that). It’s a small script — the full source is publish.sh on the companion files page.
Put it on the update server, make it executable, and skim the top of it to confirm DEPLOY_DIR matches where your build dropped its output:
If your update server and build host are different machines, uncomment the SSH
rsync line near the top of publish.sh (it’s right above the local one) and set DEPLOY_DIR to the path on the build host.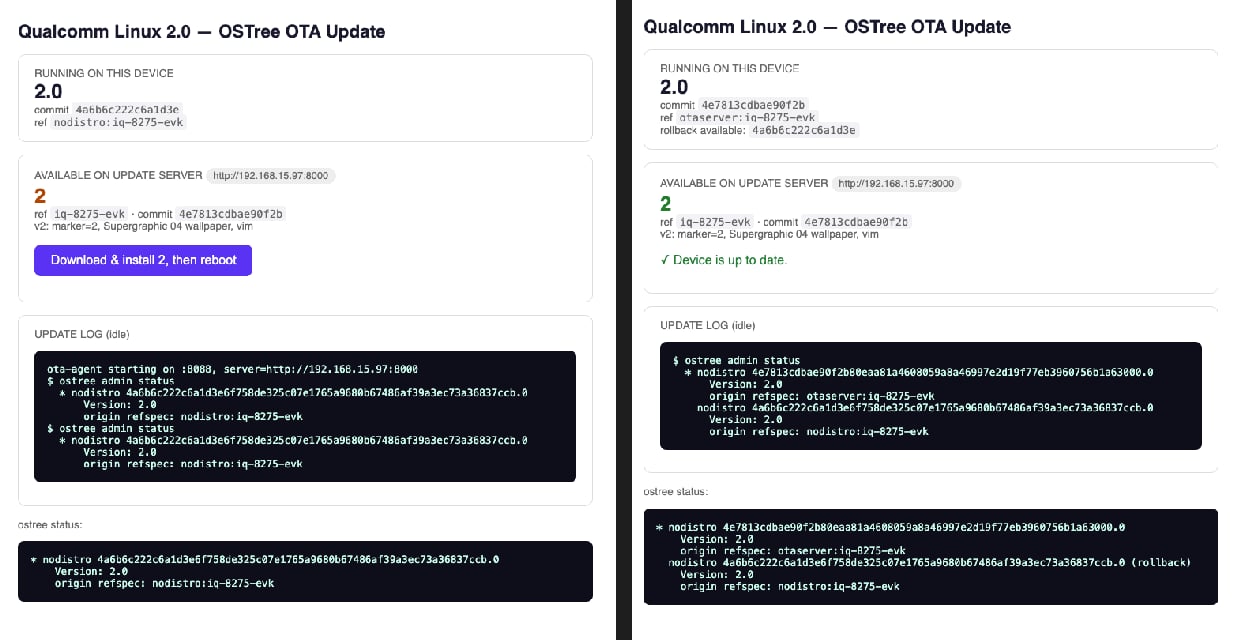
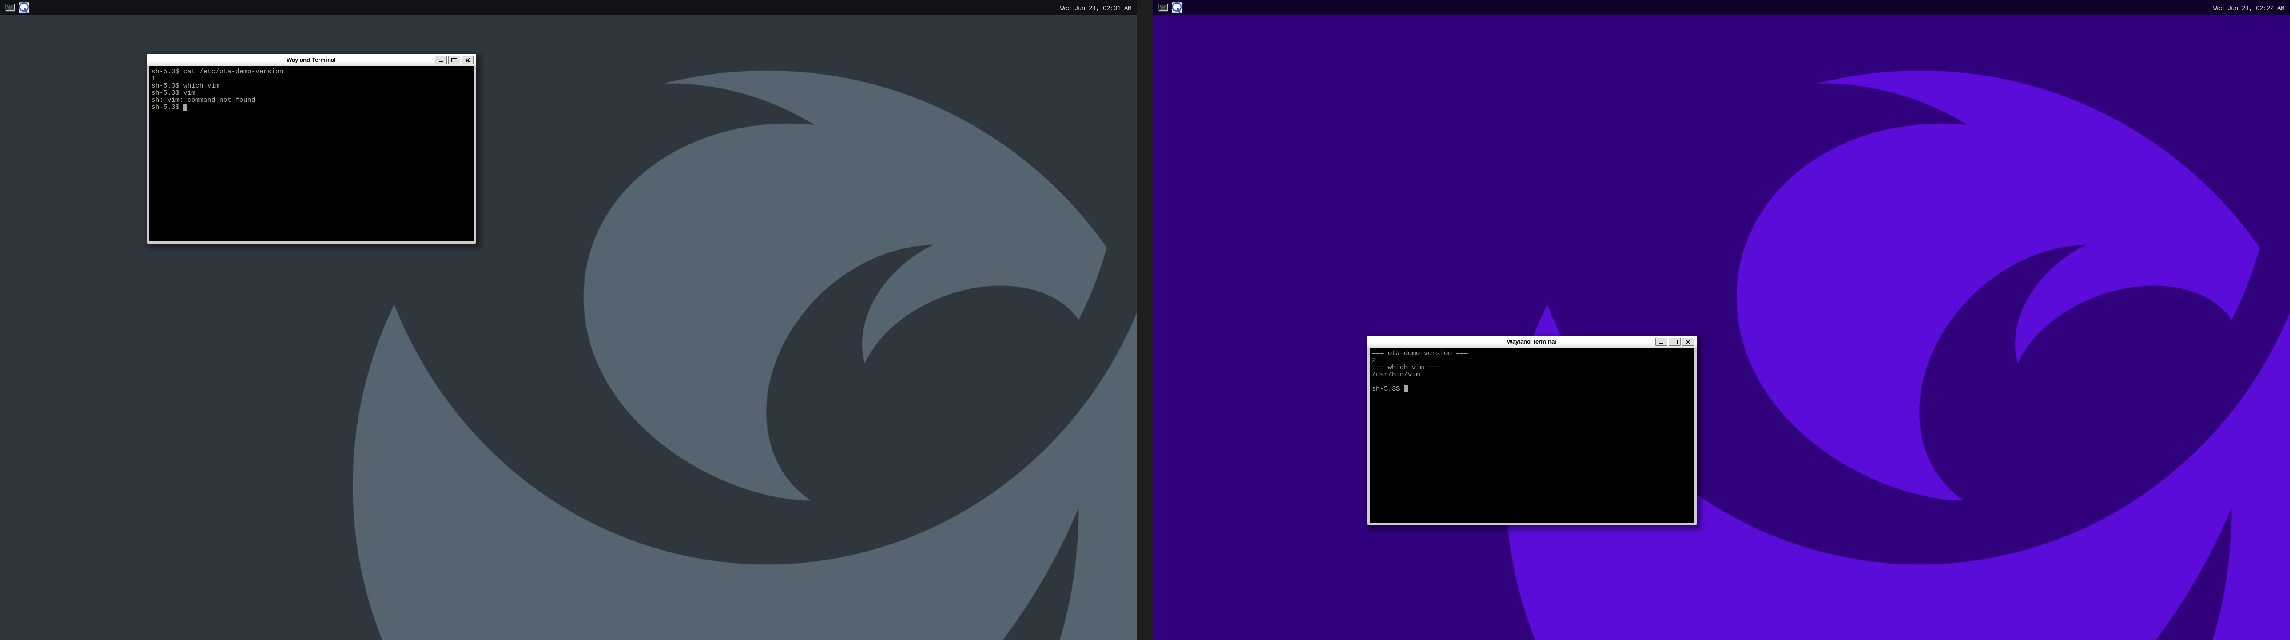
vim appeared, and the version file reads 2. The visual difference is hard to miss:
Version: field, which is the distro version 2.0 for every build, not my demo marker. It still compares the actual commits correctly, so “up to date” is right, but if I were productizing this I’d display a real product release version from signed metadata instead of leaning on that field.
The number I promised you
Here’s the headline. How big is the actual change to add a whole text editor, swap the wallpaper, and bump a version file? First, the size of the OS content we’d be replacing in a naive full image push:static-delta generate measures how small the change compresses to — about 7.8 MB. The bare-bones POC flow in this post doesn’t publish that delta to the server, so the device’s ostree pull actually fetched the changed objects loose (the loose=40542896 figure above, ~40 MB) rather than one tidy 7.8 MB file. That’s still tiny next to 2.1 GB, but to make the device pull the 7.8 MB delta on the wire you generate the static delta into the served repo before devices update — which is exactly what production does.
Now picture that across a fleet on metered cellular or flaky rural links. The difference between every device pulling single-digit megabytes versus a couple of gigabytes is the difference between an update you push casually on a Tuesday and an update you schedule like a military operation. For production you’d pre-generate these static deltas on the server so each device gets one tidy file. Same idea, even tighter on the wire.
Proving the persistence claim
I said/etc survives updates. Let me actually show it instead of asserting it. Before the v1 to v2 update, drop a file in /etc:
/usr got swapped wholesale, but your stuff in /etc came along. One thing the build will warn you about, and you should listen: data dropped into places like /var/lib or /home at build time is not preserved the way you might expect. In an OSTree system, initial image content and persistent runtime state are different things, and deciding what lives where is a real design step for your product, not an afterthought.
Where to take it next
What I built is a proof of concept on purpose. It uses plain HTTP, skips signing so the mechanics stay visible, and the agent runs as root because deploying and rebooting need that. None of that is what you ship. For production you’d sign your commits, serve over HTTPS, give devices real identity, and lean on the aktualizr-lite plus TUF stack the SOTA distro already bundles, so devices verify exactly what they’re installing and you get a real fleet story with rollout policy and update reporting. You’d also pre-generate static deltas for known version paths. But the foundation under all of that is the same one we just used, and it came in the box with Qualcomm Linux 2.0. Atomic deployments, retained rollback, tiny deltas, a clean line between the read only OS and your persistent data. The hard, scary, brick-your-device parts are handled. What’s left is the genuinely fun part, deciding how and when your devices should update, and that part you get to design however your product needs. For an embedded customer the interesting thing here was never the little Python web page. That page is disposable. The interesting thing is that choosingqcom-distro-sota turns the image into an OSTree managed system, and a real device can move between real Yocto-built OS commits over the network without reflashing, keeping the old one as a safety net, paying only for what changed. That’s the piece you can build a product on.
If you want to run this yourself, the full source of the longer files lives on the companion files page — the ota-agent.py web agent and the publish.sh server script, each with a copy button — and the short meta-ota-demo recipes are inline above as copy-paste heredocs. Create them as shown, point the three IP addresses at your own gear, and go push an update to something.