

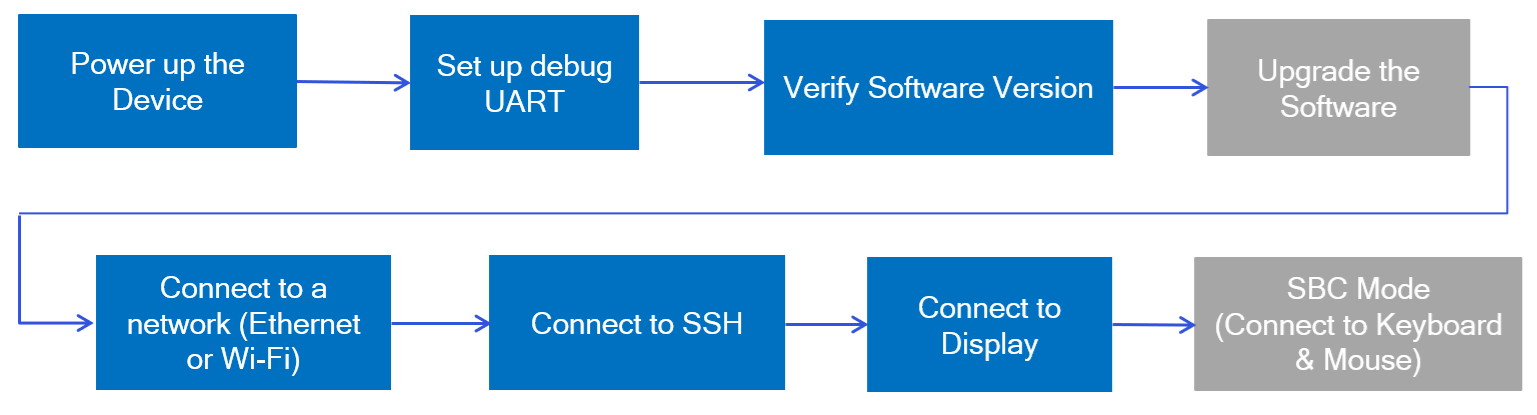
- Powering on the device for the first time.
- Configuring the debug UART for serial console access.
- Verifying software versions and performing software upgrades when required to ensure the latest features and security patches.
- Establishing network connectivity via Ethernet or Wi-Fi.
- Setting up secure SSH access for remote management.
- Connecting display outputs for application visualization.
- Enabling SBC mode to connect peripherals such as keyboard and mouse, transforming the EVK into a functional Single Board Computer for interactive development.
Setup workflow of Dragonwing IQ-9075 EVK
Power on the device
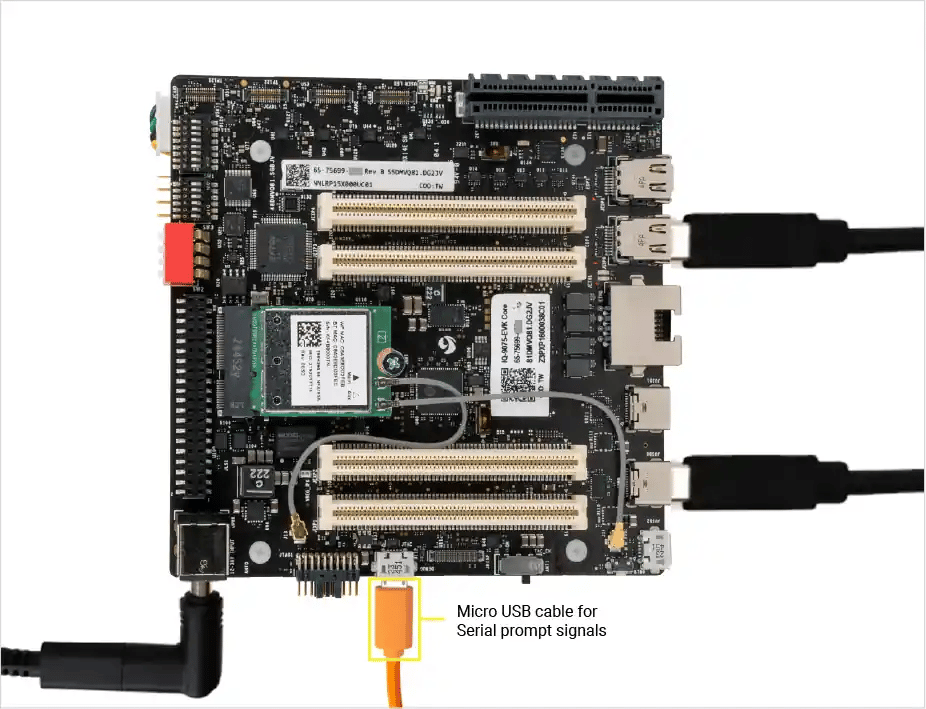
To power up the device, do the following:- The Dragonwing IQ-9075 board receives its main power through a 2.10 mm barrel jack connector (JPWR, JACK-C-PC-10A-RA(R)), which supports an input voltage range of 12 V to 36 V. The EVK also includes a Type-C to barrel plug adapter for convenience. Connect a +12 V power adapter to supply power to the board.
- Connect the USB Type-C end of the cable to USB0 and the other end (Type-A or Type-C) to the host device. This connection allows you to flash the software.
Set up debug UART
The debug UART displays diagnostic messages and provides access to the device through the UART shell. To set up the debug UART, do the following:- Connect one end of a micro-USB cable to the micro-USB port on the Dragonwing IQ-9075 device.
- Connect the other end of the micro-USB cable to the host computer.
- The figure below shows the port location on the device:
- Select a host computer OS below for detailed instructions.
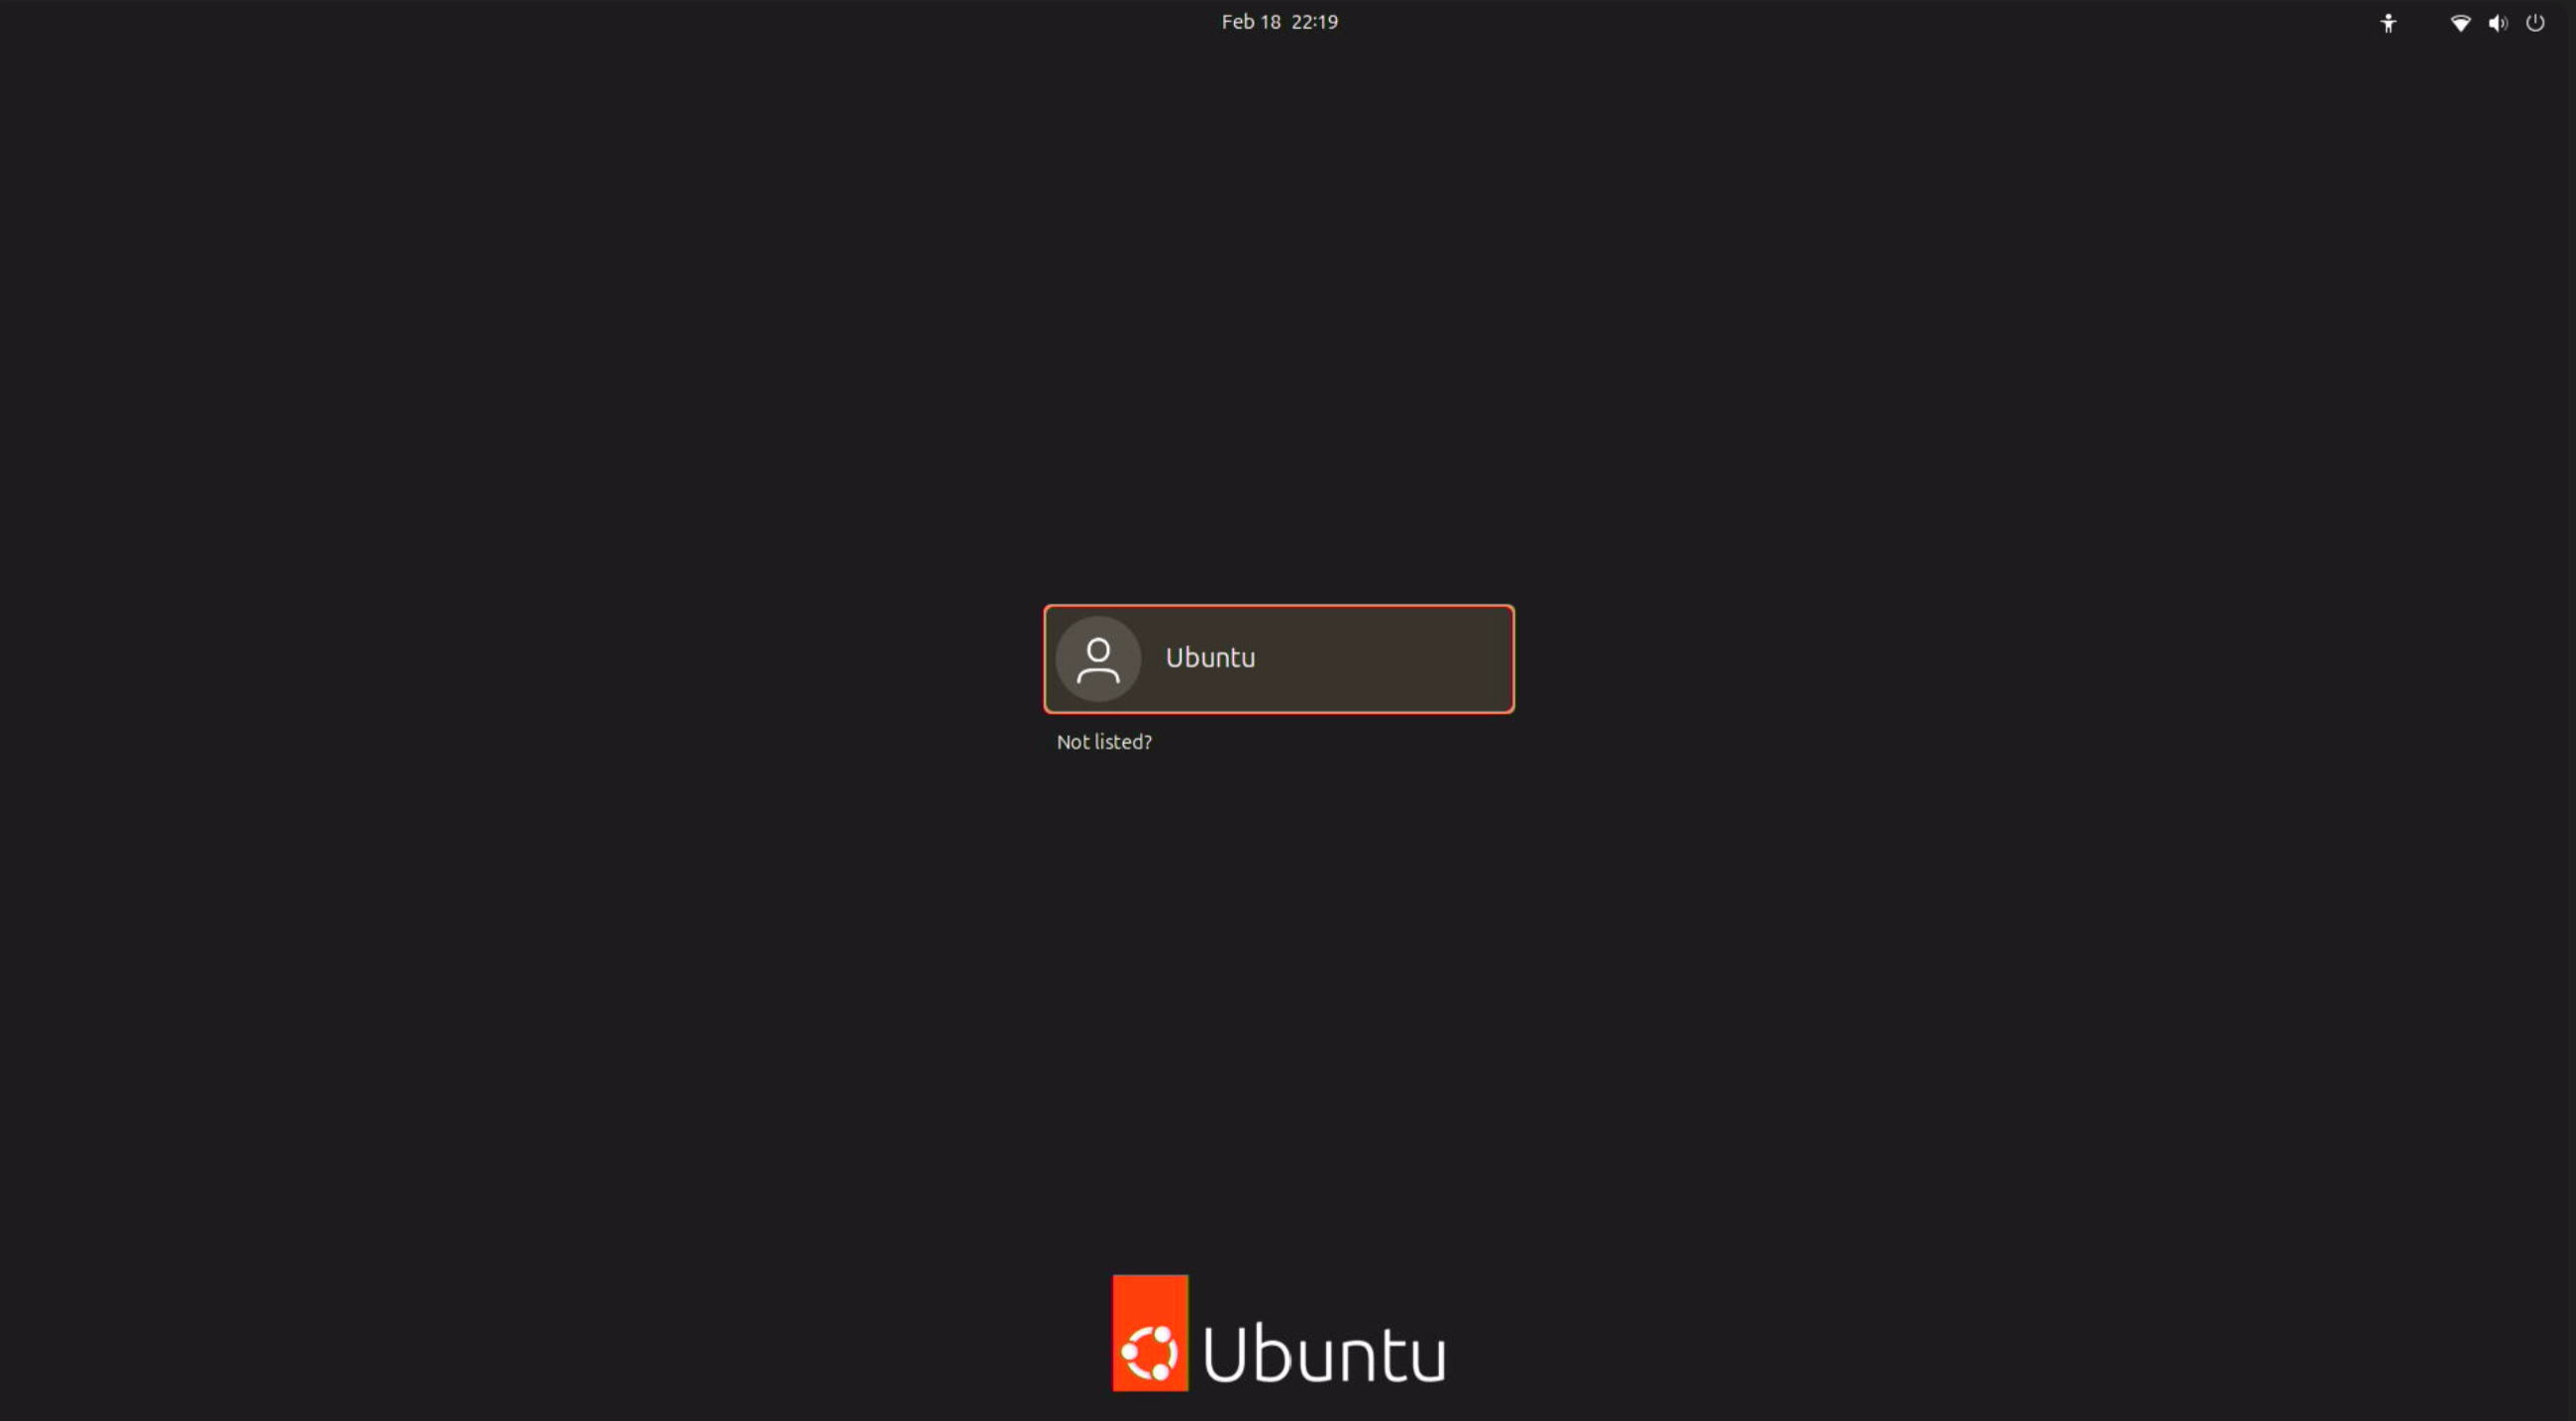
- Ubuntu host
- Windows host
- macOS host
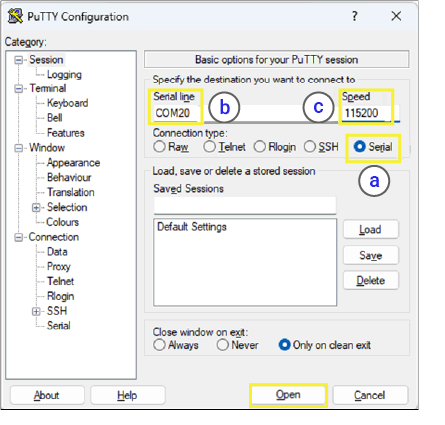
Install the Screen application on the Ubuntu host by running the following commands:Verify the USB port connection by running the following command:Sample Output:Open the debug UART port by running the following command:Details of the Parameters
serial_port: is your device serial port connection.
baud_rate: is the appropriate baud rate, which is 115200 by default.Example
serial_port: is your device serial port connection.
baud_rate: is the appropriate baud rate, which is 115200 by default.Example
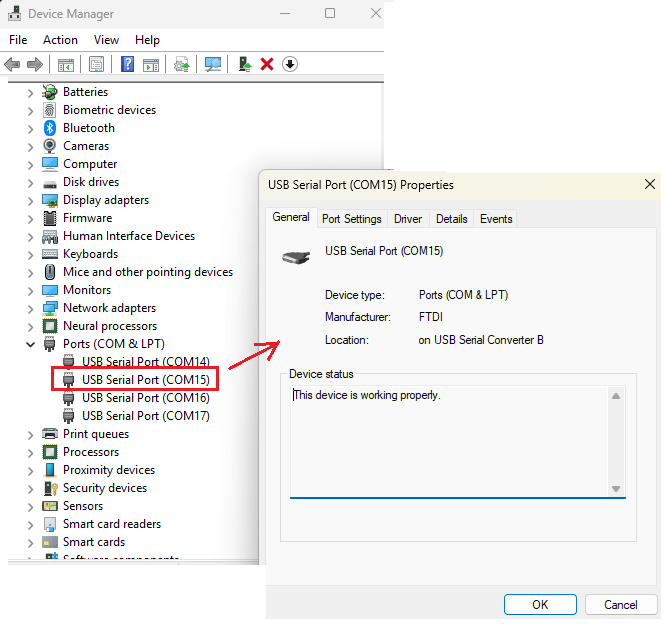
- The IQ9-EVK console will likely enumerate as /dev/ttyUSB1. This is due to the onboard serial adapter, which exposes a total of 4 serial devices, and the console is rendered on the second of those devices.
- To open the debug UART port, run the following command:

Verify the SW version
Sign in to the Dragonwing IQ-9075 EVK Ubuntu UART console, using ubuntu as both the username and password. Then, you can reset the password in your command terminal upon first login. Run the following commands in the terminal to verify the version:Note: If your IQ9-EVK is not currently running Ubuntu or in EDL mode, you can refer to the instructions mentioned in the 🔗“flash Ubuntu to the device” section.
Connect to network
Prerequisites:Sign in to the Dragonwing IQ-9075 EVK Ubuntu UART console, using ubuntu as both the username and password. Establish an internet connection to retrieve the device IP address using one of the following methods:
Connect using Wi-Fi
The device operates Wi-Fi in Station mode. When the device boots up, it initializes the Wi-Fi host driver and authenticates network management. Use the following steps to establish a wireless connection.- Connect to a wireless access point (Wi-Fi router) by running the following command:
WiFi-SSID: is the name of the Wi-Fi network.
WiFi-password: is the password of the Wi-Fi network. Example
The name of the Wi-Fi network is QualcommWi-Fi and the password is 1234567890. To connect to this network, run the following command:
The following sample output indicates successful connection.
- Verify the connected devices and their status by running the following command:
The following sample output shows the list and status of connected devices.
- Verify the WLAN connection status and get the IP address by running the following command:
The following sample output shows the IP address of the Wi-Fi network.

- Ensure that the connection is active by pinging a website such as yahoo.com:
Connect using Ethernet
Connect one end of the Ethernet cable into the Ethernet port (RJ45) of the Dragonwing IQ-9075 device. Connect the other end of the Ethernet cable to your network router. The following figure shows the location of the Ethernet port on the Dragonwing IQ-9075 device.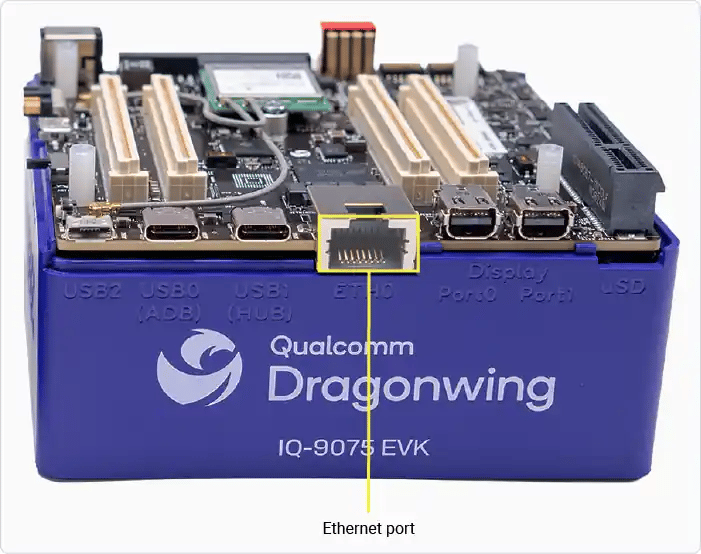

Connect to SSH
SSH facilitates secure terminal access across a network between the host computer and the Dragonwing IQ-9075 device. Before you connect to SSH, ensure that your device has network connectivity through Ethernet or Wi-Fi.Note: Ensure that the remote host computer connects to the same Wi-Fi access point as the device.
The ip-address is the IP address of eth0 or wlan0 interface. Example
To connect to a device with IP address 192.168.0.222, run the following command:
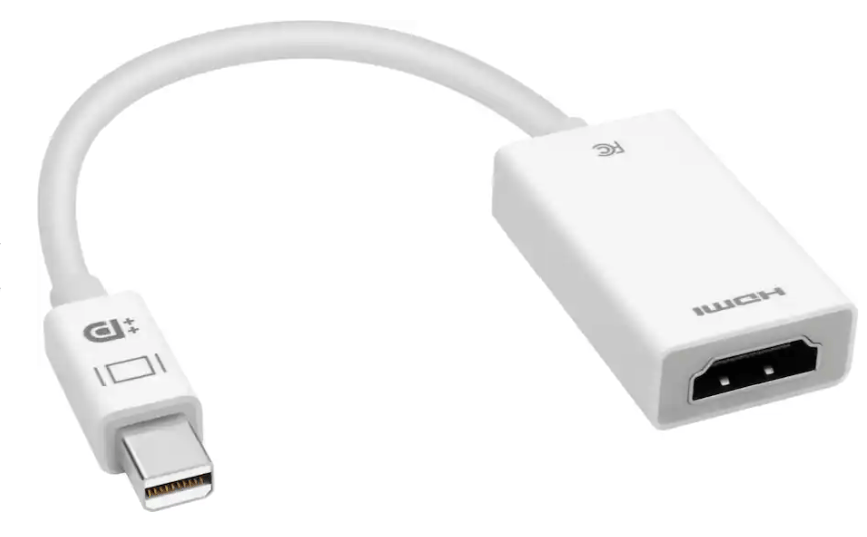
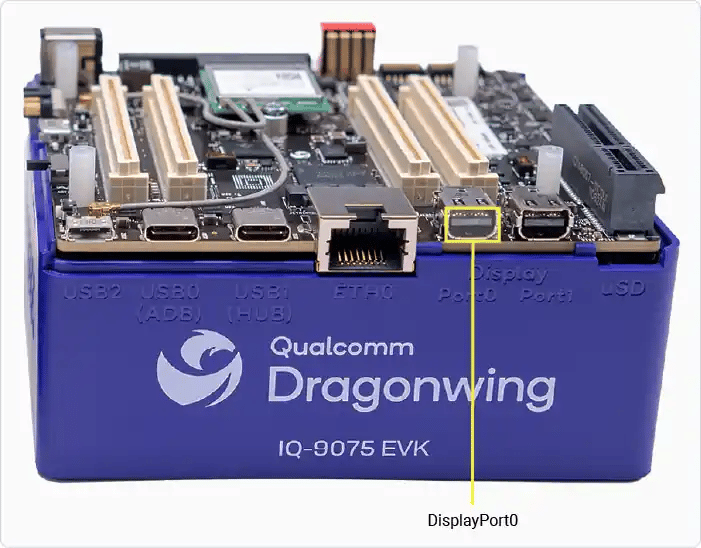
Connect to display
To connect a monitor to the DisplayPort JEDP0 or JEDP1 on the IQ-9075 EVK, use an Active mini-Displayport to Displayport cable, like the one that comes in the box, or use an Active mini-Displayport to HDMI adapter (this part is not included in the EVK kit). mini-Displayport cable to Displayport cable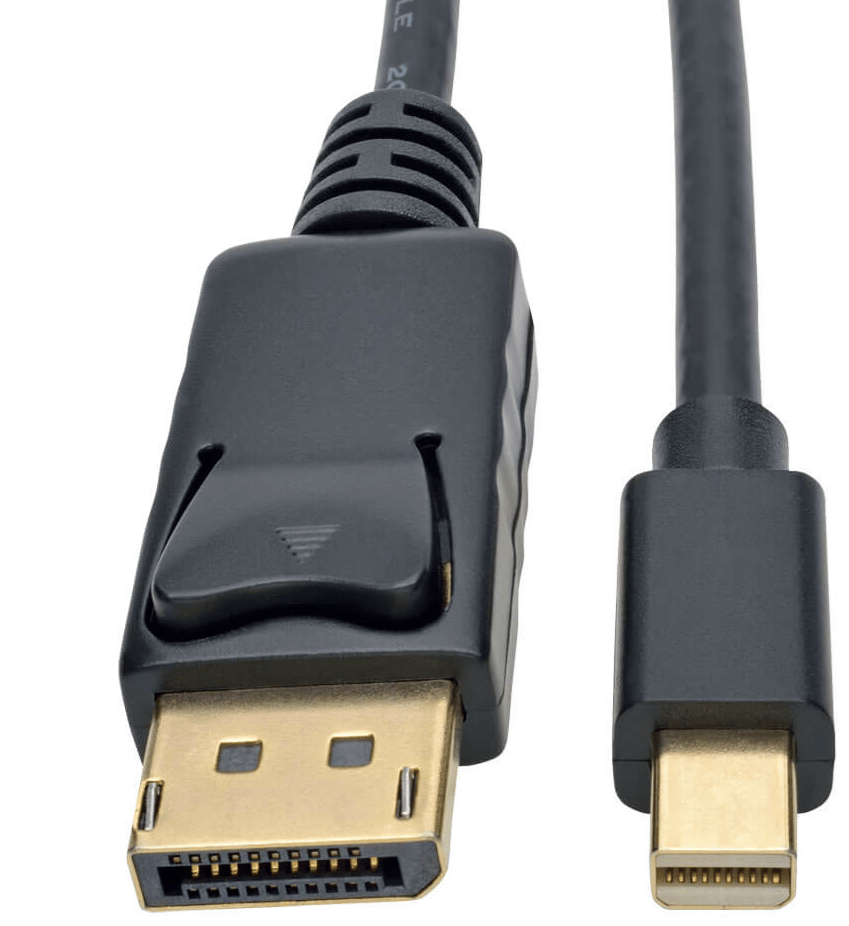
It supports:
- Contains an active conversion chip
- Converts native DisplayPort signaling to HDMI
- Does not rely on DP++ support
Server:

Single Board Computer (SBC) mode
Example connection: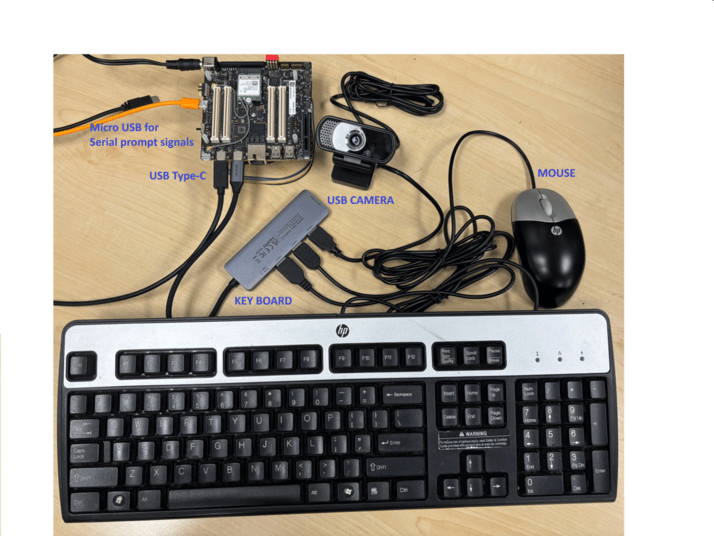
Connect the EVK to the recommended DC power adapter. Ensure correct voltage and polarity before powering on. Micro USB Cable:
Use the micro-USB port for serial console access or debugging. Connect to your host PC for UART logs. USB Hub:
Connect a powered USB hub to the EVK’s USB Type-C for multiple peripherals. Keyboard & Mouse:
Plug into the USB hub. USB Camera:
Connect to the USB hub. Ensure camera is UVC-compliant for Linux compatibility. MIPI Camera:
Attach to the designated MIPI CSI connector on the EVK board. Display:
Connect the EVK to a monitor with a mini-DisplayPort to DisplayPort cable, or an HDMI cable and mini-DisplayPort to HDMI adapter.