

Robotics
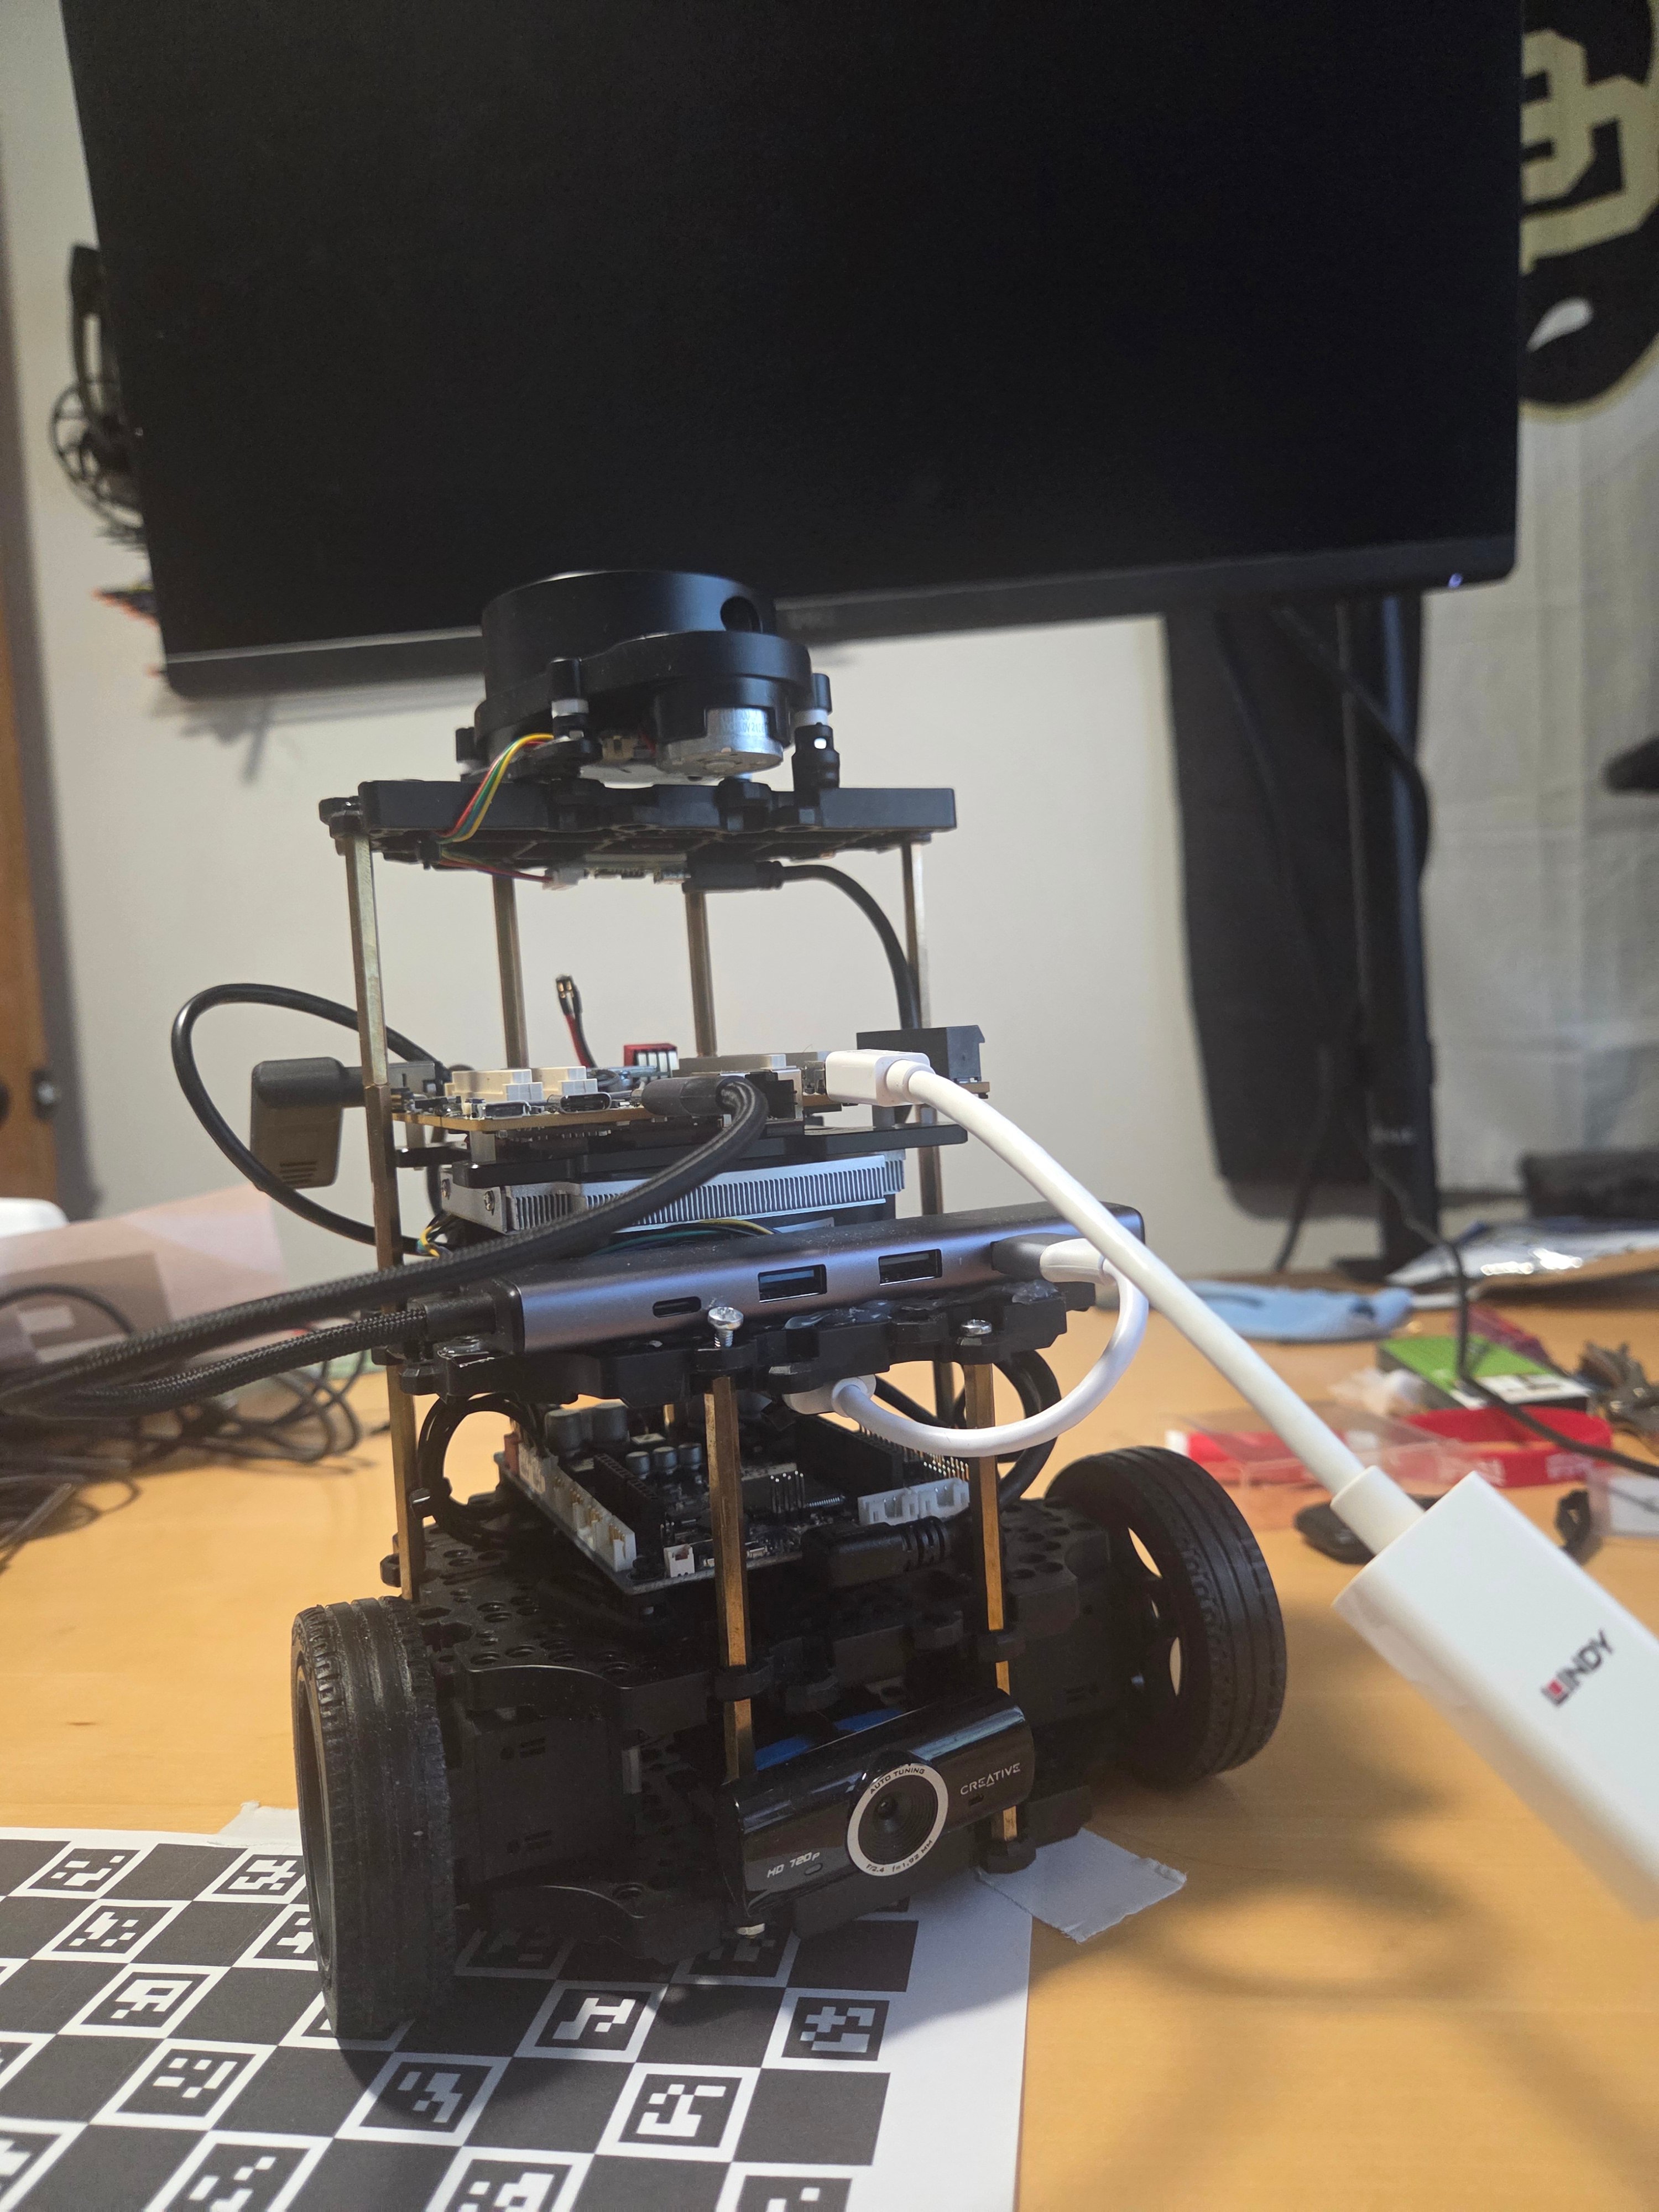
The TurtleBot3 Burger is the classic “hello world” robot for ROS 2: a small differential-drive platform with a 360-degree LiDAR that is just capable enough to do real autonomous navigation. In this post we put one on top of a Qualcomm Dragonwing SBC, install ROS 2 Jazzy from scratch, bring the robot up, build a map of a room with Cartographer, and then let Nav2 drive the robot to a goal on its own. Everything here runs on the board itself. The Dragonwing SBC is the robot’s compute, so there is no laptop in the loop except, optionally, to watch the map come together in RViz.
This walkthrough targets a TurtleBot3 Burger with a pre-flashed OpenCR controller and an LDS-02 LiDAR, running ROS 2 Jazzy on Ubuntu. If your LiDAR or controller revision differs, adjust the model variables in the setup step accordingly.
What you will do
- Install ROS 2 Jazzy on the Dragonwing device.
- Build the TurtleBot3 workspace and wire up the serial devices.
- Bring the robot up and drive it by keyboard.
- Build a map of your space with Cartographer SLAM and save it.
- Hand the map to Nav2 and send the robot to a goal autonomously.
- View everything in RViz, on the board’s own screen or from another machine.
Prerequisites
Before you begin, make sure you have:- A Dragonwing device that has completed first-time setup:
- Access to the device by SSH, or by a directly connected display, keyboard, and mouse. The setup guides above cover networking, serial console, display, and SSH access.
- A TurtleBot3 Burger with the OpenCR board pre-flashed and an LDS-02 LiDAR.
- Two free USB ports on the SBC: one for the OpenCR controller, one for the LiDAR.
Install ROS 2 Jazzy
This is a one-time step on a fresh board. It follows the standard ROS 2 Jazzy install for Ubuntu, so if you already have ROS 2 Jazzy on the device you can skip straight to setting up the TurtleBot3. The commands below mirror the official ROS 2 Jazzy installation guide exactly. First, add the ROS 2 apt repository:~/.bashrc:
Set up the TurtleBot3
With ROS in place, it is time to give the robot its software and tell it which hardware it has.Plug in and check the hardware
The Burger talks to the SBC over two USB connections:| Connection | Device |
|---|---|
| OpenCR → SBC | USB → /dev/ttyACM0 |
| LDS-02 LiDAR → SBC | USB → /dev/ttyUSB0 |
Build the TurtleBot3 workspace
Clone the three TurtleBot3 packages for Jazzy and build them with colcon. The full upstream instructions live in the ROBOTIS TurtleBot3 documentation.Tell ROS about your robot
The TurtleBot3 stack is configured through environment variables. Append them to~/.bashrc so every terminal picks them up:
| Variable | Value | Purpose |
|---|---|---|
TURTLEBOT3_MODEL | burger | Selects the robot URDF and config |
OPENCR_PORT | /dev/ttyACM0 | Serial port to the OpenCR controller |
LDS_MODEL | LDS-02 | Selects the LiDAR driver |
Grant serial permissions
Your user needs access to the serial ports, andModemManager has to stay away from the OpenCR’s CDC ACM device. Add yourself to the dialout group, disable ModemManager, and install the TurtleBot3 udev rules:
Bring the robot up
Launch the bringup. This starts the OpenCR driver, the LiDAR driver, and the differential-drive controller:Drive it by keyboard
Leave bringup running and open a second terminal. The TurtleBot3 teleop node is the recommended way to drive the robot, including while you are mapping:W/A/S/D/X keys to move, and press S or X to stop before you close the window.
Build a map with Cartographer SLAM
Now for the fun part. With the robot driving, you can build an occupancy-grid map of the space using Cartographer. Keep bringup running in its own terminal, then start Cartographer:/map topic keep working headlessly while you drive.
Now drive the robot around with keyboard teleop, or by publishing velocity commands. The more of the space you cover, the better the resulting map.
When you are happy with the coverage, save the map:
~/my_map.pgmis the occupancy-grid image.~/my_map.yamlis the map metadata (resolution, origin).
Drive autonomously with Nav2
With a saved map in hand, hand it to Nav2 and let the robot navigate on its own. (Bringup still needs to be running.)Watch it in RViz
RViz is the easiest way to see the map and the robot’s plan. There are two ways to run it: on the board’s own screen, or from another machine on the network.On the board’s screen over SSH
The GNOME desktop uses Wayland, but RViz2’s Ogre renderer needs GLX (X11). GNOME runs XWayland automatically, but the auth file (XAUTHORITY) has a random suffix that changes on every reboot. The cleanest fix is a small helper in ~/.bashrc that finds it for you:
export-display in any SSH session before you start RViz:
From another machine on the network
To run RViz on a laptop or workstation on the same network:- On both machines, set the same domain ID:
- Install ROS 2 Jazzy on the remote machine.
- On the remote machine, open RViz:
Add a Map display and set the topic to
/map. ROS 2 discovers the map data automatically over the network, so no extra configuration is needed.
Troubleshooting
A few things tend to trip people up the first time. Here are the usual suspects and their fixes./dev/ttyACM0 permission denied
You have not logged out since being added to the dialout group. Use this wrapper until you do:
LiDAR scan empty or Cartographer stuck
Queue waiting for data: (0, scan) usually means the wrong LDS model is set.
LDS_MODEL=LDS-01, fix it:
package 'ld08_driver' not found
cmd_vel commands do nothing
ROS 2 Jazzy changed the cmd_vel topic type from geometry_msgs/Twist to geometry_msgs/TwistStamped. If you publish Twist directly (for example from a custom node or an older tutorial), add a header field:
turtlebot3_teleop teleop_keyboard node already handles this correctly, so this only affects custom publishers.
Map saver fails silently
Always pass-t /map explicitly:
apt locked by a background process
Next steps
You now have a robot that maps a room and drives itself, all from a Dragonwing board. From here you can:- Run hardware-accelerated AI on the robot’s camera. The Depth Estimation on the NPU walkthrough builds a ROS 2 node that runs a quantized model on the Hexagon HTP NPU.
- Explore the QRB ROS ecosystem for zero-copy transport, reference samples, Gazebo simulation, and benchmarking.
- Start from the Robotics Workflow Overview for the full picture of robotics development on Dragonwing.