> ## Documentation Index
> Fetch the complete documentation index at: https://dragonwingdocs.qualcomm.com/llms.txt
> Use this file to discover all available pages before exploring further.
# 在 Dragonwing 上用 ROS 2 驱动 TurtleBot3
> 在 Dragonwing SBC 上启动 TurtleBot3 Burger,使用 Cartographer SLAM 构建地图,并借助 Nav2 实现自主行驶,全程基于 ROS 2 Jazzy。
Dragonwing · Qualcomm
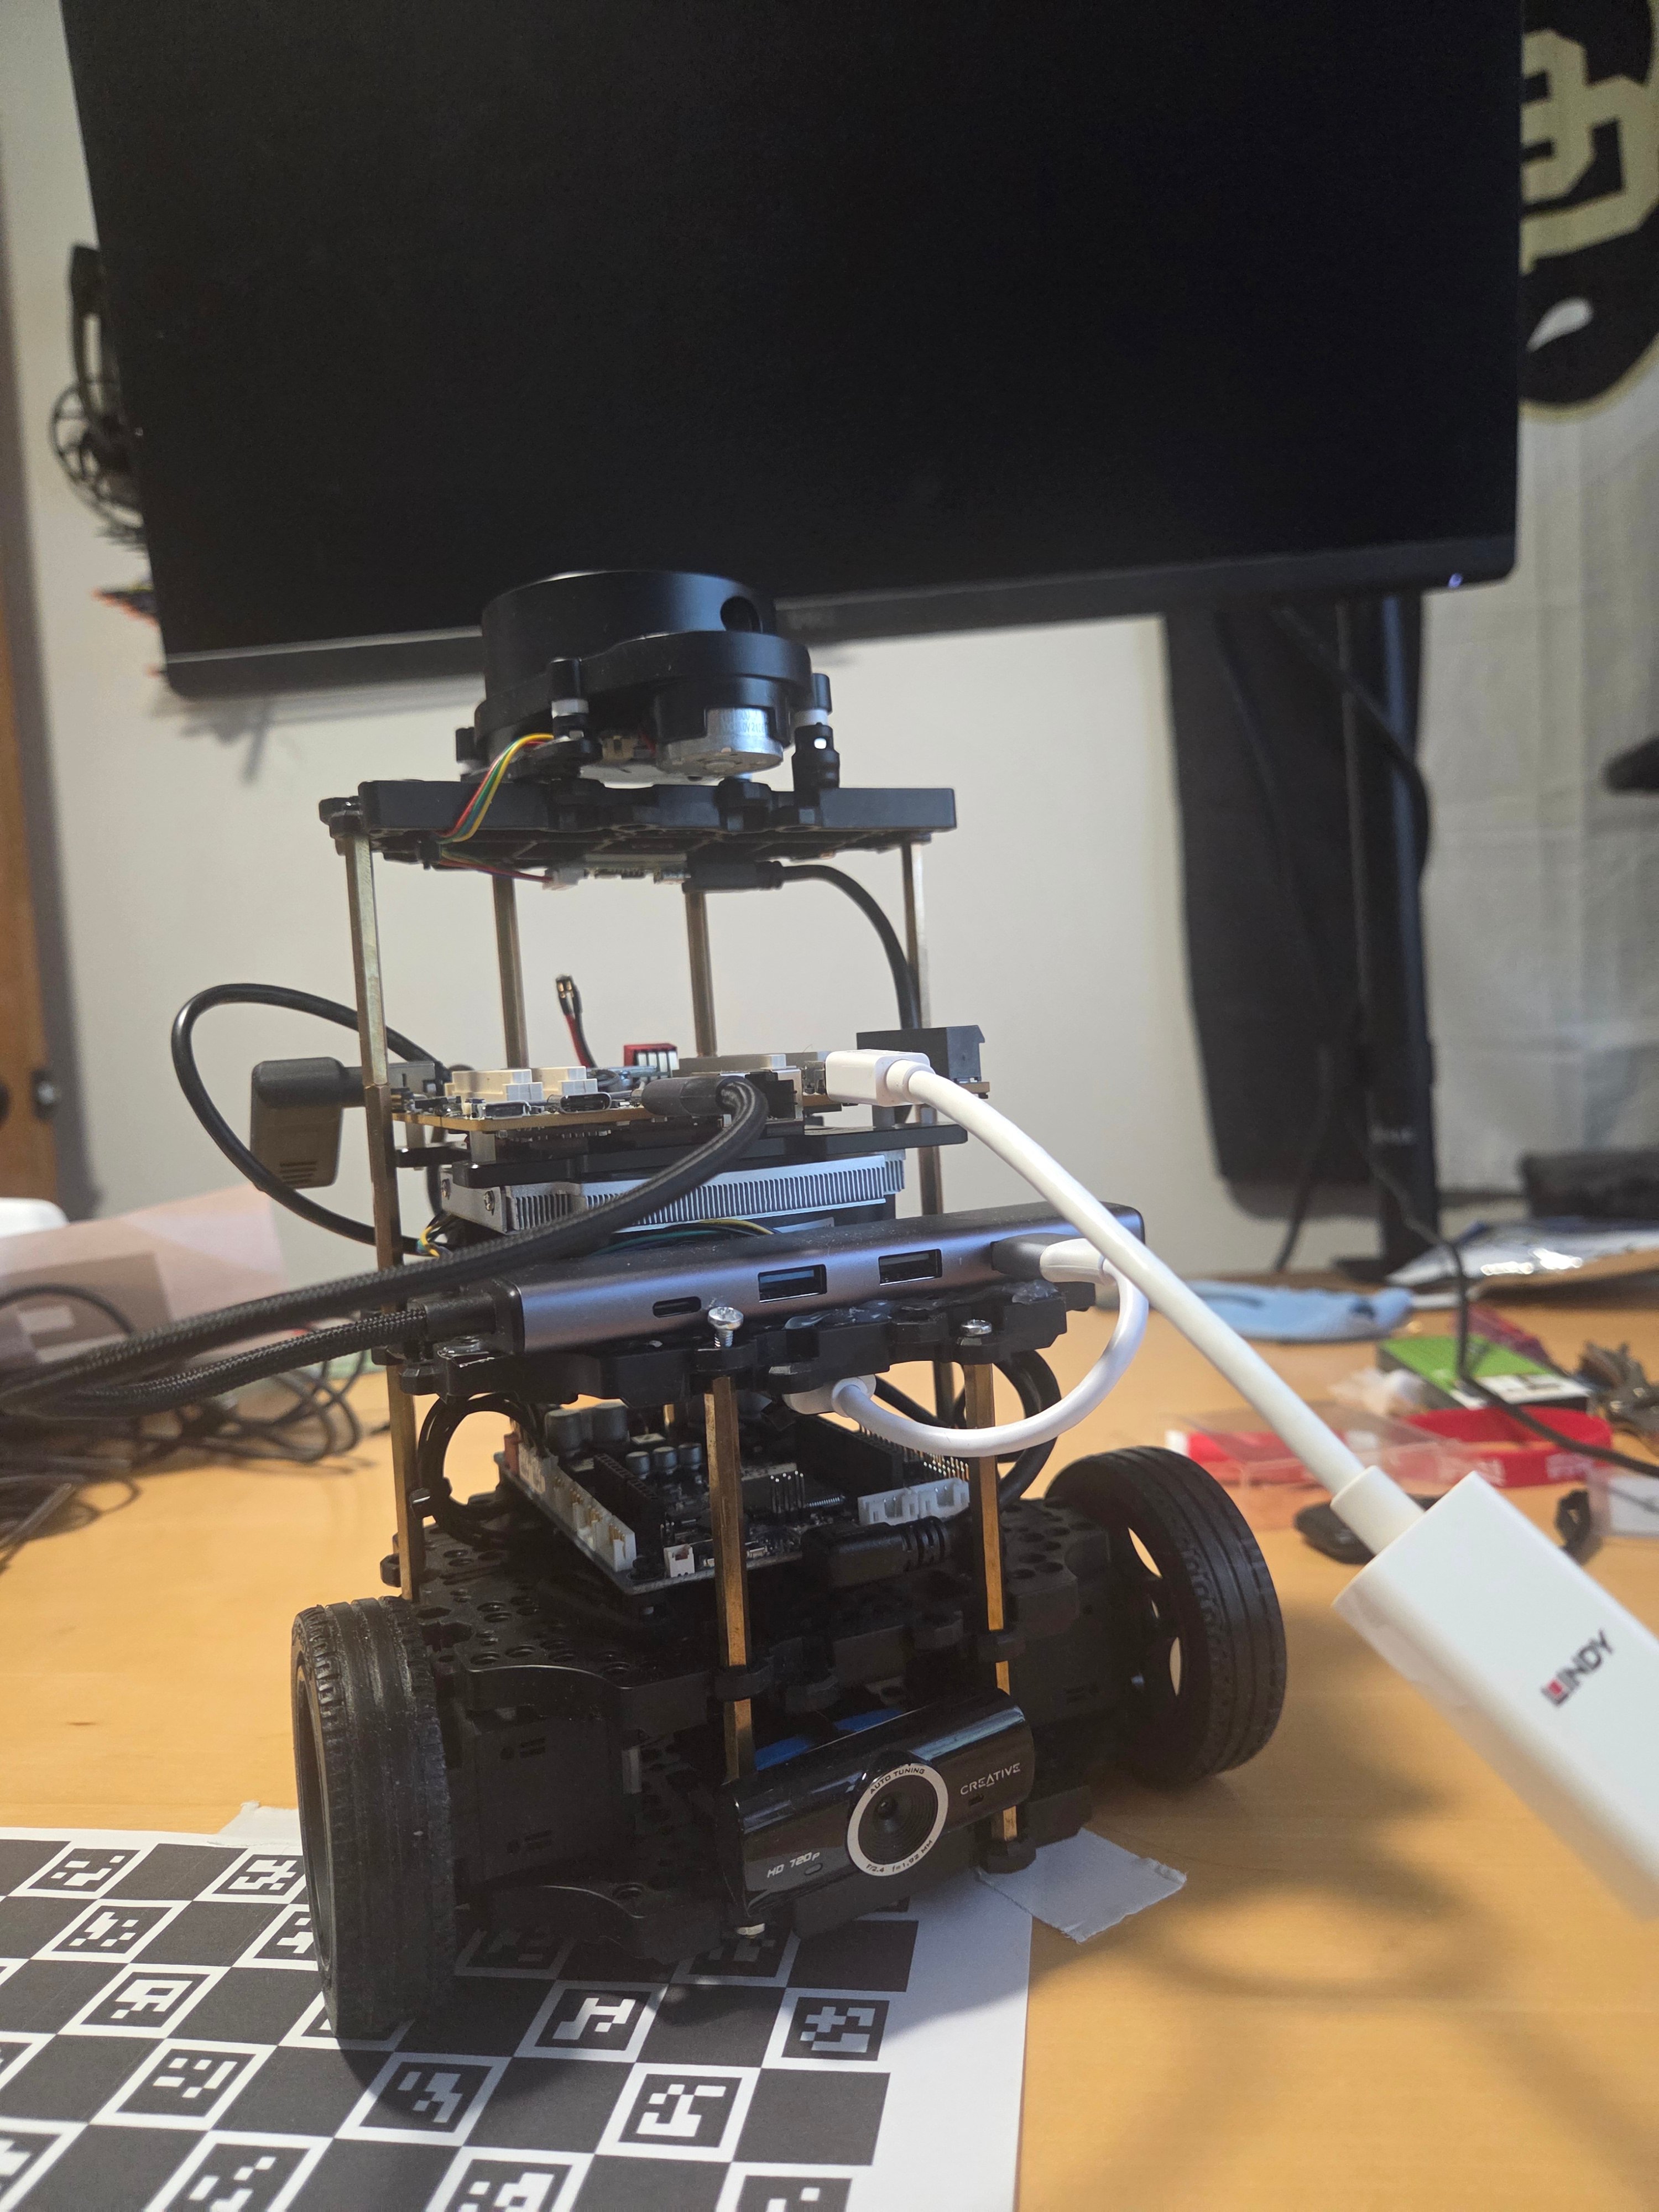
[TurtleBot3 Burger](https://emanual.robotis.com/docs/en/platform/turtlebot3/overview/) 是 ROS 2 领域经典的"hello world"机器人:一款小型差速驱动平台,配备 360 度 LiDAR,恰好足以完成真正的自主导航。在本文中,我们将它安装到 Qualcomm Dragonwing SBC 上,从零安装 ROS 2 Jazzy,启动机器人,使用 Cartographer 为房间构建地图,然后让 Nav2 驱动机器人自主到达目标点。
这里的一切都直接运行在开发板上。Dragonwing SBC 就是机器人的计算单元,因此整个流程无需笔记本电脑参与——除非你想在 RViz 中观看地图逐步生成。
本教程面向配备**预刷写 OpenCR** 控制器和 **LDS-02 LiDAR** 的 **TurtleBot3 Burger**,运行 Ubuntu 上的 **ROS 2 Jazzy**。如果你的 LiDAR 或控制器版本不同,请在设置步骤中相应调整型号变量。
## 你将完成的内容
1. 在 Dragonwing 设备上安装 ROS 2 Jazzy。
2. 构建 TurtleBot3 工作区并连接串口设备。
3. 启动机器人并用键盘驾驶它。
4. 使用 Cartographer SLAM 为你的空间构建并保存地图。
5. 将地图交给 Nav2,让机器人自主前往目标点。
6. 在 RViz 中查看全部过程——在开发板自身的屏幕上或从另一台机器上。
## 前提条件
开始之前,请确保你具备:
* 一台已完成首次设置的 Dragonwing 设备:
* [Dragonwing IQ8 设置](/zh/Ubuntu/devices/iq8275-evk/setup)
* [Dragonwing IQ9 设置](/zh/Ubuntu/devices/iq9075-evk/setup)
* 通过 SSH 或直接连接的显示器、键盘和鼠标访问设备的能力。上述设置指南涵盖了联网、串口控制台、显示和 SSH 访问。
* 一台 OpenCR 板已预刷写并配备 LDS-02 LiDAR 的 TurtleBot3 Burger。
* SBC 上有两个空闲的 USB 端口:一个连接 OpenCR 控制器,一个连接 LiDAR。
## 安装 ROS 2 Jazzy
这是在全新开发板上的一次性步骤。它遵循 Ubuntu 上 ROS 2 Jazzy 的标准安装流程,因此如果设备上已经有 ROS 2 Jazzy,可以直接跳到[设置 TurtleBot3](#set-up-the-turtlebot3)。以下命令与 [ROS 2 Jazzy 官方安装指南](https://docs.ros.org/en/jazzy/Installation/Ubuntu-Install-Debs.html)完全一致。
首先,添加 ROS 2 apt 软件源:
```bash theme={null}
sudo apt update
sudo apt install -y curl gnupg2 lsb-release ca-certificates software-properties-common locales
sudo locale-gen en_US en_US.UTF-8
sudo update-locale LANG=en_US.UTF-8 LC_ALL=en_US.UTF-8
sudo add-apt-repository universe -y
sudo curl -sSL https://raw.githubusercontent.com/ros/rosdistro/master/ros.key \
-o /usr/share/keyrings/ros-archive-keyring.gpg
echo "deb [arch=$(dpkg --print-architecture) signed-by=/usr/share/keyrings/ros-archive-keyring.gpg] \
http://packages.ros.org/ros2/ubuntu $(. /etc/os-release && echo $UBUNTU_CODENAME) main" \
| sudo tee /etc/apt/sources.list.d/ros2.list > /dev/null
```
然后安装桌面套件及构建工具:
```bash theme={null}
sudo apt update
sudo apt install -y ros-jazzy-desktop \
python3-colcon-common-extensions \
python3-rosdep \
python3-argcomplete
sudo rosdep init || true
rosdep update
```
最后,将 ROS 追加到 `~/.bashrc` 中,使每个新 shell 都自动加载:
```bash theme={null}
echo 'source /opt/ros/jazzy/setup.bash' >> ~/.bashrc
source ~/.bashrc
```
## 设置 TurtleBot3
ROS 就绪后,接下来为机器人安装软件并告诉它自己的硬件配置。
### 插入并检查硬件
Burger 通过两条 USB 连接与 SBC 通信:
| 连接 | 设备 |
| ------------------ | -------------------- |
| OpenCR → SBC | USB → `/dev/ttyACM0` |
| LDS-02 LiDAR → SBC | USB → `/dev/ttyUSB0` |
继续之前,先确认两台设备都已被枚举:
```bash theme={null}
ls /dev/ttyACM0 /dev/ttyUSB0
```
### 构建 TurtleBot3 工作区
克隆 Jazzy 版本的三个 TurtleBot3 软件包,并用 colcon 构建。完整的上游说明见 [ROBOTIS TurtleBot3 文档](https://emanual.robotis.com/docs/en/platform/turtlebot3/quick-start/)。
```bash theme={null}
mkdir -p ~/turtlebot3_ws/src
cd ~/turtlebot3_ws/src
git clone -b jazzy https://github.com/ROBOTIS-GIT/DynamixelSDK.git
git clone -b jazzy https://github.com/ROBOTIS-GIT/turtlebot3_msgs.git
git clone -b jazzy https://github.com/ROBOTIS-GIT/turtlebot3.git
cd ~/turtlebot3_ws
source /opt/ros/jazzy/setup.bash
rosdep install --from-paths src --ignore-src -r -y
colcon build --symlink-install
```
### 告诉 ROS 你的机器人信息
TurtleBot3 软件栈通过环境变量进行配置。将它们追加到 `~/.bashrc`,使每个终端都能加载:
```bash theme={null}
echo 'source ~/turtlebot3_ws/install/setup.bash' >> ~/.bashrc
echo 'export TURTLEBOT3_MODEL=burger' >> ~/.bashrc
echo 'export OPENCR_PORT=/dev/ttyACM0' >> ~/.bashrc
echo 'export LDS_MODEL=LDS-02' >> ~/.bashrc
source ~/.bashrc
```
各变量的作用如下:
| 变量 | 值 | 作用 |
| ------------------ | -------------- | ---------------- |
| `TURTLEBOT3_MODEL` | `burger` | 选择机器人的 URDF 和配置 |
| `OPENCR_PORT` | `/dev/ttyACM0` | 连接 OpenCR 控制器的串口 |
| `LDS_MODEL` | `LDS-02` | 选择 LiDAR 驱动 |
### 授予串口权限
你的用户需要具备串口访问权限,并且 `ModemManager` 不能干扰 OpenCR 的 CDC ACM 设备。将自己加入 `dialout` 组,禁用 `ModemManager`,并安装 TurtleBot3 udev 规则:
```bash theme={null}
sudo usermod -aG dialout $USER
sudo systemctl disable --now ModemManager
sudo cp $(ros2 pkg prefix turtlebot3_bringup)/share/turtlebot3_bringup/script/99-turtlebot3-cdc.rules \
/etc/udev/rules.d/
sudo udevadm control --reload-rules
sudo udevadm trigger
```
此步骤之后请**注销并重新登录**(或重启),使 `dialout` 组成员身份生效。如果在注销前需要继续在同一会话中工作,请参阅[故障排查](#troubleshooting)中的串口权限临时解决方案。
## 启动机器人
启动 bringup。这会启动 OpenCR 驱动、LiDAR 驱动和差速驱动控制器:
```bash theme={null}
ros2 launch turtlebot3_bringup robot.launch.py
```
正常的 bringup 会输出类似如下日志:
```
[DynamixelSDKWrapper]: Succeeded to open the port(/dev/ttyACM0)!
[ld08_driver]: FOUND LDS-02
[ld08_driver]: LDS-02 started successfully
[turtlebot3_node]: Run!
[diff_drive_controller]: Run!
```
### 用键盘驾驶
保持 bringup 运行,另开一个终端。TurtleBot3 teleop 节点是驾驶机器人的推荐方式,包括在建图过程中:
```bash theme={null}
ros2 run turtlebot3_teleop teleop_keyboard
```
使用 `W/A/S/D/X` 键移动,关闭窗口前按 `S` 或 `X` 停车。
## 使用 Cartographer SLAM 构建地图
接下来是有趣的部分。让机器人边行驶边使用 Cartographer 构建空间的占据栅格地图。
让 [bringup](#bring-the-robot-up) 在其自己的终端中保持运行,然后启动 Cartographer:
```bash theme={null}
ros2 launch turtlebot3_cartographer cartographer.launch.py use_sim_time:=false
```
如果没有连接显示器,RViz 会启动失败,这没有关系。Cartographer 和 `/map` 话题会在你驾驶的同时以无头模式继续工作。
现在用[键盘遥控](#drive-it-by-keyboard)或发布速度指令驾驶机器人四处移动。覆盖的空间越多,最终的地图效果越好。
对覆盖范围满意后,保存地图:
```bash theme={null}
ros2 run nav2_map_server map_saver_cli -t /map -f ~/my_map
```
这会生成两个文件:
* `~/my_map.pgm` 是占据栅格图像。
* `~/my_map.yaml` 是地图元数据(分辨率、原点)。
地图保存后即可停止 Cartographer。
## 使用 Nav2 自主行驶
有了保存好的地图,把它交给 Nav2,让机器人自主导航。(bringup 仍需保持运行。)
```bash theme={null}
ros2 launch turtlebot3_navigation2 navigation2.launch.py \
use_sim_time:=false \
map:=$HOME/my_map.yaml
```
在 RViz 中,先设置 **2D Pose Estimate**,让 Nav2 知道机器人在地图上的位置,然后发送导航目标,观察它规划路径并驶向目标。
没有显示器?也可以通过发送 ROS 2 action 目标以无头方式完成同样的操作:
```bash theme={null}
ros2 action send_goal /navigate_to_pose nav2_msgs/action/NavigateToPose \
'{pose: {header: {frame_id: "map"}, pose: {position: {x: 1.0, y: 0.5}}}}'
```
## 在 RViz 中查看
RViz 是查看地图和机器人规划路径最简单的方式。有两种运行方式:在开发板自身的屏幕上,或从网络中的另一台机器上。
### 通过 SSH 在开发板屏幕上运行
GNOME 桌面使用 Wayland,但 RViz2 的 Ogre 渲染器需要 GLX(X11)。GNOME 会自动运行 XWayland,但认证文件(`XAUTHORITY`)带有随机后缀,且每次重启都会变化。最干净的解决办法是在 `~/.bashrc` 中添加一个小的辅助函数来自动查找它:
```bash theme={null}
cat >> ~/.bashrc << 'EOF'
export-display() {
local xauth
xauth=$(find /run/user/1000 -name '.mutter-Xwaylandauth.*' 2>/dev/null | head -1)
export DISPLAY=:0
export XAUTHORITY="$xauth"
export XDG_RUNTIME_DIR=/run/user/1000
echo "DISPLAY=$DISPLAY XAUTHORITY=$XAUTHORITY"
}
EOF
source ~/.bashrc
```
在启动 RViz 之前,在任意 SSH 会话中运行 `export-display`:
```bash theme={null}
export-display
```
它会打印解析出的环境变量:
```
DISPLAY=:0 XAUTHORITY=/run/user/1000/.mutter-Xwaylandauth.XXXXXX
```
综合起来,在已连接的屏幕上使用 RViz 建图的流程如下:
```bash theme={null}
# Terminal 1 – bringup
ros2 launch turtlebot3_bringup robot.launch.py
# Terminal 2 – SLAM + RViz on the connected screen
export-display
ros2 launch turtlebot3_cartographer cartographer.launch.py use_sim_time:=false
```
如果你直接在 GNOME 桌面上打开终端而不是通过 SSH,`DISPLAY` 和 `XAUTHORITY` 已经设置好了。无需 `export-display`,直接正常运行 RViz 即可。
### 从网络中的另一台机器运行
要在同一网络中的笔记本电脑或工作站上运行 RViz:
1. 在**两台**机器上设置相同的 domain ID:
```bash theme={null}
export ROS_DOMAIN_ID=30
```
2. 在远程机器上安装 ROS 2 Jazzy。
3. 在远程机器上打开 RViz:
```bash theme={null}
rviz2
```
添加 **Map** 显示并将话题设置为 `/map`。ROS 2 会通过网络自动发现地图数据,无需额外配置。
## 故障排查
初次上手时有几个常见的坑。以下是最常见的问题及其解决方法。
### `/dev/ttyACM0` 权限被拒绝
你在被加入 `dialout` 组后还没有注销。在注销之前,可以使用这个包装命令:
```bash theme={null}
sg dialout -c '. /opt/ros/jazzy/setup.sh; . ~/turtlebot3_ws/install/setup.sh; \
export TURTLEBOT3_MODEL=burger OPENCR_PORT=/dev/ttyACM0 LDS_MODEL=LDS-02; \
ros2 launch turtlebot3_bringup robot.launch.py'
```
注销并重新登录一次后,就不再需要这个包装命令了。
### LiDAR 扫描为空或 Cartographer 卡住
`Queue waiting for data: (0, scan)` 通常意味着设置了错误的 LDS 型号。
```bash theme={null}
echo $LDS_MODEL # must be LDS-02
ls /dev/ttyUSB0 # must exist
```
如果 `LDS_MODEL=LDS-01`,请修正:
```bash theme={null}
sed -i 's/export LDS_MODEL=LDS-01/export LDS_MODEL=LDS-02/' ~/.bashrc
source ~/.bashrc
```
### `package 'ld08_driver' not found`
```bash theme={null}
sudo apt install -y ros-jazzy-ld08-driver
```
### `cmd_vel` 指令无效
ROS 2 Jazzy 将 `cmd_vel` 话题的类型从 `geometry_msgs/Twist` 改为了 `geometry_msgs/TwistStamped`。如果你直接发布 `Twist`(例如来自自定义节点或旧版教程),需要添加 `header` 字段:
```python theme={null}
from geometry_msgs.msg import TwistStamped
from builtin_interfaces.msg import Time
msg = TwistStamped()
msg.header.stamp = self.get_clock().now().to_msg()
msg.twist.linear.x = 0.2
msg.twist.angular.z = 0.0
publisher.publish(msg)
```
内置的 `turtlebot3_teleop teleop_keyboard` 节点已经正确处理了这一点,因此只有自定义发布者会受影响。
### 地图保存悄然失败
请始终显式传入 `-t /map`:
```bash theme={null}
ros2 run nav2_map_server map_saver_cli -t /map -f ~/my_map
```
### `apt` 被后台进程锁定
```bash theme={null}
sudo systemctl stop apt-daily.service apt-daily-upgrade.service packagekit.service
sudo pkill -f aptd || true
sudo apt update
```
## 后续步骤
现在你拥有了一台能够建图并自主行驶的机器人,全部运行在 Dragonwing 开发板上。接下来你可以:
* 在机器人的摄像头上运行硬件加速的 AI。[NPU 上的深度估计](/zh/Ubuntu/robotics-workflows/npu-workflows)教程构建了一个在 Hexagon HTP NPU 上运行量化模型的 ROS 2 节点。
* 探索 [QRB ROS 生态系统](/zh/Ubuntu/robotics-workflows/qrb-ros-overview),了解零拷贝传输、参考示例、Gazebo 仿真和基准测试。
* 从[机器人工作流概览](/zh/Ubuntu/robotics-workflows/robotics-workflows_overview)开始,全面了解在 Dragonwing 上进行机器人开发的完整图景。