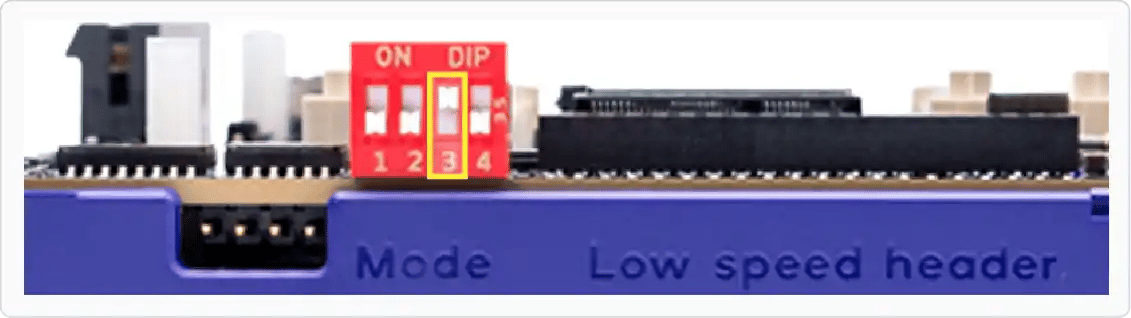
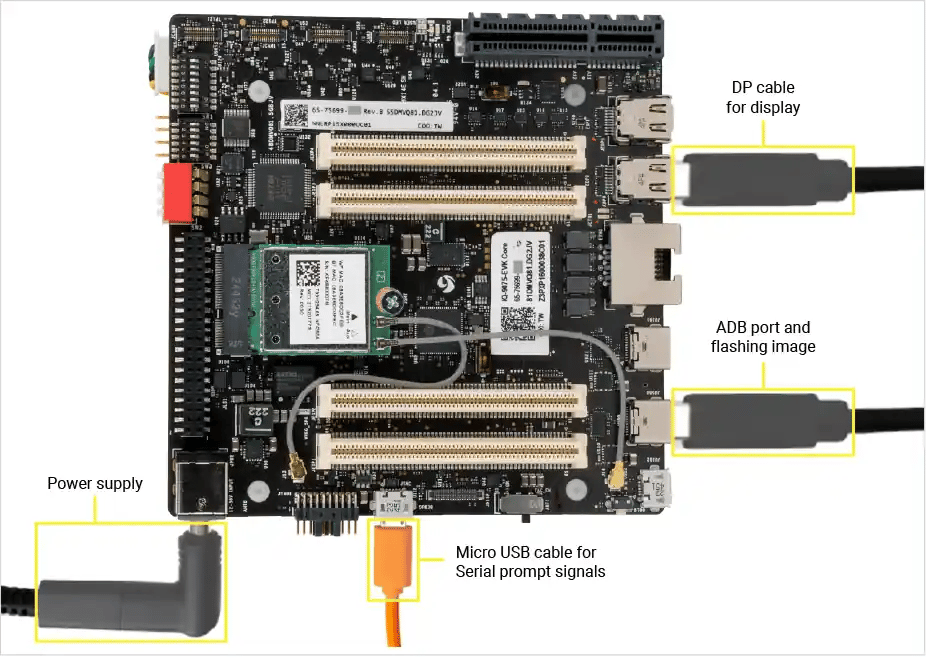
Use the Qualcomm Device Loader (QDL) command-line tool to flash Ubuntu onto the IQ-9075 EVK from Ubuntu, Windows, or macOS hosts.
Qualcomm Device Loader (QDL) is a cross-platform command-line flashing tool for Qualcomm devices. Use this method when you need full control over the flash process, are running in a headless environment, or want to script automated flashing.For a GUI-based alternative, see Flash Ubuntu using Qualcomm Launcher.
Flashing erases all data on the device. Back up anything important before you begin.
UFS (Universal Flash Storage) provisioning divides the internal storage into separate logical unit numbers (LUNs). This step is required when switching from Qualcomm Linux to Ubuntu.Run UFS provisioning if any of the following apply:
This is a brand-new board that has never been flashed.
You are upgrading to a new image version.
You are switching distributions (Qualcomm Linux ↔ Ubuntu).
Provision UFS from the unzipped provision directory:
cd provision<qdl_dir>/qdl --storage ufs prog_firehose_ddr.elf provision_1_2.xml
Expected output:
UFS provisioning succeeded
After UFS provisioning completes, the device disconnects from USB. Toggle the power switch off and on to reboot it back into EDL mode before continuing.
The Safety Island (SAIL) is a separate, isolated processor that handles safety-critical functions independently from the main application processor. Its firmware lives on a dedicated spinor flash partition.
Navigate to the sail_nor subfolder inside the image folder:
Download the QDL tool for Windows and extract it. The extracted folder contains qdl.exe — referred to as <qdl_dir> below.
We recommend extracting the image folder and QDL into the same parent folder (for example C:\Users\you\Downloads\qualcomm-flash\). This keeps all paths under one root.
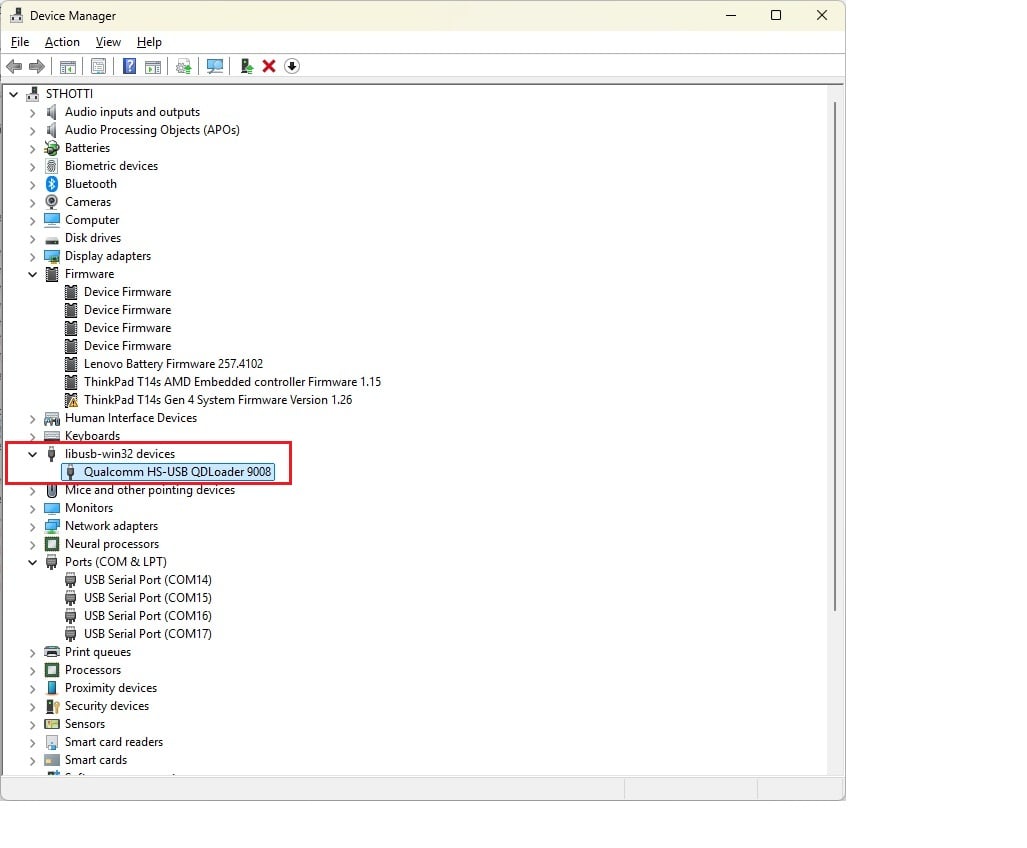
Uninstall any existing Qualcomm USB drivers (QUD) — they conflict with the QDL driver. Open Device Manager, find your device, and uninstall any existing drivers. The device should not appear under COM Ports.
Run install_driver.bat from the unzipped QDL folder to install the WinUSB driver.
UFS (Universal Flash Storage) provisioning divides the internal storage into separate logical unit numbers (LUNs). This step is required when switching from Qualcomm Linux to Ubuntu.Run UFS provisioning if any of the following apply:
This is a brand-new board that has never been flashed.
You are upgrading to a new image version.
You are switching distributions (Qualcomm Linux ↔ Ubuntu).
After UFS provisioning completes, the device disconnects from USB. Toggle the power switch off and on to reboot it back into EDL mode before continuing.
The Safety Island (SAIL) is a separate, isolated processor that handles safety-critical functions independently from the main application processor. Its firmware lives on a dedicated spinor flash partition.
Navigate to the sail_nor subfolder inside the image folder:
Download the prebuilt Ubuntu image and boot firmware from the Canonical Ubuntu site.
Always verify the latest build availability on the Canonical Ubuntu website. The links below are pinned to the latest validated release.
Run the following script to download and assemble the flashable image folder. Pass --server or --desktop depending on the image you want:
./prepare_iq9075_ubuntu_flashable.sh --server
./prepare_iq9075_ubuntu_flashable.sh --desktop
This generates the flashable images in iq9075_flash_prep_work/IQ9075_ubuntu_images — referred to as <path-to-image> below. See the Ubuntu tab for the full script.
sudo is needed because some bundled libraries are read-only. If macOS still blocks the tool after this step, allow it under System Settings → Privacy & Security.
Verify QDL is working:
<qdl_dir>/qdl --help
You should see the QDL usage output. If you get an error, check the path.
UFS (Universal Flash Storage) provisioning divides the internal storage into separate logical unit numbers (LUNs). This step is required when switching from Qualcomm Linux to Ubuntu.Run UFS provisioning if any of the following apply:
This is a brand-new board that has never been flashed.
You are upgrading to a new image version.
You are switching distributions (Qualcomm Linux ↔ Ubuntu).
Move the provision files and the QDL binary into the same folder, then run from there:
On macOS, the qdl binary and its supporting libraries must be in the same directory as the provision files. Copy the provision files into <qdl_dir>, then run the command from there.
After UFS provisioning completes, the device disconnects from USB. Toggle the power switch off and on to reboot it back into EDL mode before continuing.
The Safety Island (SAIL) is a separate, isolated processor that handles safety-critical functions independently from the main application processor. Its firmware lives on a dedicated spinor flash partition.
Navigate to the sail_nor subfolder inside the image folder: