

Qualcomm Linux · Edge AI · Deep Dive
The full manual pipeline: every command, every script, every design decision explained, from first photo to a C++ daemon running live on the Qualcomm NPU at 2 ms.
This is the no-shortcuts version. Every command is here. Every script is on the companion files page, copy them from there into the paths shown. Steps 1-6 run on a Mac and the board. Steps 7-9, the NPU part, need the free QAIRT (Qualcomm AI Runtime SDK) and an x86 Linux machine. The four moves, so you always know which machine you’re on:
What you need
Hardware: A computer for training — the guide uses a Mac with Apple Silicon (PyTorch MPS (Metal Performance Shaders) backend), but Linux or Windows with a CUDA GPU (Graphics Processing Unit) works the same way; just replace--device mps with --device cuda in the training commands. IQ-8275 EVK (QCS8300, Hexagon V75 NPU), aarch64 Qualcomm Linux, Python 3.x and onnxruntime preinstalled on the Qualcomm Linux image. A USB webcam for the live demo. An x86-64 Linux machine for the QAIRT SDK (NPU compiler is x86-only).
Software: Python 3 and git on the Mac. The free QAIRT SDK v2.47.0.260601 on the x86 Linux box. To build the live C++ daemon: an aarch64 cross-compiler (aarch64-linux-gnu-g++-13).
Scripts: All scripts referenced below are on the companion files page. Copy each one to the path shown in its header.
Step 1: Build the dataset
The dataset is the foundation of everything. You need photos of the paddle with a bounding box drawn on each one, plus background frames with no paddle. The tool for this is Edge Impulse Studio. Its Data acquisition tab lets you record images from a connected device, draw bounding boxes in the browser, and export in its own format. That’s how the ~670 images in this project were labeled, no external tool required. If you followed the Edge Impulse quickstart first, you already have this dataset — skip to the export step below. Export as Object Detection: in the Studio go to Dashboard → Export → Object Detection format. Choose the format that gives you, per split, a folder of images plus abounding_boxes.labels JSON file. Aim for variety: different distances, lighting, angles, and rooms. Include ~15–20% background frames.
You’ll end up with:
x,y at the top-left corner. That’s the convention training/labels.py expects.
Step 2: Mac environment
Create a working folder and copy the scripts into it:Step 3: Phase A, a CNN from scratch (the instructive baseline)
This builds a small network from nothing and trains it only on your paddle photos. It will underperform. That’s the point. It’s the control group that explains why Phase B works.3.1 Preprocess
.npy arrays. The cache is memory-mapped at training time. Decoding 670 images 40 times per training run costs minutes; reading from a memory-mapped array is nearly free.
3.2 Train
val_IoU column. That’s the honest measure (Intersection over Union: how much the predicted box overlaps the true one, 0 = miss, 1 = perfect). It tops out around 0.56. The best checkpoint goes to training/checkpoints/best.pt.
3.3 Export to ONNX
3.4 Watch it fail
Step 4: Phase B, fine-tune YOLOv8n (the one that works)
4.1 Environment
4.2 Convert labels to YOLO format
4.3 Fine-tune
yolo/runs/paddle/weights/best.pt with mAP@0.5 ≈ 0.979.
4.4 Export to ONNX
nms=False (NMS, Non-Maximum Suppression, lives in numpy not the graph) and dynamic=False (fixed 1x3x320x320, the NPU requires fixed shapes). These two flags are what make Steps 7-9 work cleanly.
Step 5: Live demo in a browser (Mac)
--model npu flag will plug in the NPU engine later without changing the server code.
Step 6: Run on the board’s CPU
onnxruntime installed. This gets you roughly 24 fps on the CPU, your baseline before the NPU.
Step 7: Convert the model for the NPU
This step runs on the x86-64 Linux machine. The NPU compiler is x86-only. Copy these scripts from the companion files page to annpu/ folder on your x86 box:
7.0: Install the QAIRT SDK (once)
Pick a working directory with ~4 GB free. Export it asQW. The env.sh file derives all other paths from it automatically when this variable is set:
virtualenv, since the built-in python3 -m venv is broken on many Ubuntu setups without sudo):
$QW is exported in your shell, you don’t edit anything. The env.sh file derives all paths from it automatically:
env.sh is on the companion files page.
7.1: Copy model and calibration data to the x86 box
Generate calibration data on the Mac first:7.2: ONNX to floating-point DLC
7.3: Quantize to A16W8
This is the subtle part. Quantizing everything to INT8 (8-bit Integer) collapses the confidence scores to zero. Bounding-box coordinates are large numbers (like 400 pixels), confidence scores are tiny (0.87), and the same 8-bit scale can’t represent both. The fix is A16W8: keep weights at 8-bit (compact) but let activations use 16-bit precision to protect the score. See Part 6 of the story for the full explanation.best_a16w8_htpv75.bin is the context binary, compiled ahead of time for the HTP (Hexagon Tensor Processor) V75. Copy it to the board:
Step 8: Run on the NPU
8.1: One-shot test
The board already has the QNN runtime in/usr/lib. You don’t need to copy any .so files from the SDK. Copy only the context binary (done above) and run_npu16.sh from the companion files page.
run_npu16.sh expects a test input at /home/weston/npu/emeet2_input.raw — a raw float32 NCHW tensor (shape 1×3×320×320). Generate it from any JPEG on the Mac using the same letterbox preprocessing that the model was trained with:
8.2: Live stream via the resident C++ daemon
For real-time use you want the model resident: loaded once, processing frames forever. The daemon holds the QNN context in memory, reads frames from a FIFO pipe, runs inference, and streams MJPEG over HTTP. Building it requires an aarch64 cross-compiler on the x86 box. SetR in npu/env.sh to the cross-compiler root (the dir that contains usr/bin/aarch64-linux-gnu-g++-13).
The daemon is a small overlay on top of the QNN SDK SampleApp. Create the three overlay files from the SDK, then apply the diffs from the companion files page — Daemon C++ source section:
server.py --model npu launches the daemon as a subprocess automatically and communicates with it via two FIFOs: /tmp/npu_cmd.fifo (commands) and /tmp/npu_resp.fifo (responses). No separate daemon startup step needed.
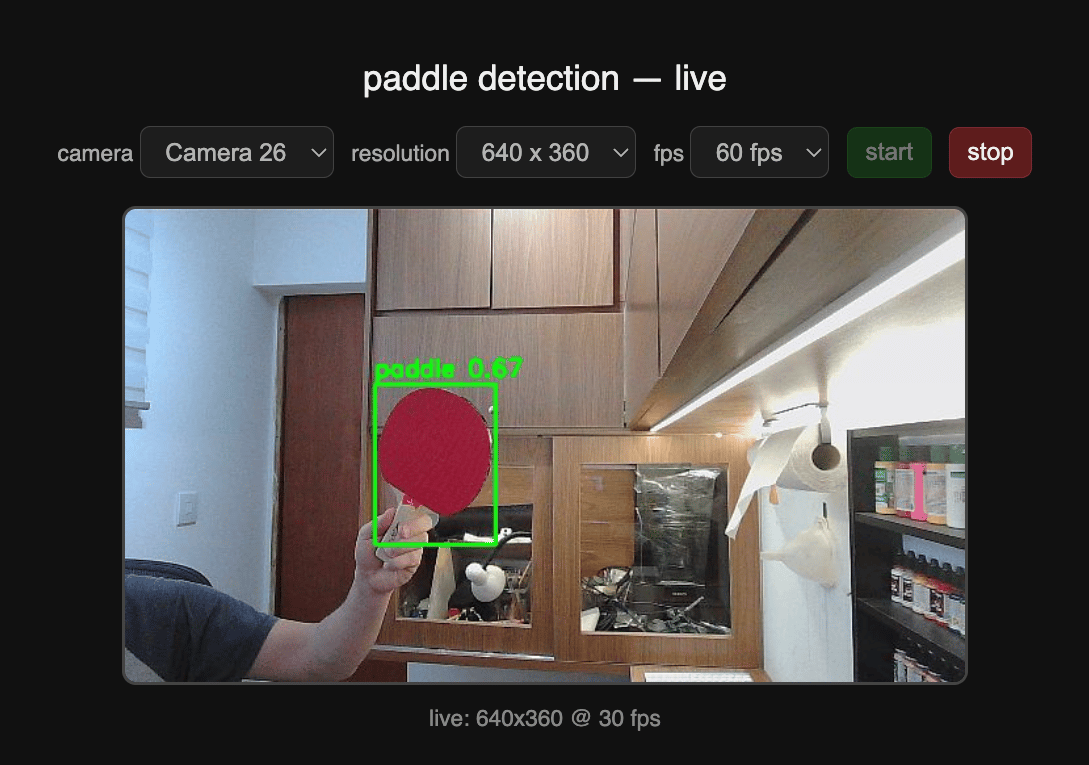
Step 9: Benchmark CPU vs NPU honestly
The raw NPU math is 84x faster. The end-to-end win is 1.7x. Before the in-memory path was implemented, the NPU version was slower than CPU end-to-end. 307,200 float-to-int16 conversions happening one number at a time cost 30 ms. Fixing that (convert the whole frame with a vectorized call) is what produced the real-world win.
A benchmark that only measures the chip math is not a real benchmark.
Source files
All the scripts referenced above are on the companion files page with copy buttons.The daemon C++ source files (
npu/daemon/main.cpp, QnnSampleApp.cpp, QnnSampleApp.hpp) are not embedded on the companion page because they partially derive from the Qualcomm QNN SDK SampleApp. The exact modifications are documented as diffs in the companion files page — Daemon C++ source section. Apply them to a clean SDK SampleApp checkout using build_daemon.sh.