

Log in issues
To access the Qualcomm Software Center (web portal and desktop application), you need a Qualcomm ID. Sign up at https://myaccount.qualcomm.com/signup. If you have log in issues using correct Qualcomm ID credentials with the Qualcomm Software Center desktop application, see firewall requirements to ensure that connectivity functions as expected between your network and Qualcomm servers.Firewall requirements
The QSC server requires access to the following URLs:- https://apigwx-aws.qualcomm.com (port 443)
- https://d1fmewm8udj8en.cloudfront.net (port 443)
- https://dvbe2v39djgxg.cloudfront.net/ (port 443)
- https://d1k9x1hli7v4r5.cloudfront.net/ (port 443)
- (Optional, recommended for users based in China) https://qpm.chinacloudfront.qualcomm.com (port 443)
- Verify that the client can resolve the API endpoint via DNS. .. container:: nohighlight
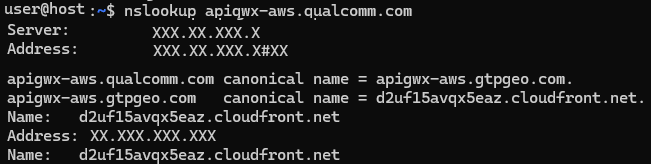
nslookup apigwx-aws.qualcomm.comSample output
- Check the connection. .. container:: nohighlight
curl -v https://apigwx-aws.qualcomm.comSample output .. container:: nohighlight
Rebuilt URL to: https://apigwx-aws.qualcomm.com/
timeout on name lookup is not supported
Trying x.x.x.x…
TCP_NODELAY set
Connected to apigwx-aws.qualcomm.com (x.x.x.x) port
443 (#0)
schannel: SSL/TLS connection with
apigwx-aws.qualcomm.com port 443 (step 1/3)
schannel: checking server certificate revocation
…
schannel: SSL/TLS handshake complete
schannel: SSL/TLS connection with
apigwx-aws.qualcomm.com port 443 (step 3/3)
schannel: stored credential handle in session cache
GET / HTTP/1.1
Connection #0 to host apigwx-aws.qualcomm.com left intact
Troubleshoot Linux clients
Test these steps in the following order. If a step is completed successfully, proceed to the next test.-
Verify that the client can resolve the API endpoint via DNS.
-
In a Linux terminal, type
nslookupand click Enter. -
Type the API endpoint
apigwx-aws.qualcomm.comand click Enter. The expected response is a list or IPs similar to the following image. .. figure:: ../images/nslookup_linux.png :alt: nslookup :scale: 60
apigwx-aws.qualcomm.comfrom your client or issues with your client DNS. -
In a Linux terminal, type
-
Verify that the client can reach the API endpoint via Ping.
-
In a Linux terminal type
ping apigwx-aws.qualcomm.com. -
Type Ctrl + C to stop the ping test after five to ten seconds.
The following image shows the response with zero packet loss.

apigwx-aws.qualcomm.comvia Ping. -
In a Linux terminal type
-
Verify that the client can reach the API endpoint via Telnet.
-
In a Linux terminal, type
telnet apigwx-aws.qualcomm.com 443. The expected display is aConnected to *****.cloudfront.netmessage. - Type Ctrl + C to close the connection.
connection failedortimed outmessages, contact your network team to troubleshootapigwx-aws.qualcomm.comvia Telnet from your client. -
In a Linux terminal, type
Troubleshoot Windows clients
Test these steps in order. If a step is completed successfully, move to the next test.-
Verify that the client can resolve the API endpoint via DNS
- Open a windows command prompt.
-
Type
nslookupand click Enter. - Type the API endpoint \ apigwx-aws.qualcomm.com\ and click Enter. The expected response is a list or IPs similar to the following image.
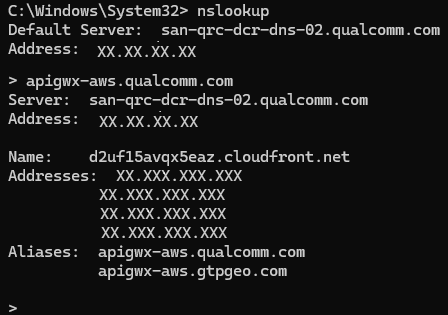
apigwx-aws.qualcomm.com not
resolvable from your client or any issue with your client DNS.
-
Verify that the client can reach the API endpoint via Ping
- Open a Windows command prompt.
-
Type
ping apigwx-aws.qualcomm.com. The expected response is a display with zero packets lost as shown in the following image. .. figure:: ../images/ping_windows.png :alt: nslookup response :scale: 70
apigwx-aws.qualcomm.comvia Ping. -
Verify that the client can reach the API endpoint via Tracert
- Open a windows command prompt.
-
Type
tracert apigwx-aws.qualcomm.com. The expected response is an initialTracing route to XXXXXX.cloudfront.net [IP address]message. The trace route shows the internet route taken to reach the endpoint from Step 2 . The following is an example of the expected response.
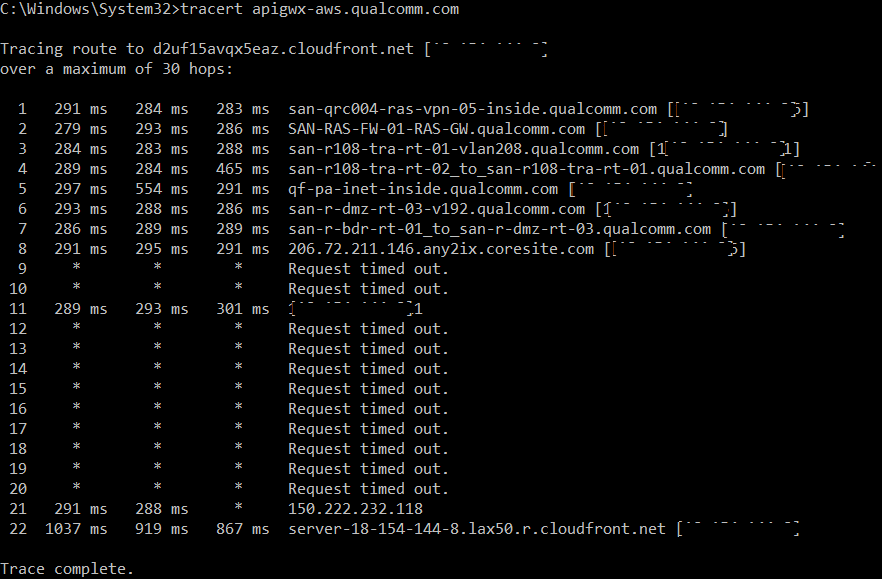
apigwx-aws.qualcomm.com endpoint. Contact your IT group with
an example of the client cannot route to the apigwx-aws.qualcomm.com Qualcomm endpoint message.
QSC Launcher on Windows (WSL) disk space not reclaimed after file deletion
After deleting files inside WSL, sometimes the virtual disk (ext4.vhdx) doesn’t shrink, and Windows still shows high disk usage. This is because WSL uses a virtual disk file to store the Linux filesystem. When files are deleted inside WSL, space is freed internally, but the VHDX file size remains the same because Windows doesn’t automatically compact it. To fix this, manually compact the VHDX file.
- Shut down WSL with the following command. .. container:: nohighlight
wsl —shutdown
-
Locate the VHDX file.
The default location is
%USERPROFILE%\AppData\Local\Packages\<Distro>\LocalState\ext4.vhdx. -
Compact the disk with Hyper V tools or diskpart.
.. list-table::
- Hyper V tools
- Use PowerShell with the Hyper V feature enabled: .. container:: nohighlight
Optimize-VHD -Path “C:\Path\To\ext4.vhdx” -Mode Full
- diskpart
- Use PowerShell: .. container:: nohighlight
DiskPart
Select vdisk file=“C:\Path\To\ext4.vhdx”
compact vdisk
exit
- Verify the file size before and after running these steps with the following command. .. container:: nohighlight
Get-Item “C:\Path\To\ext4.vhdx” | Select-Object LengthTo prevent this issue from occurring:
- Regularly run Optimize-VHD after large deletions.
- Avoid storing large temporary files inside WSL.
- Use mounted Windows directories for transient data.
Contact support
For technical issues, visit the Support site. For assistance or clarification on information in this document, open a technical support case at https://support.qualcomm.com/. You will need to register for a Qualcomm ID account and your company must have support enabled to access the case system. To file a support case to report an issue, include the following information:- Host operating system details
- Version of the Qualcomm Software Center desktop application
- Details of the issue with exact steps to reproduce
- Relevant UI screenshot(s)
- Logs To collect logs on the Qualcomm Software Center desktop application, go to the Help menu > Download Logs > Select the date range > Download.
Logs can be collected manually from the locations listed below.
/var/tmp/qcom/softwarecenter/logs/var/tmp/qcom/qik/logs
C:\ProgramData\Qualcomm\SoftwareCenter\Logs%temp%\QIK\Logs%temp%\Qualcomm\QIK\Logs