

Overview
The AI Models section lets you browse the Qualcomm AI Hub model catalog, download models to your host, flash them to your active device, and profile them — all without leaving VS Code. The AI Models section has two tabs:- MY MODELS — models you have already downloaded to the host
- EXPLORE MODELS — the full Qualcomm AI Hub model catalog
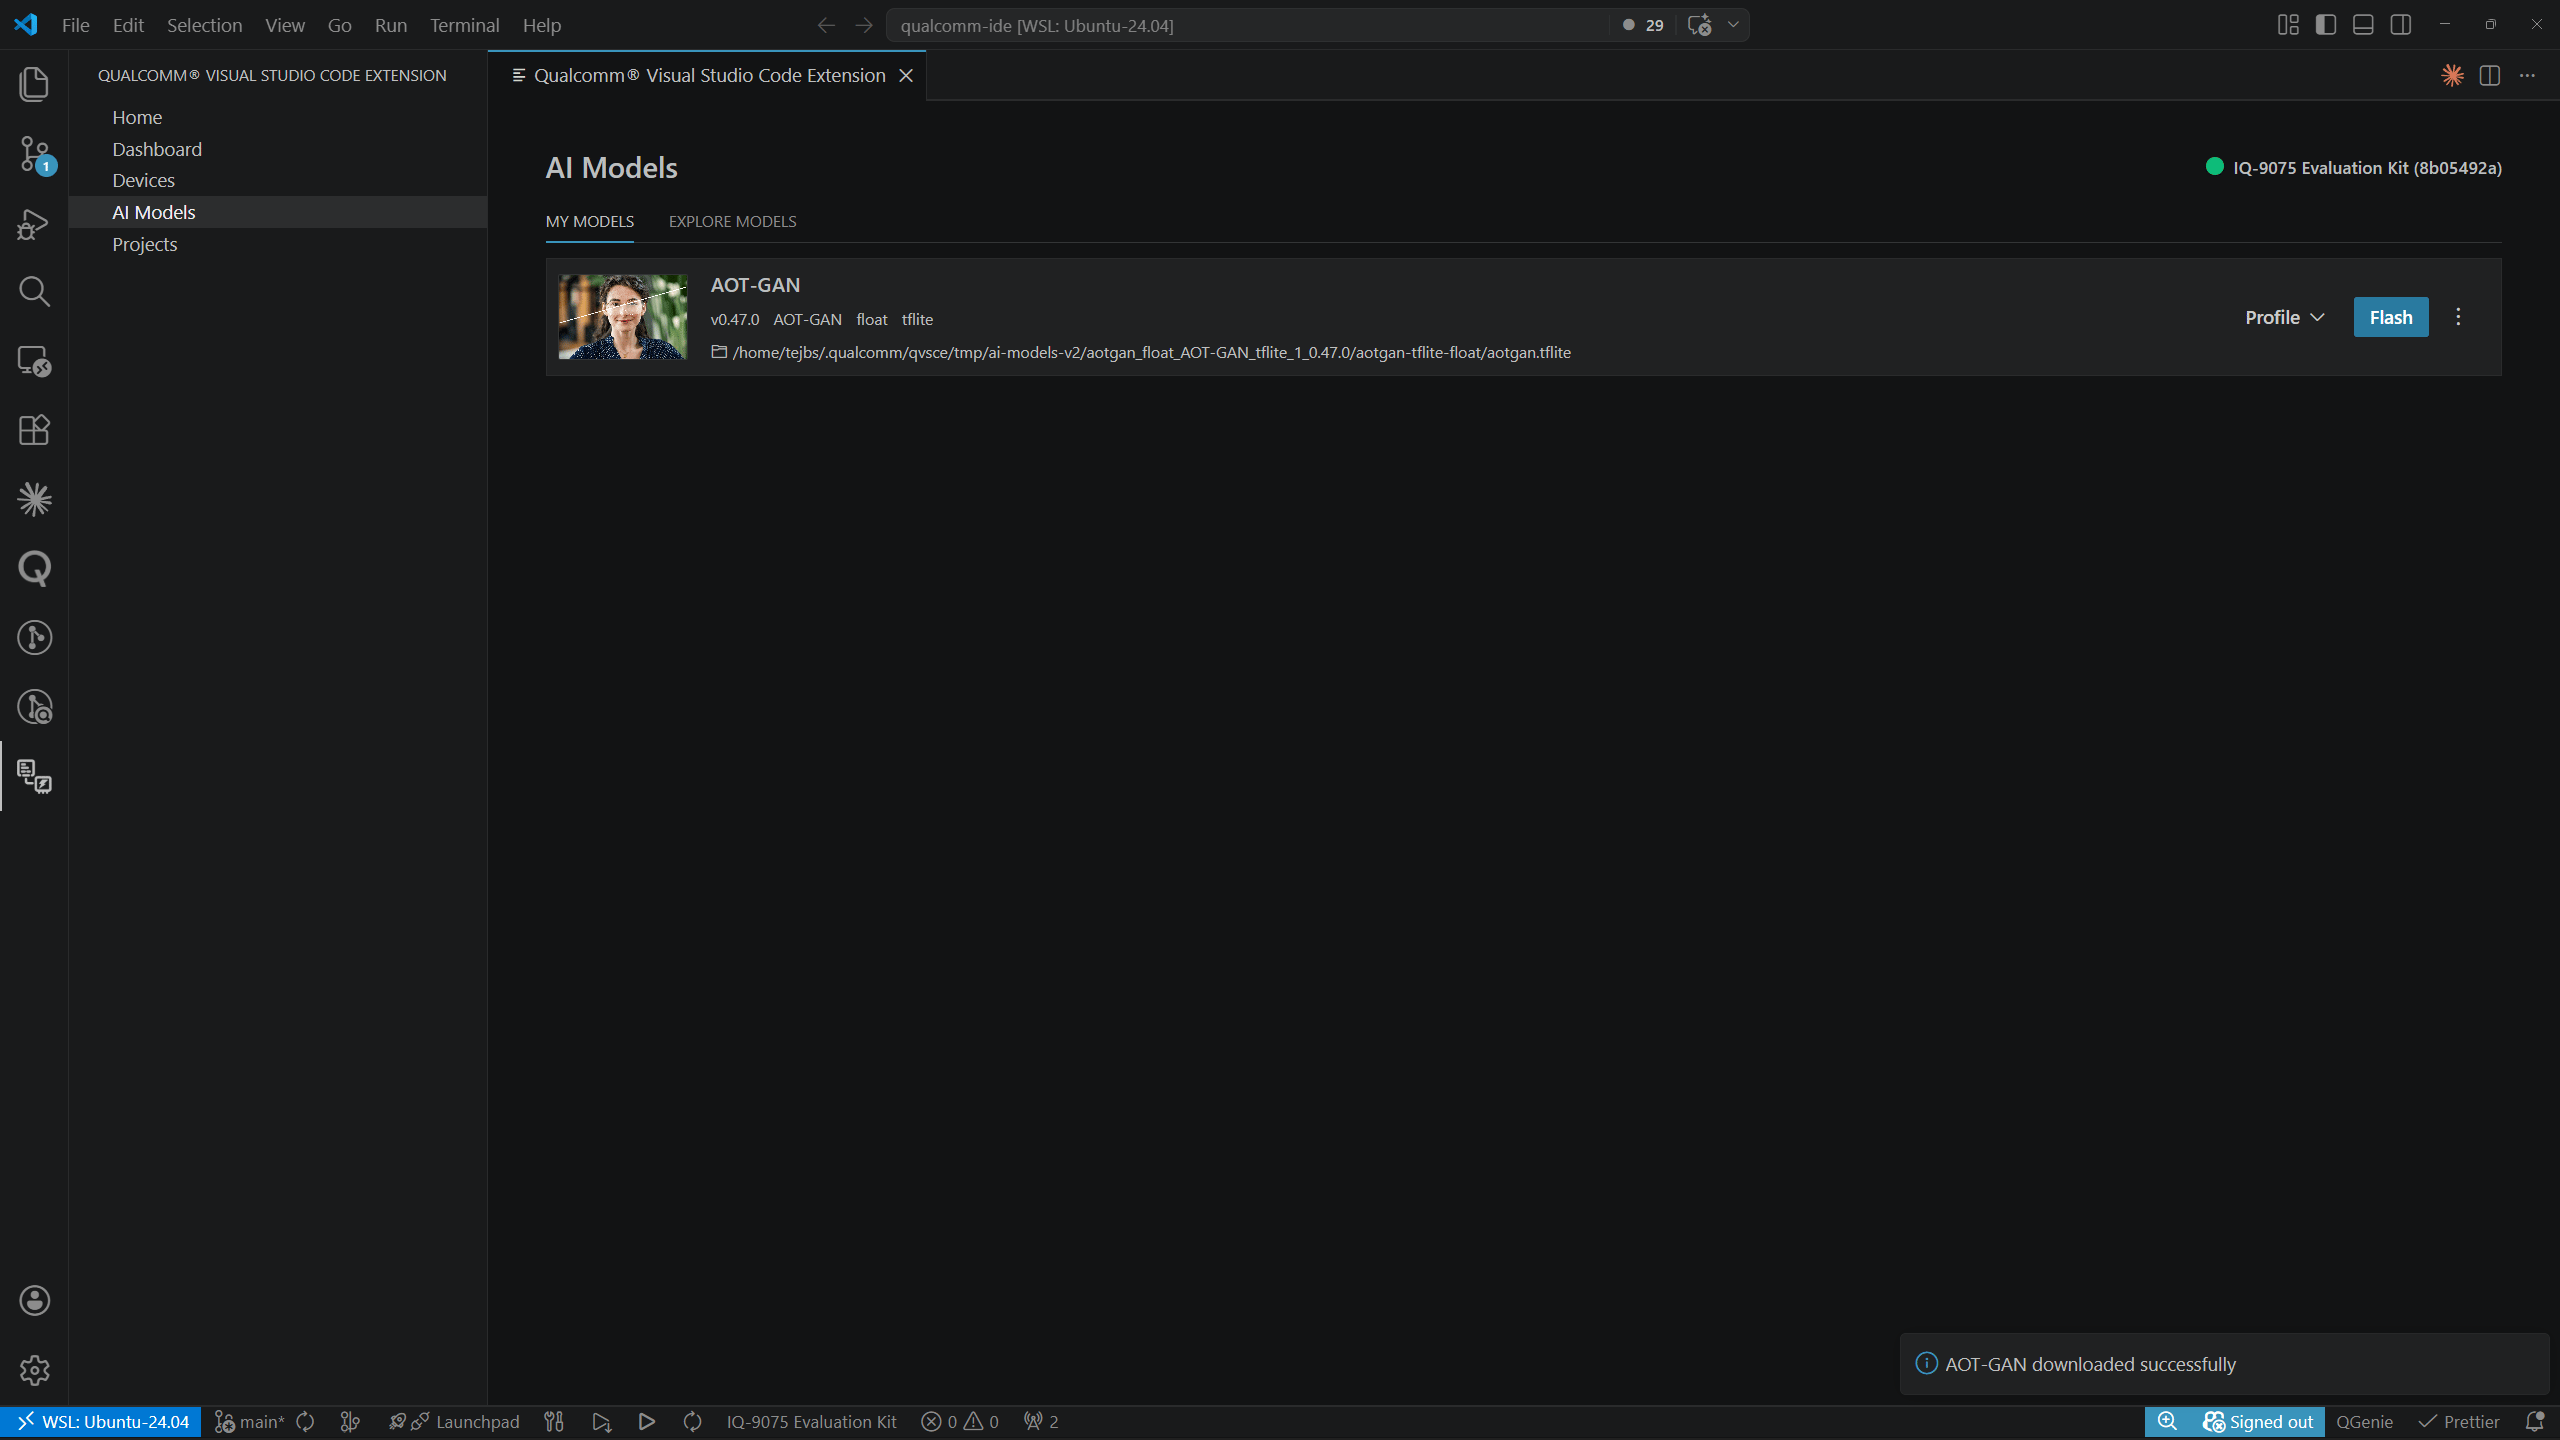
My Models
When no models have been downloaded yet, MY MODELS shows an empty state with an Explore Models button:
Explore Models
The EXPLORE MODELS tab displays the AI Hub model catalog as a card grid grouped by category (e.g., Computer Vision, Generative AI, Multimodal). Each category heading shows the total number of available models and a View All link.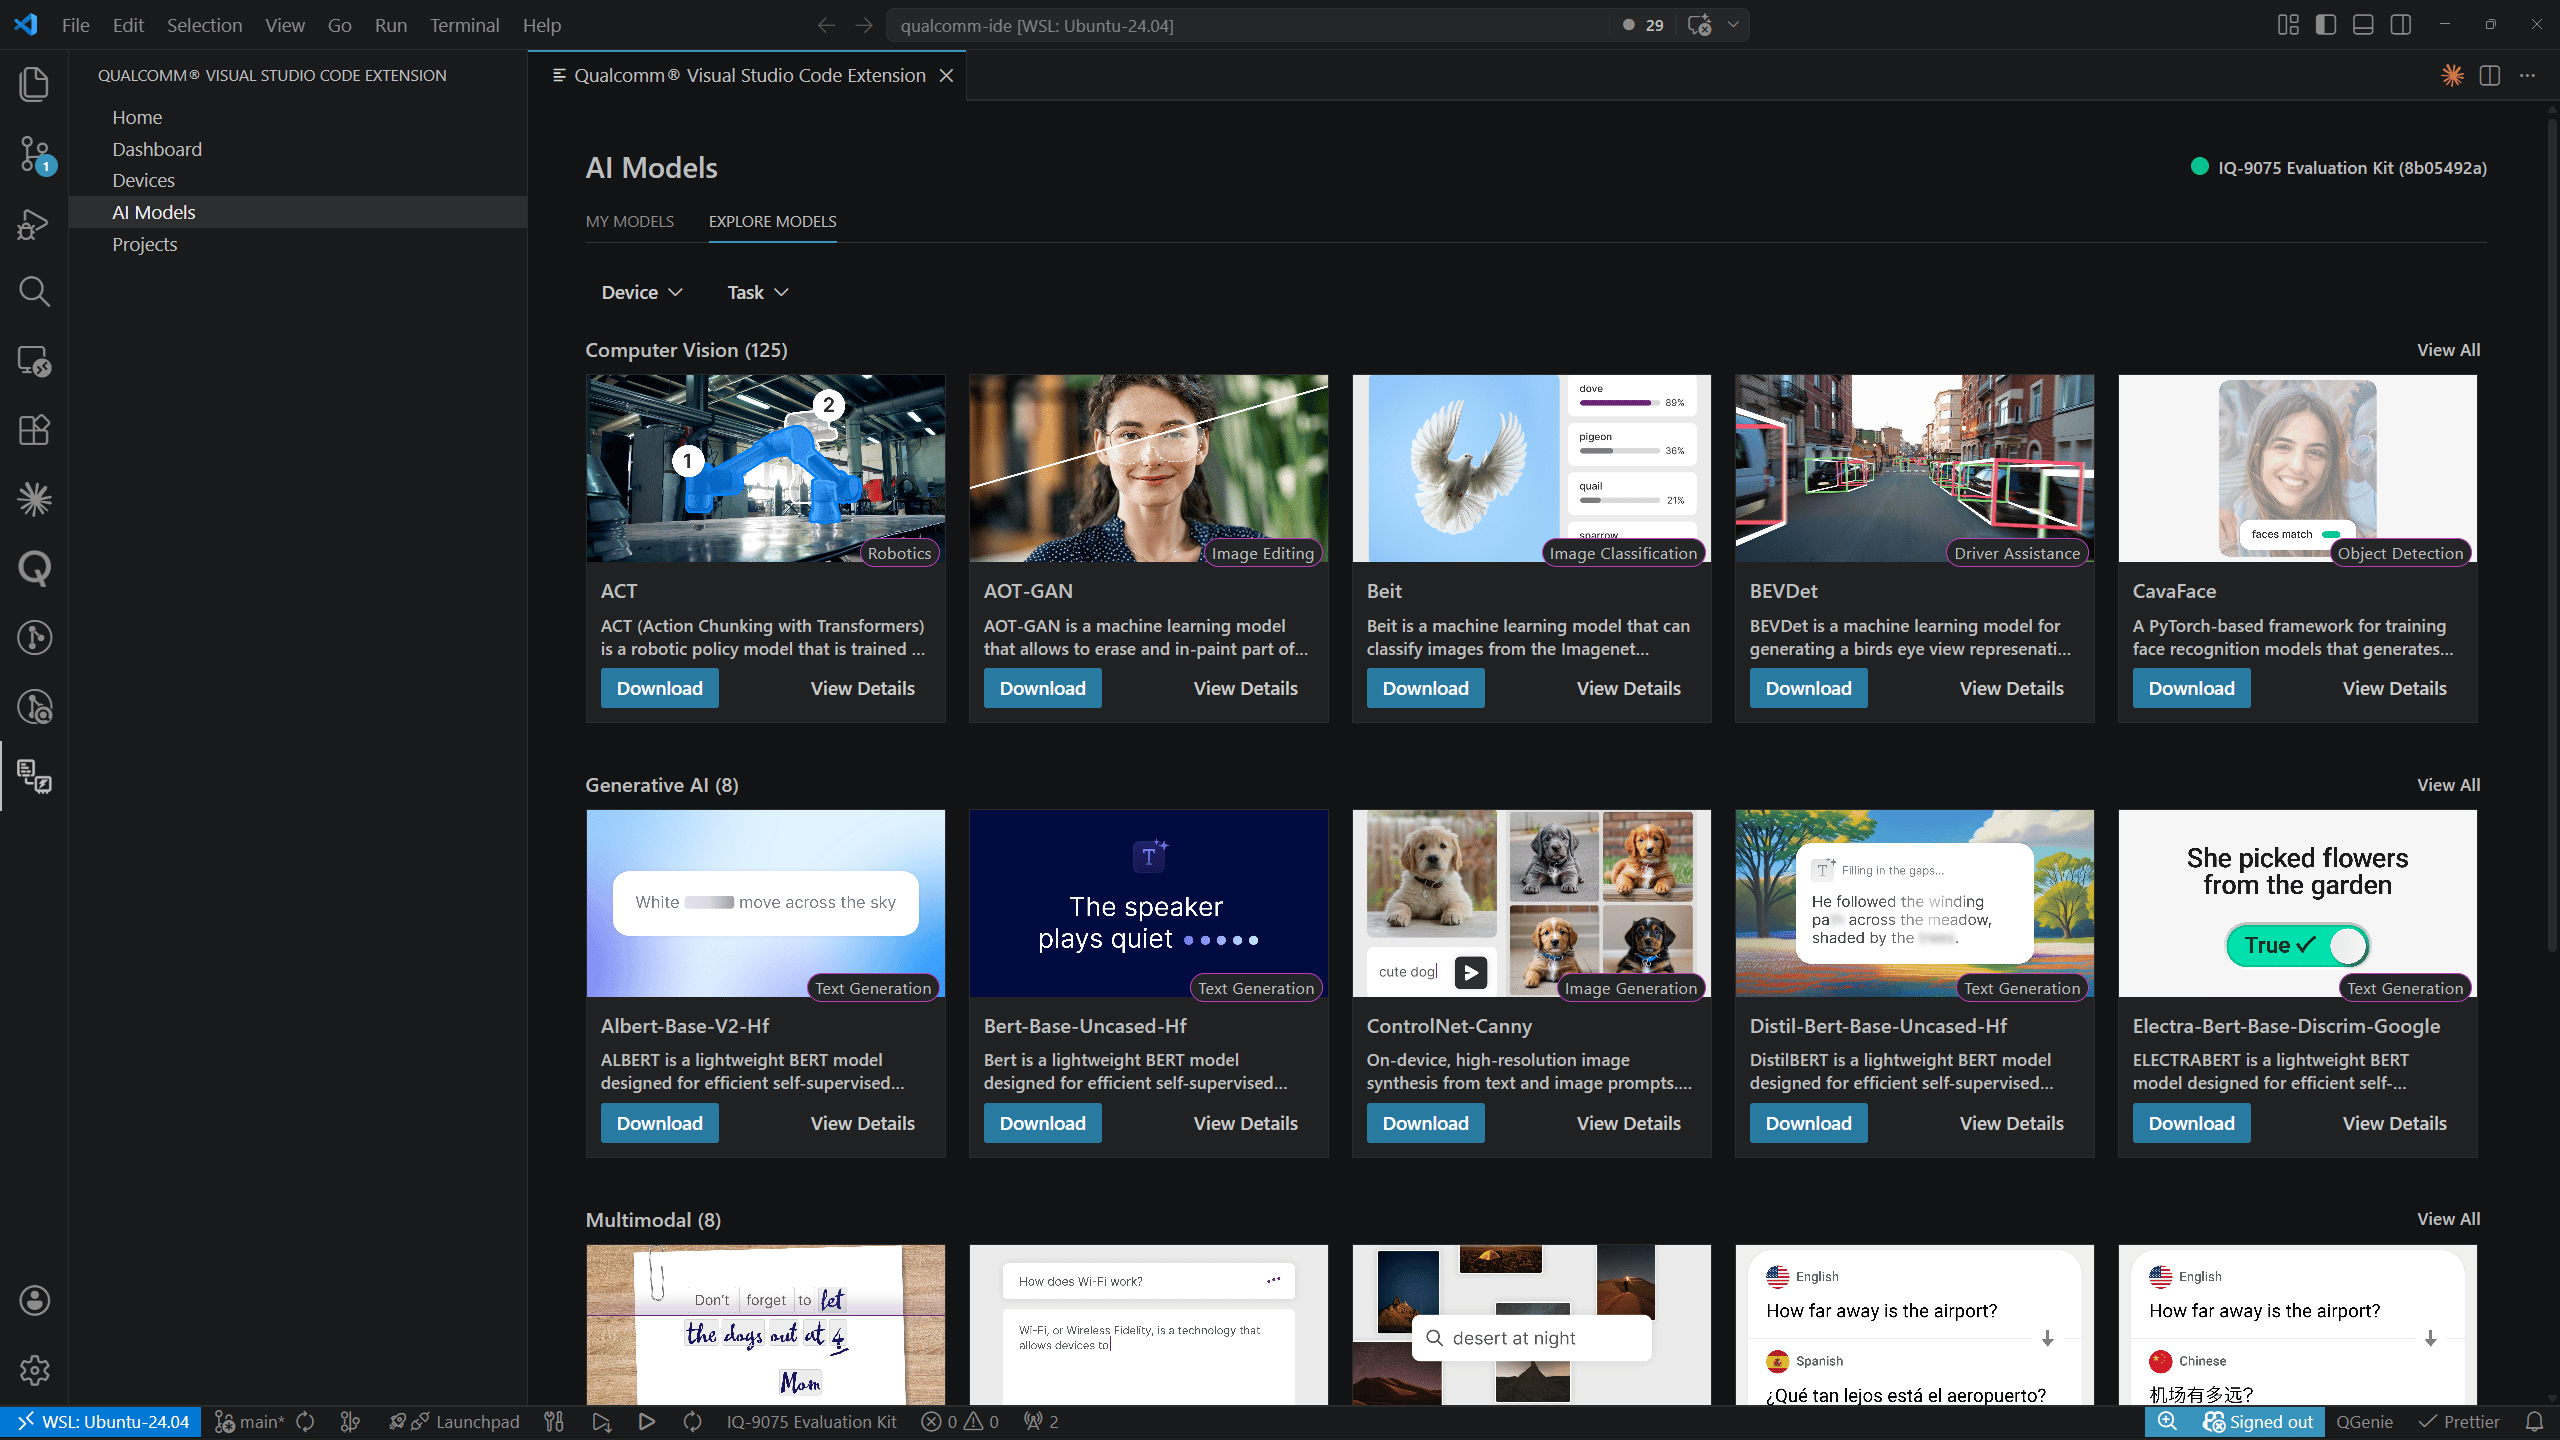
- A preview image with a task badge (e.g., Image Classification, Text Generation)
- Model name and short description
- Download and View Details action buttons
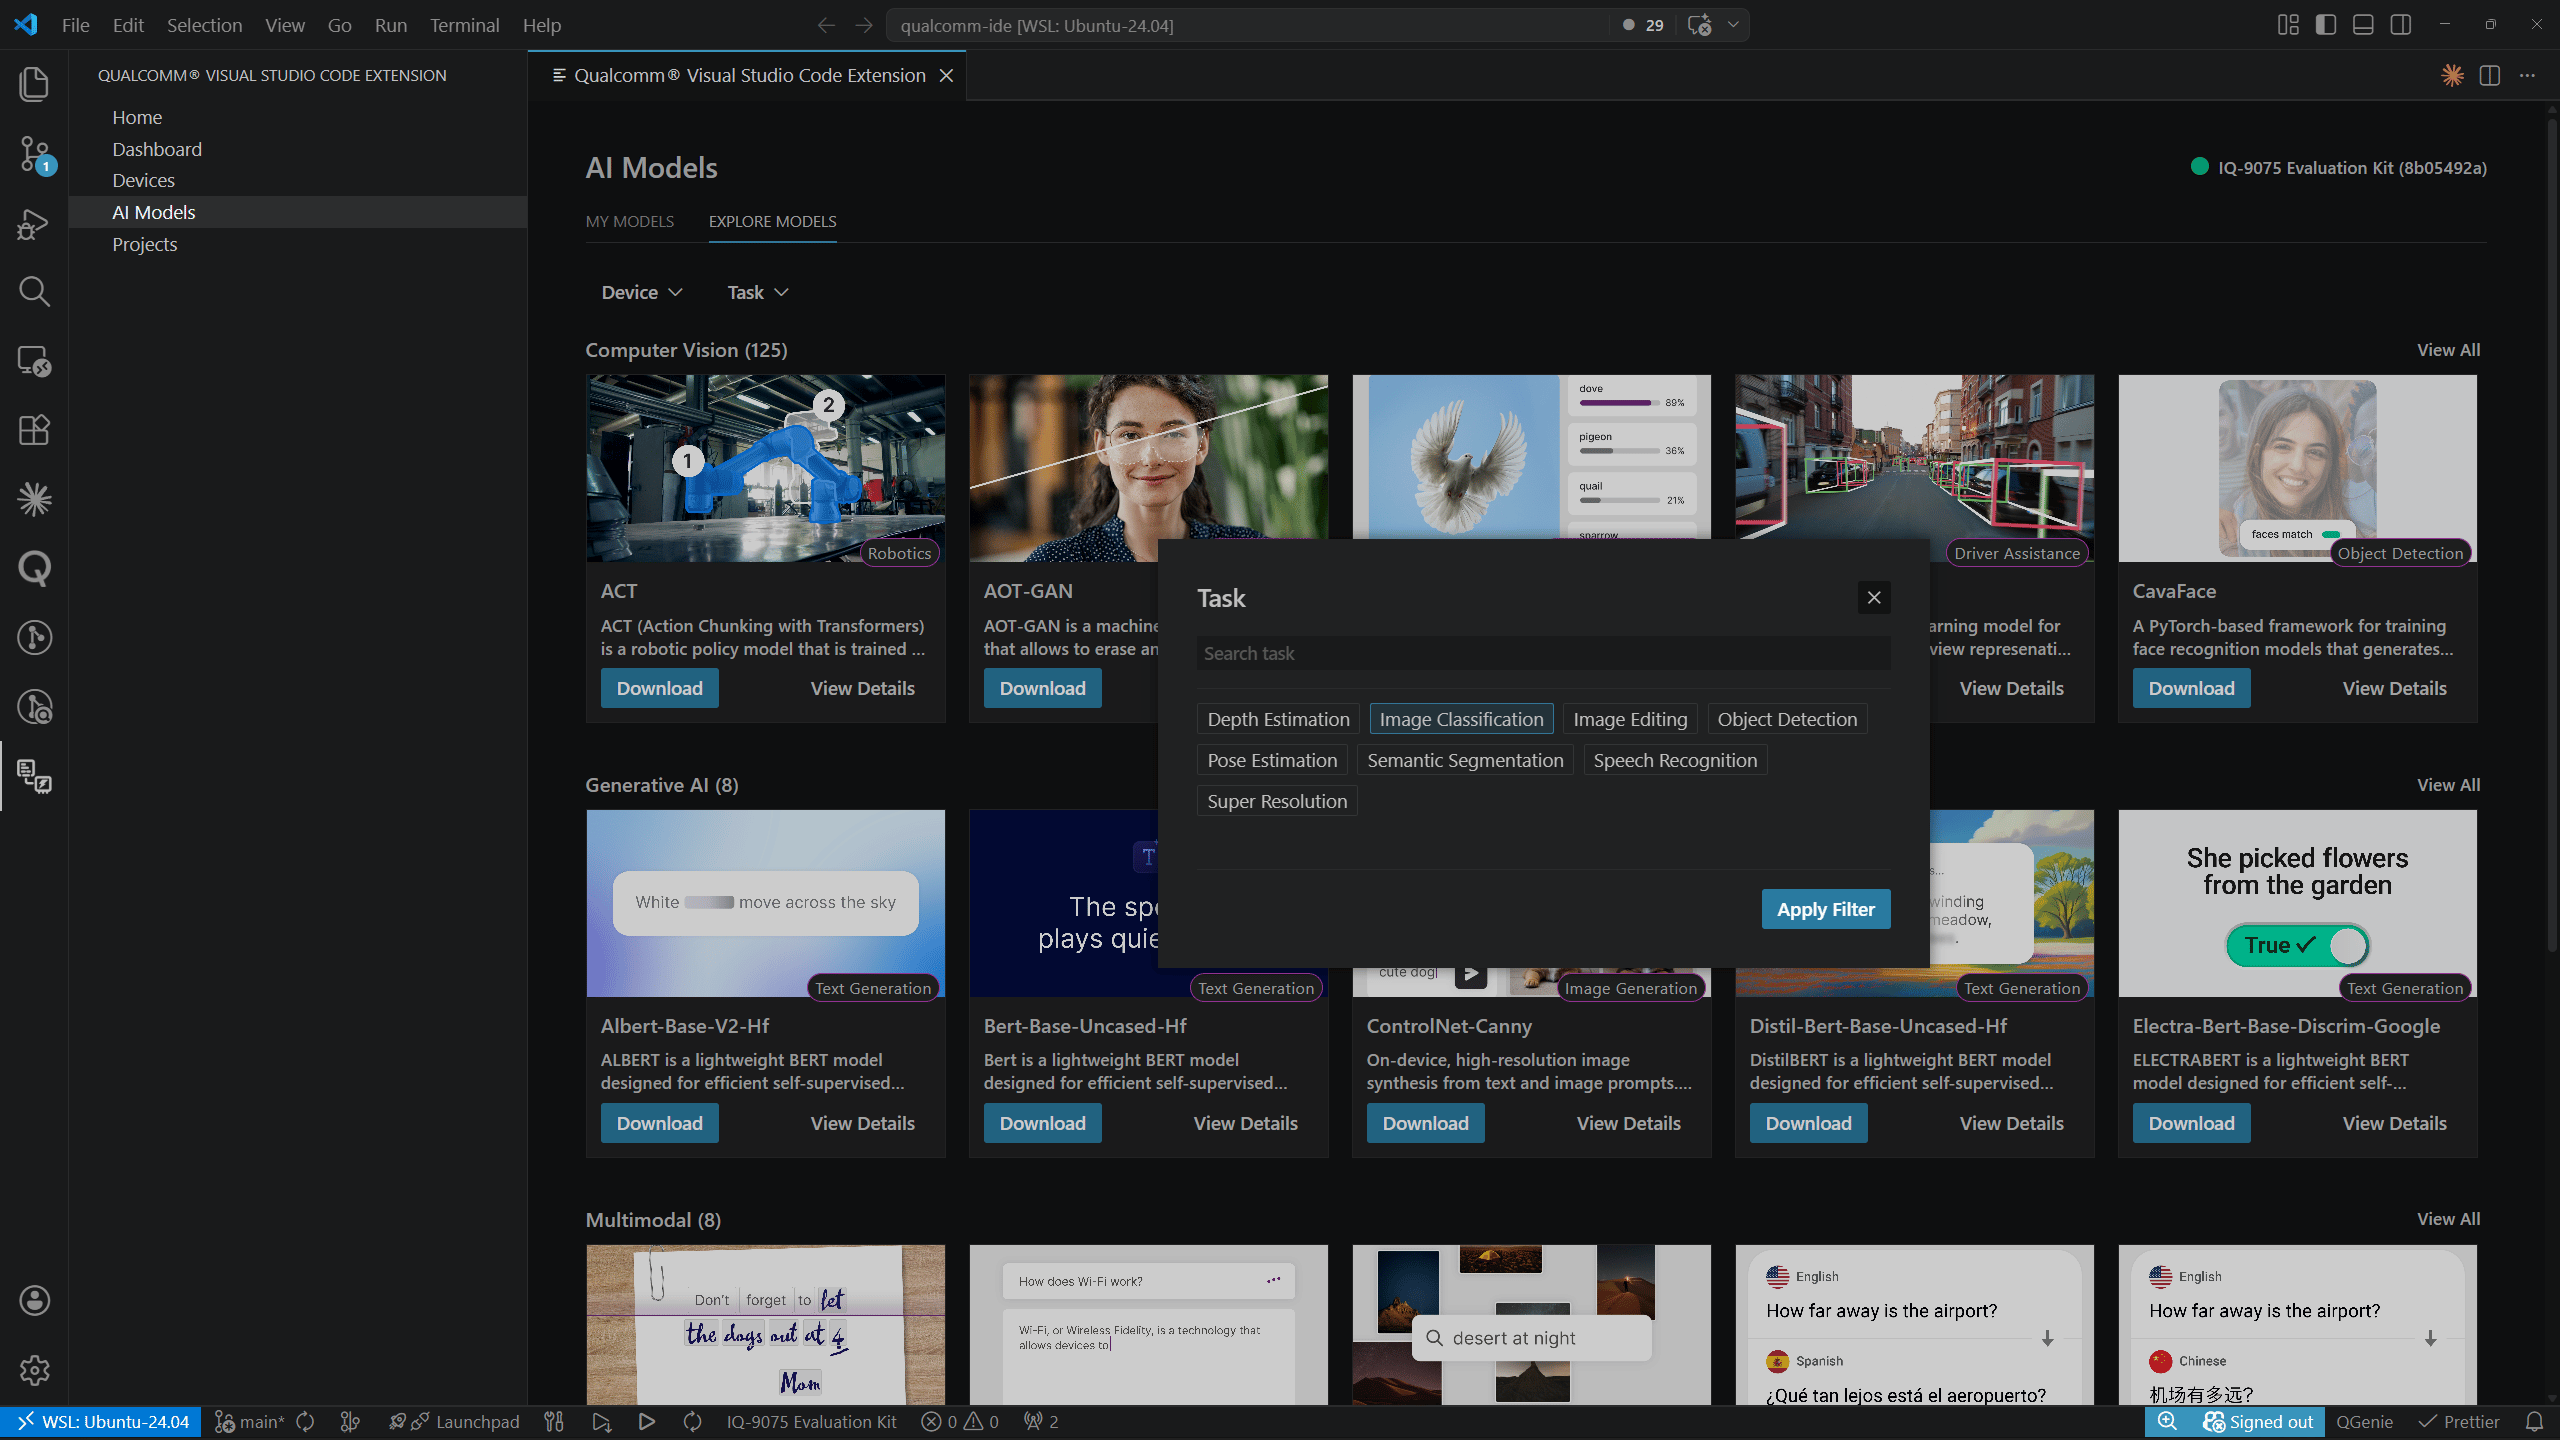
Filtering the Catalog
Use the Device and Task filter dropdowns above the grid to narrow results. Clicking Device opens a modal with a search field and device chip selectors (e.g., RB3 Gen2 Vision Kit, IQ-9075 Evaluation Kit, IQ-8275 Evaluation Kit Pro). Select one or more devices, then click Apply Filter.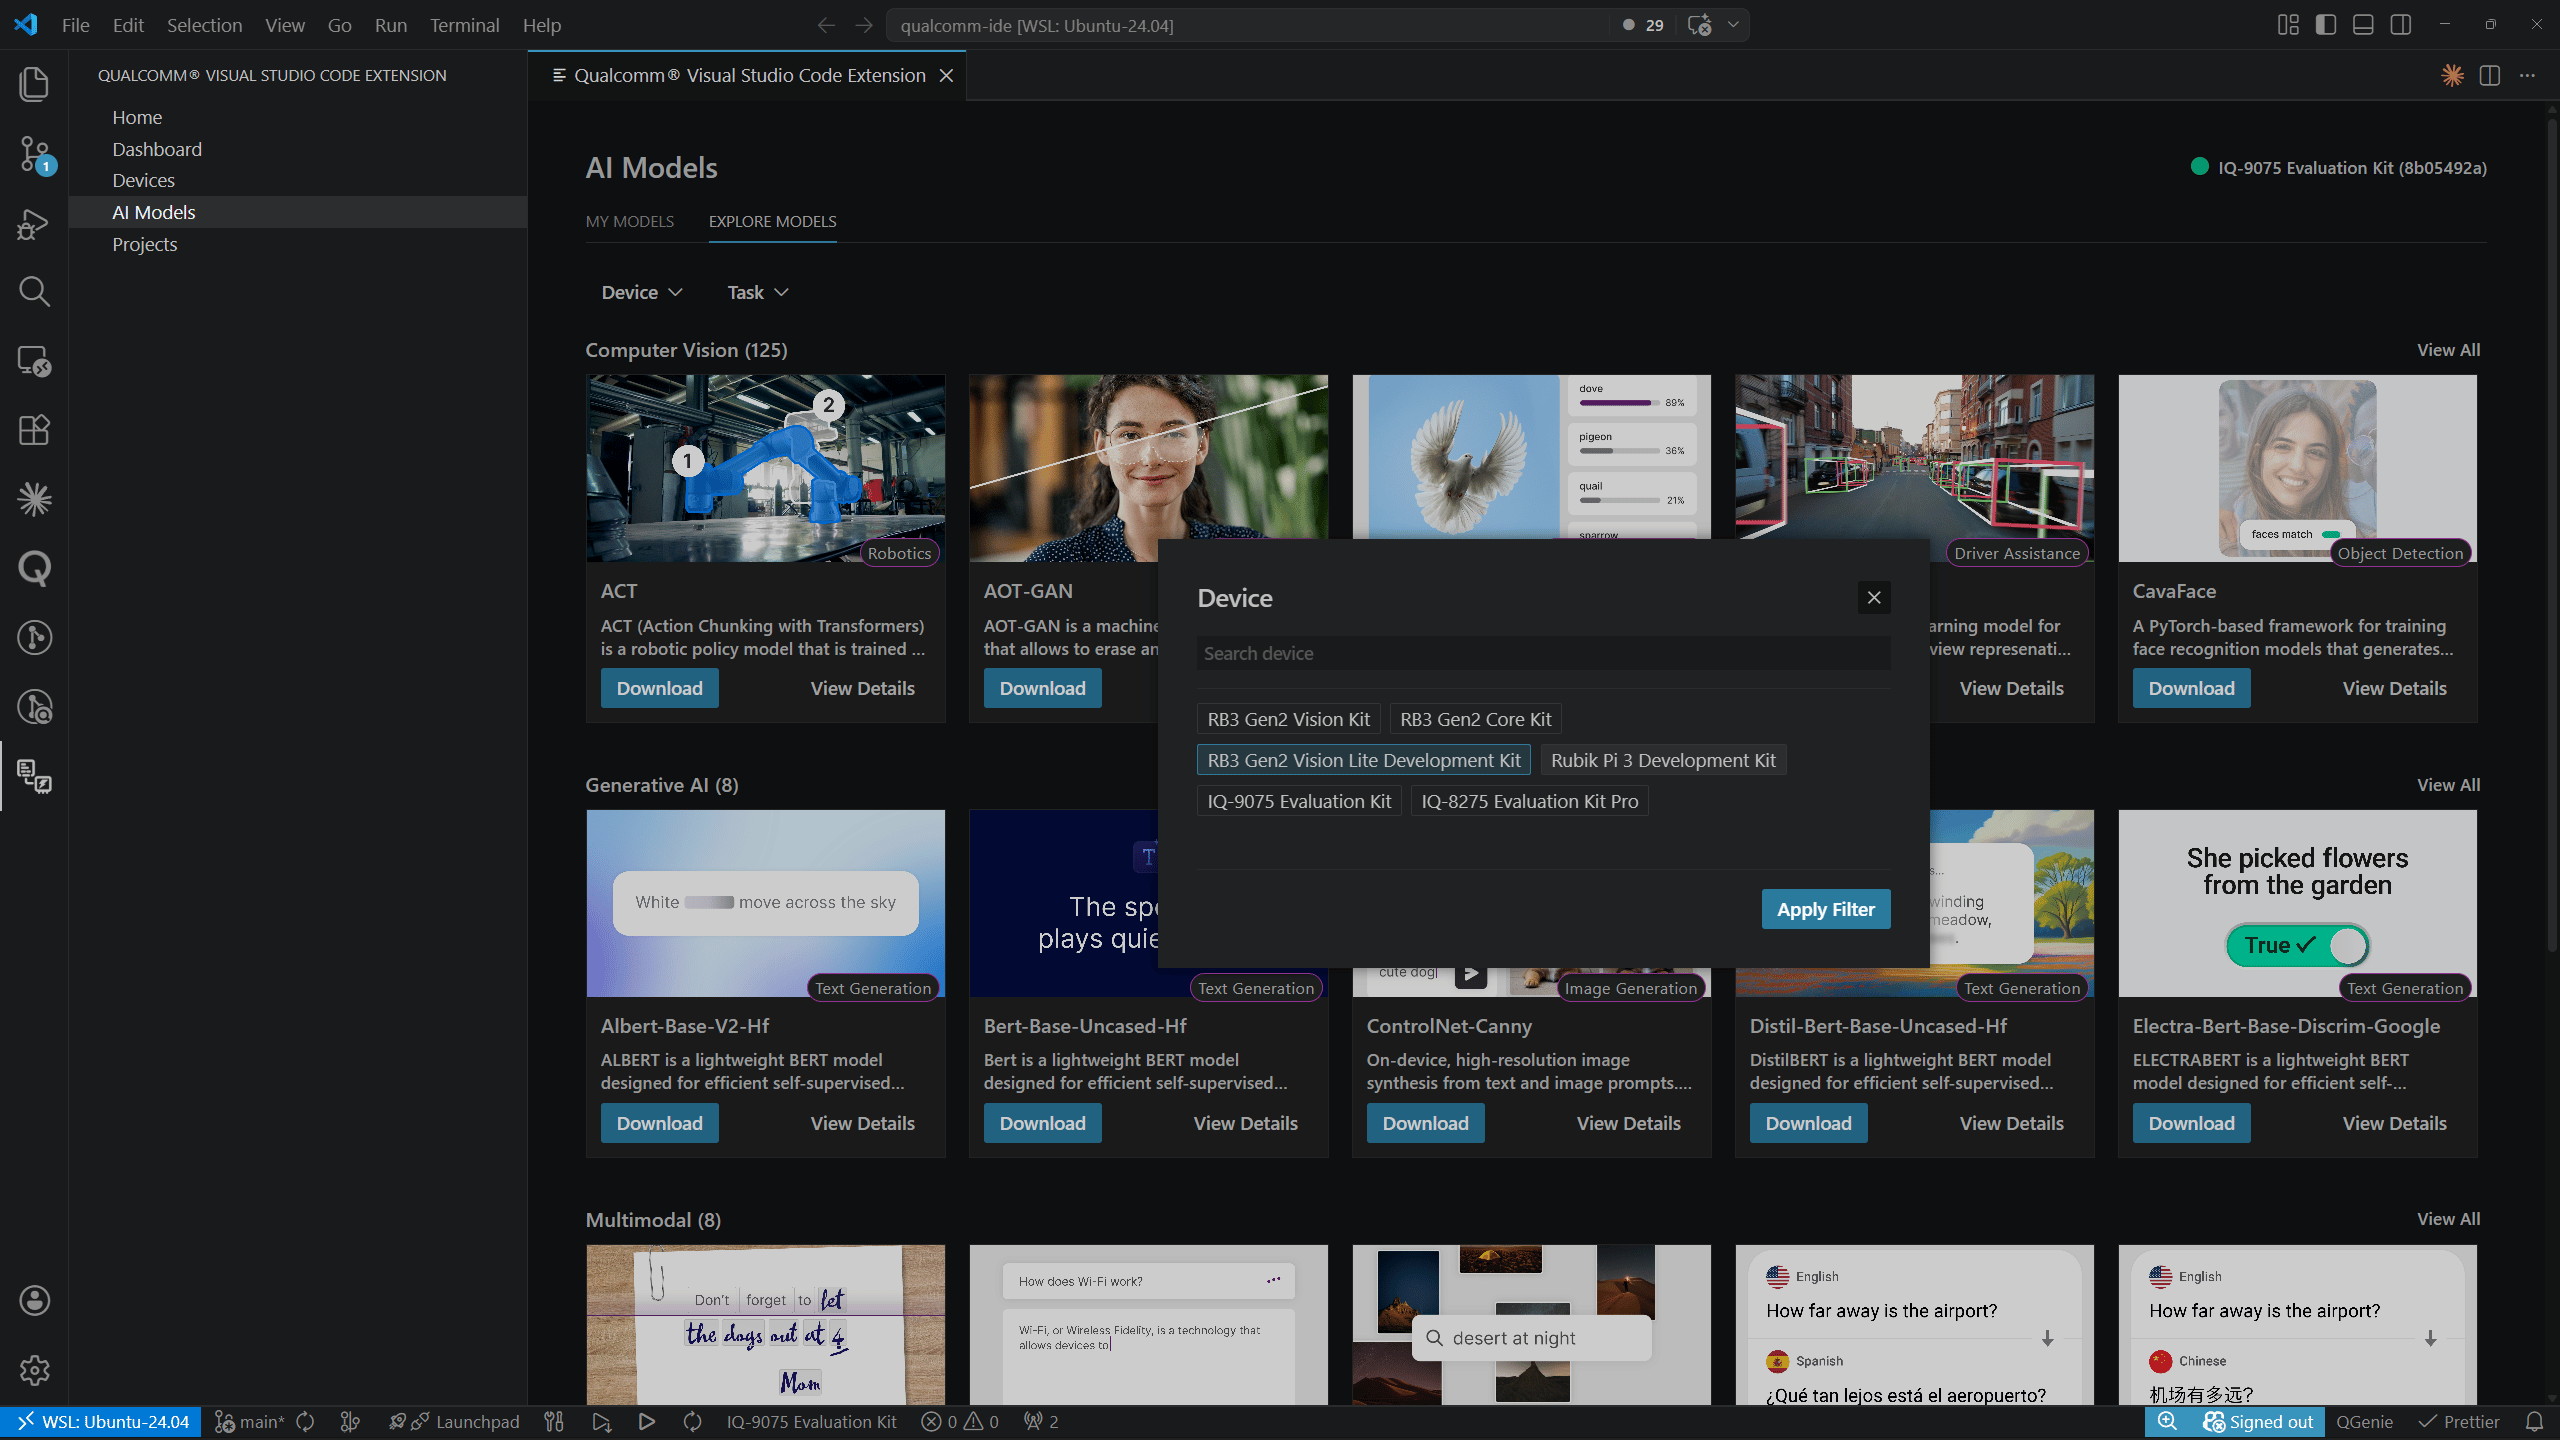
Model Detail Page
Click View Details on any catalog card to open the model detail page. You can also reach this page from MY MODELS by clicking the model name. The breadcrumb shows the navigation path:- From Explore Models:
Explore Models > <Category> > <Model Name> - From My Models:
My Models > <Model Name>
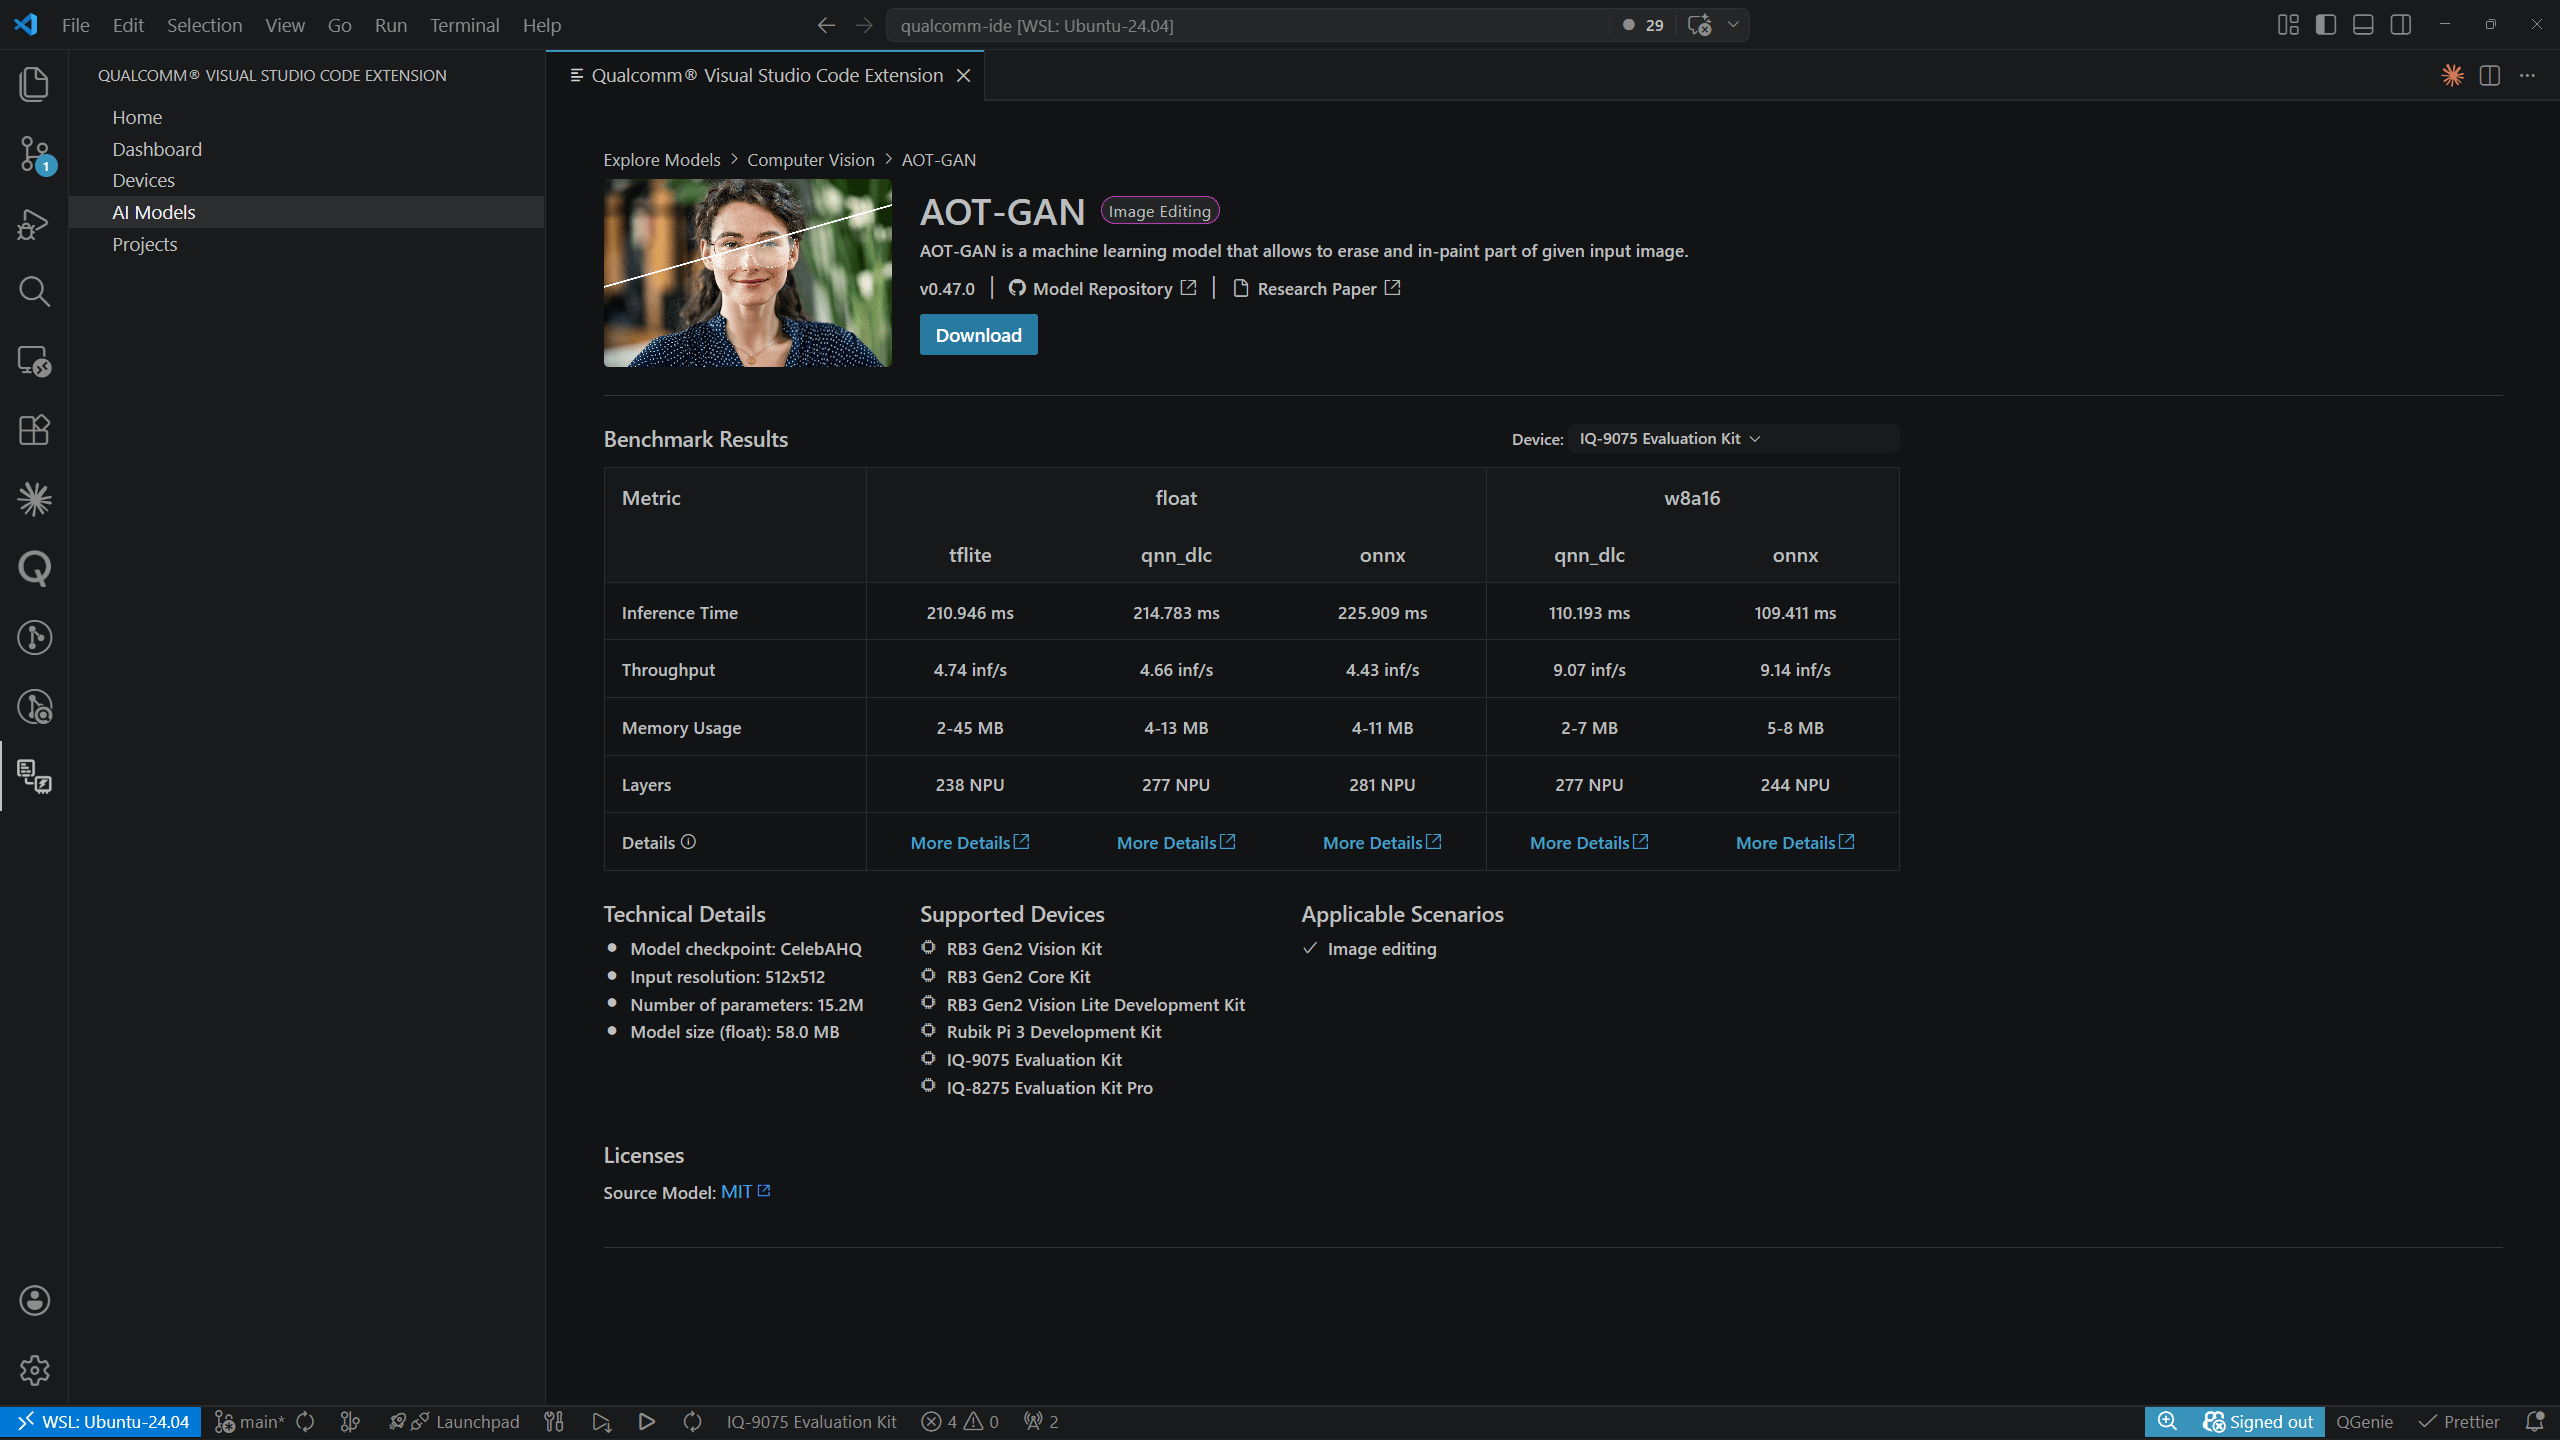
- Model name, task badge, and description
- Version, Model Repository link, and Research Paper link
- Download button
- Results table with a Device selector
- Technical Details — model checkpoint, input resolution, parameter count, model size
- Supported Devices — list of compatible dev kits
- Applicable Scenarios — suggested use cases
- Licenses — source model license
Downloading a Model
Starting a Download
Click Download on a catalog card or on the model detail page. In the Download Model dialog, select the desired Precision, Float, and Runtime values, then click Start Download.
Download Progress
While downloading, the model appears in MY MODELS with a Downloading… label and a progress bar: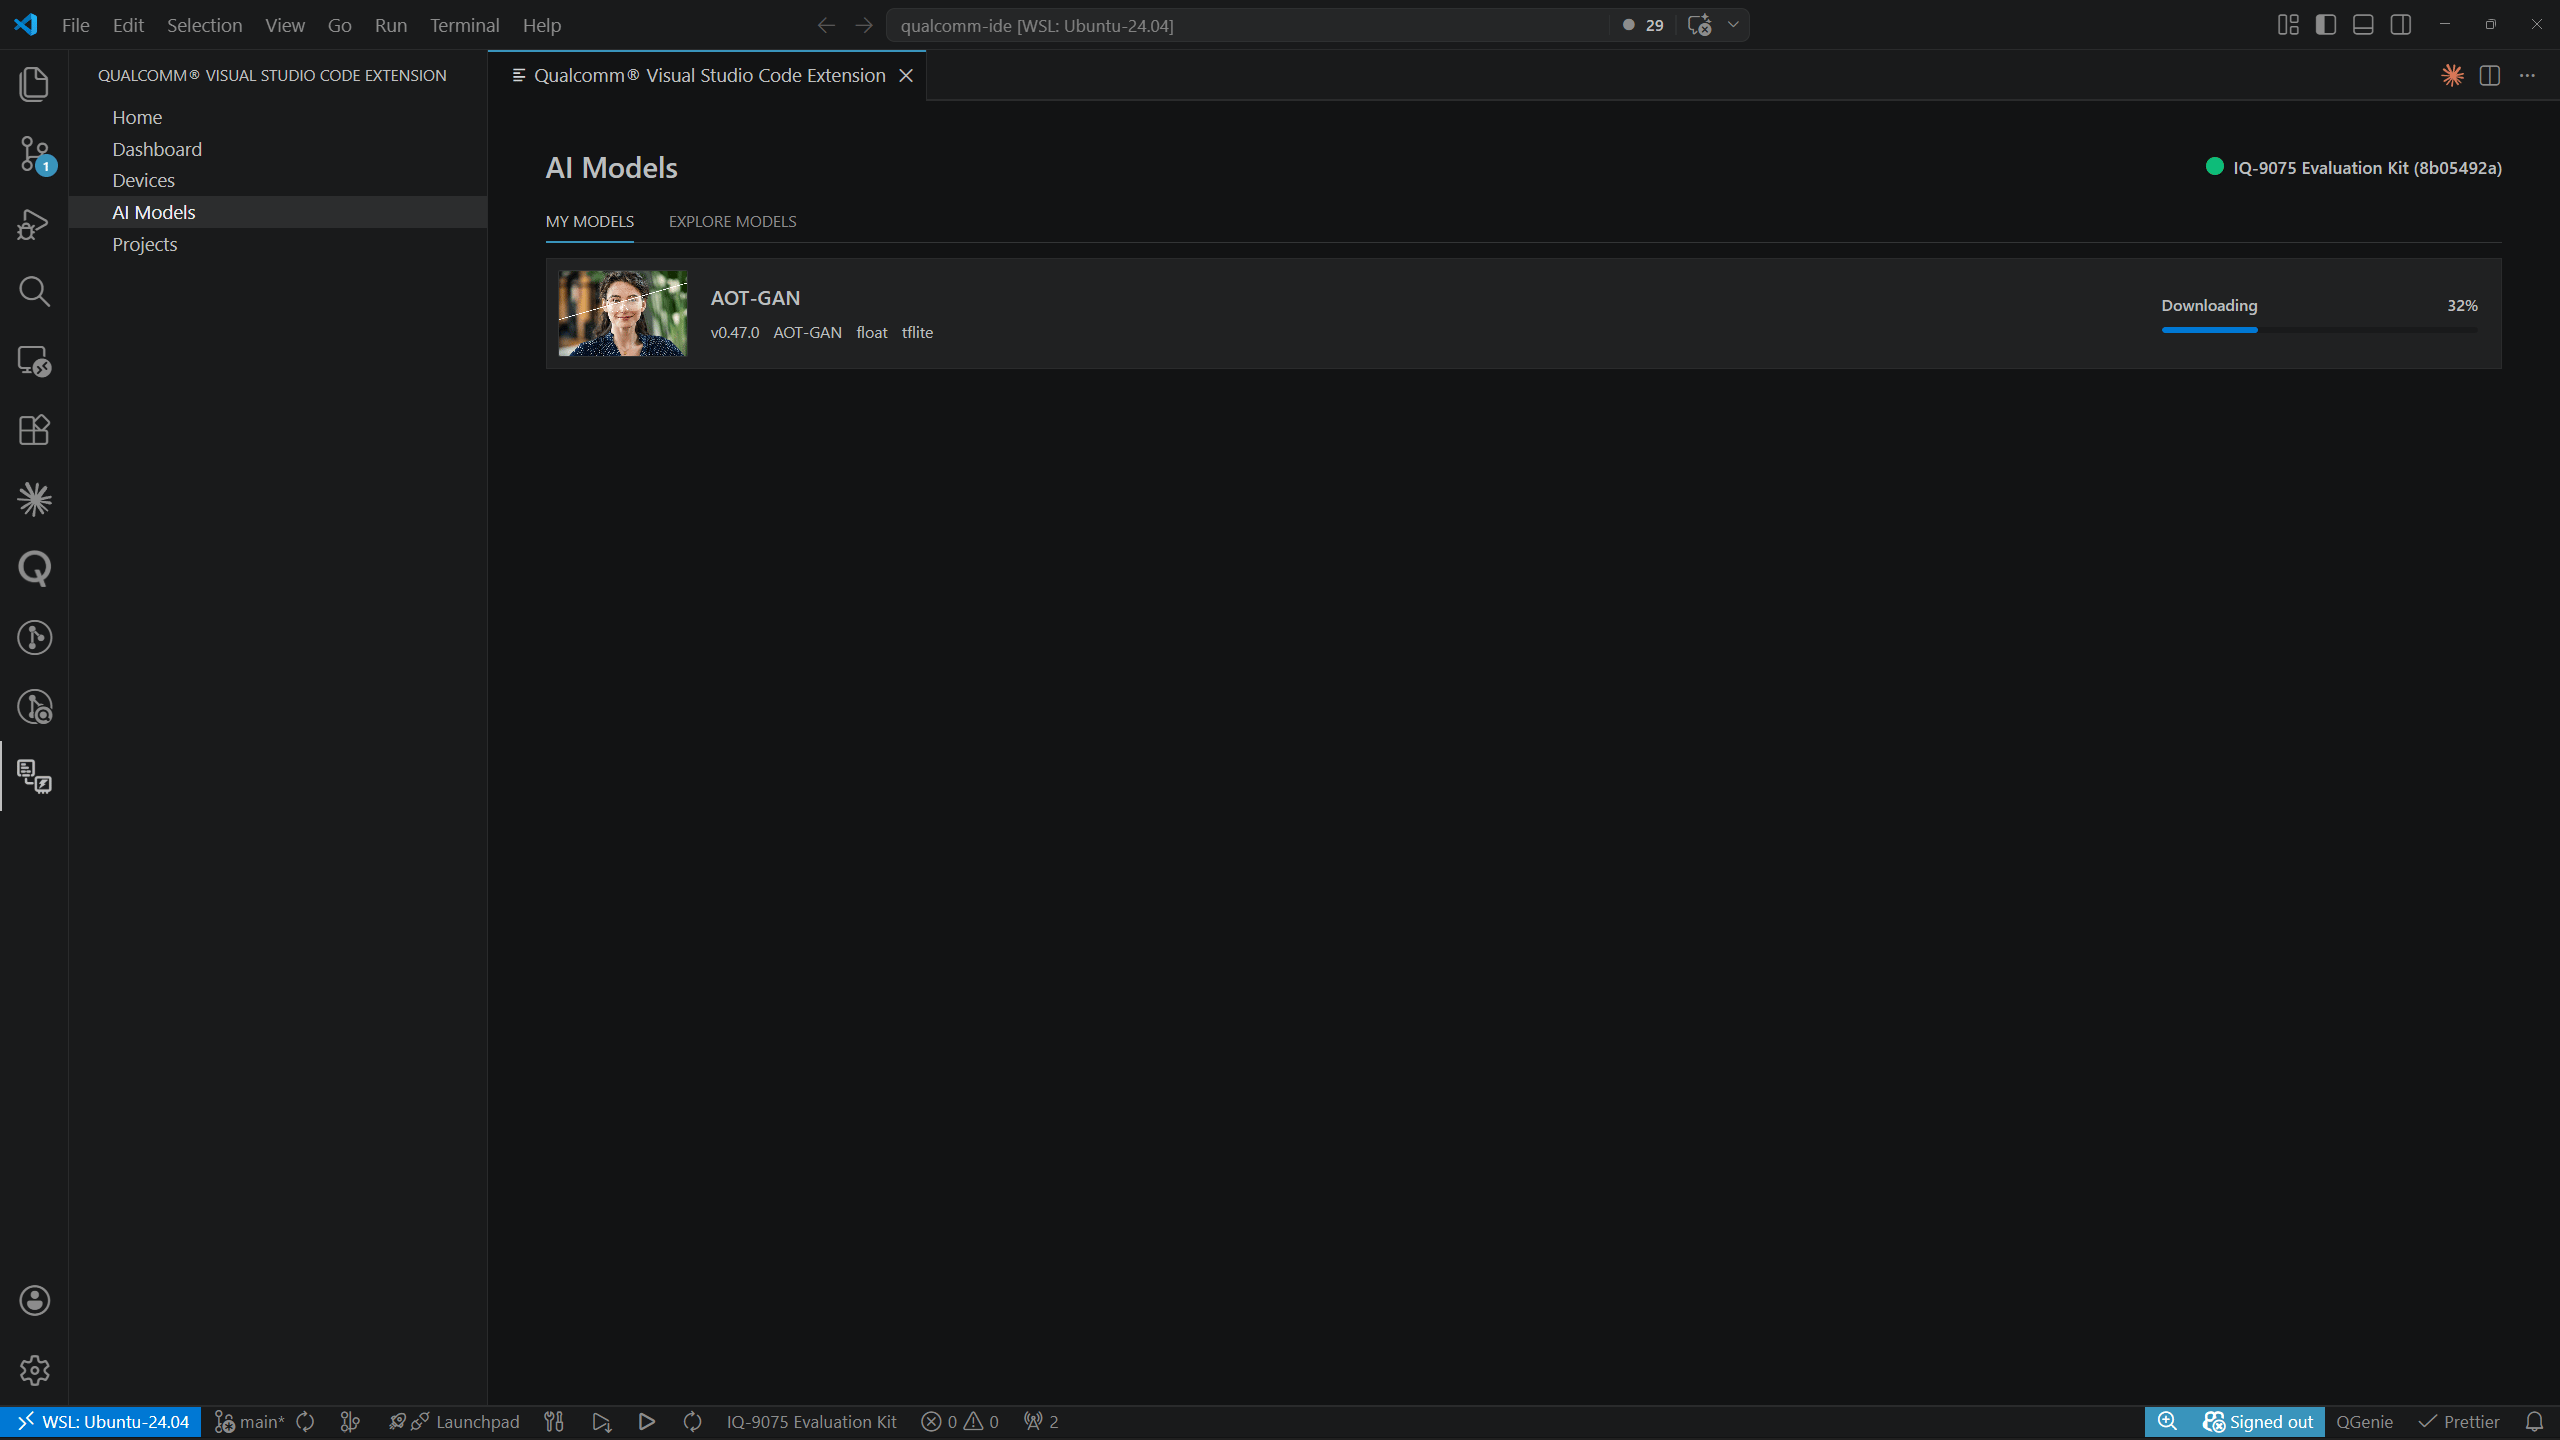
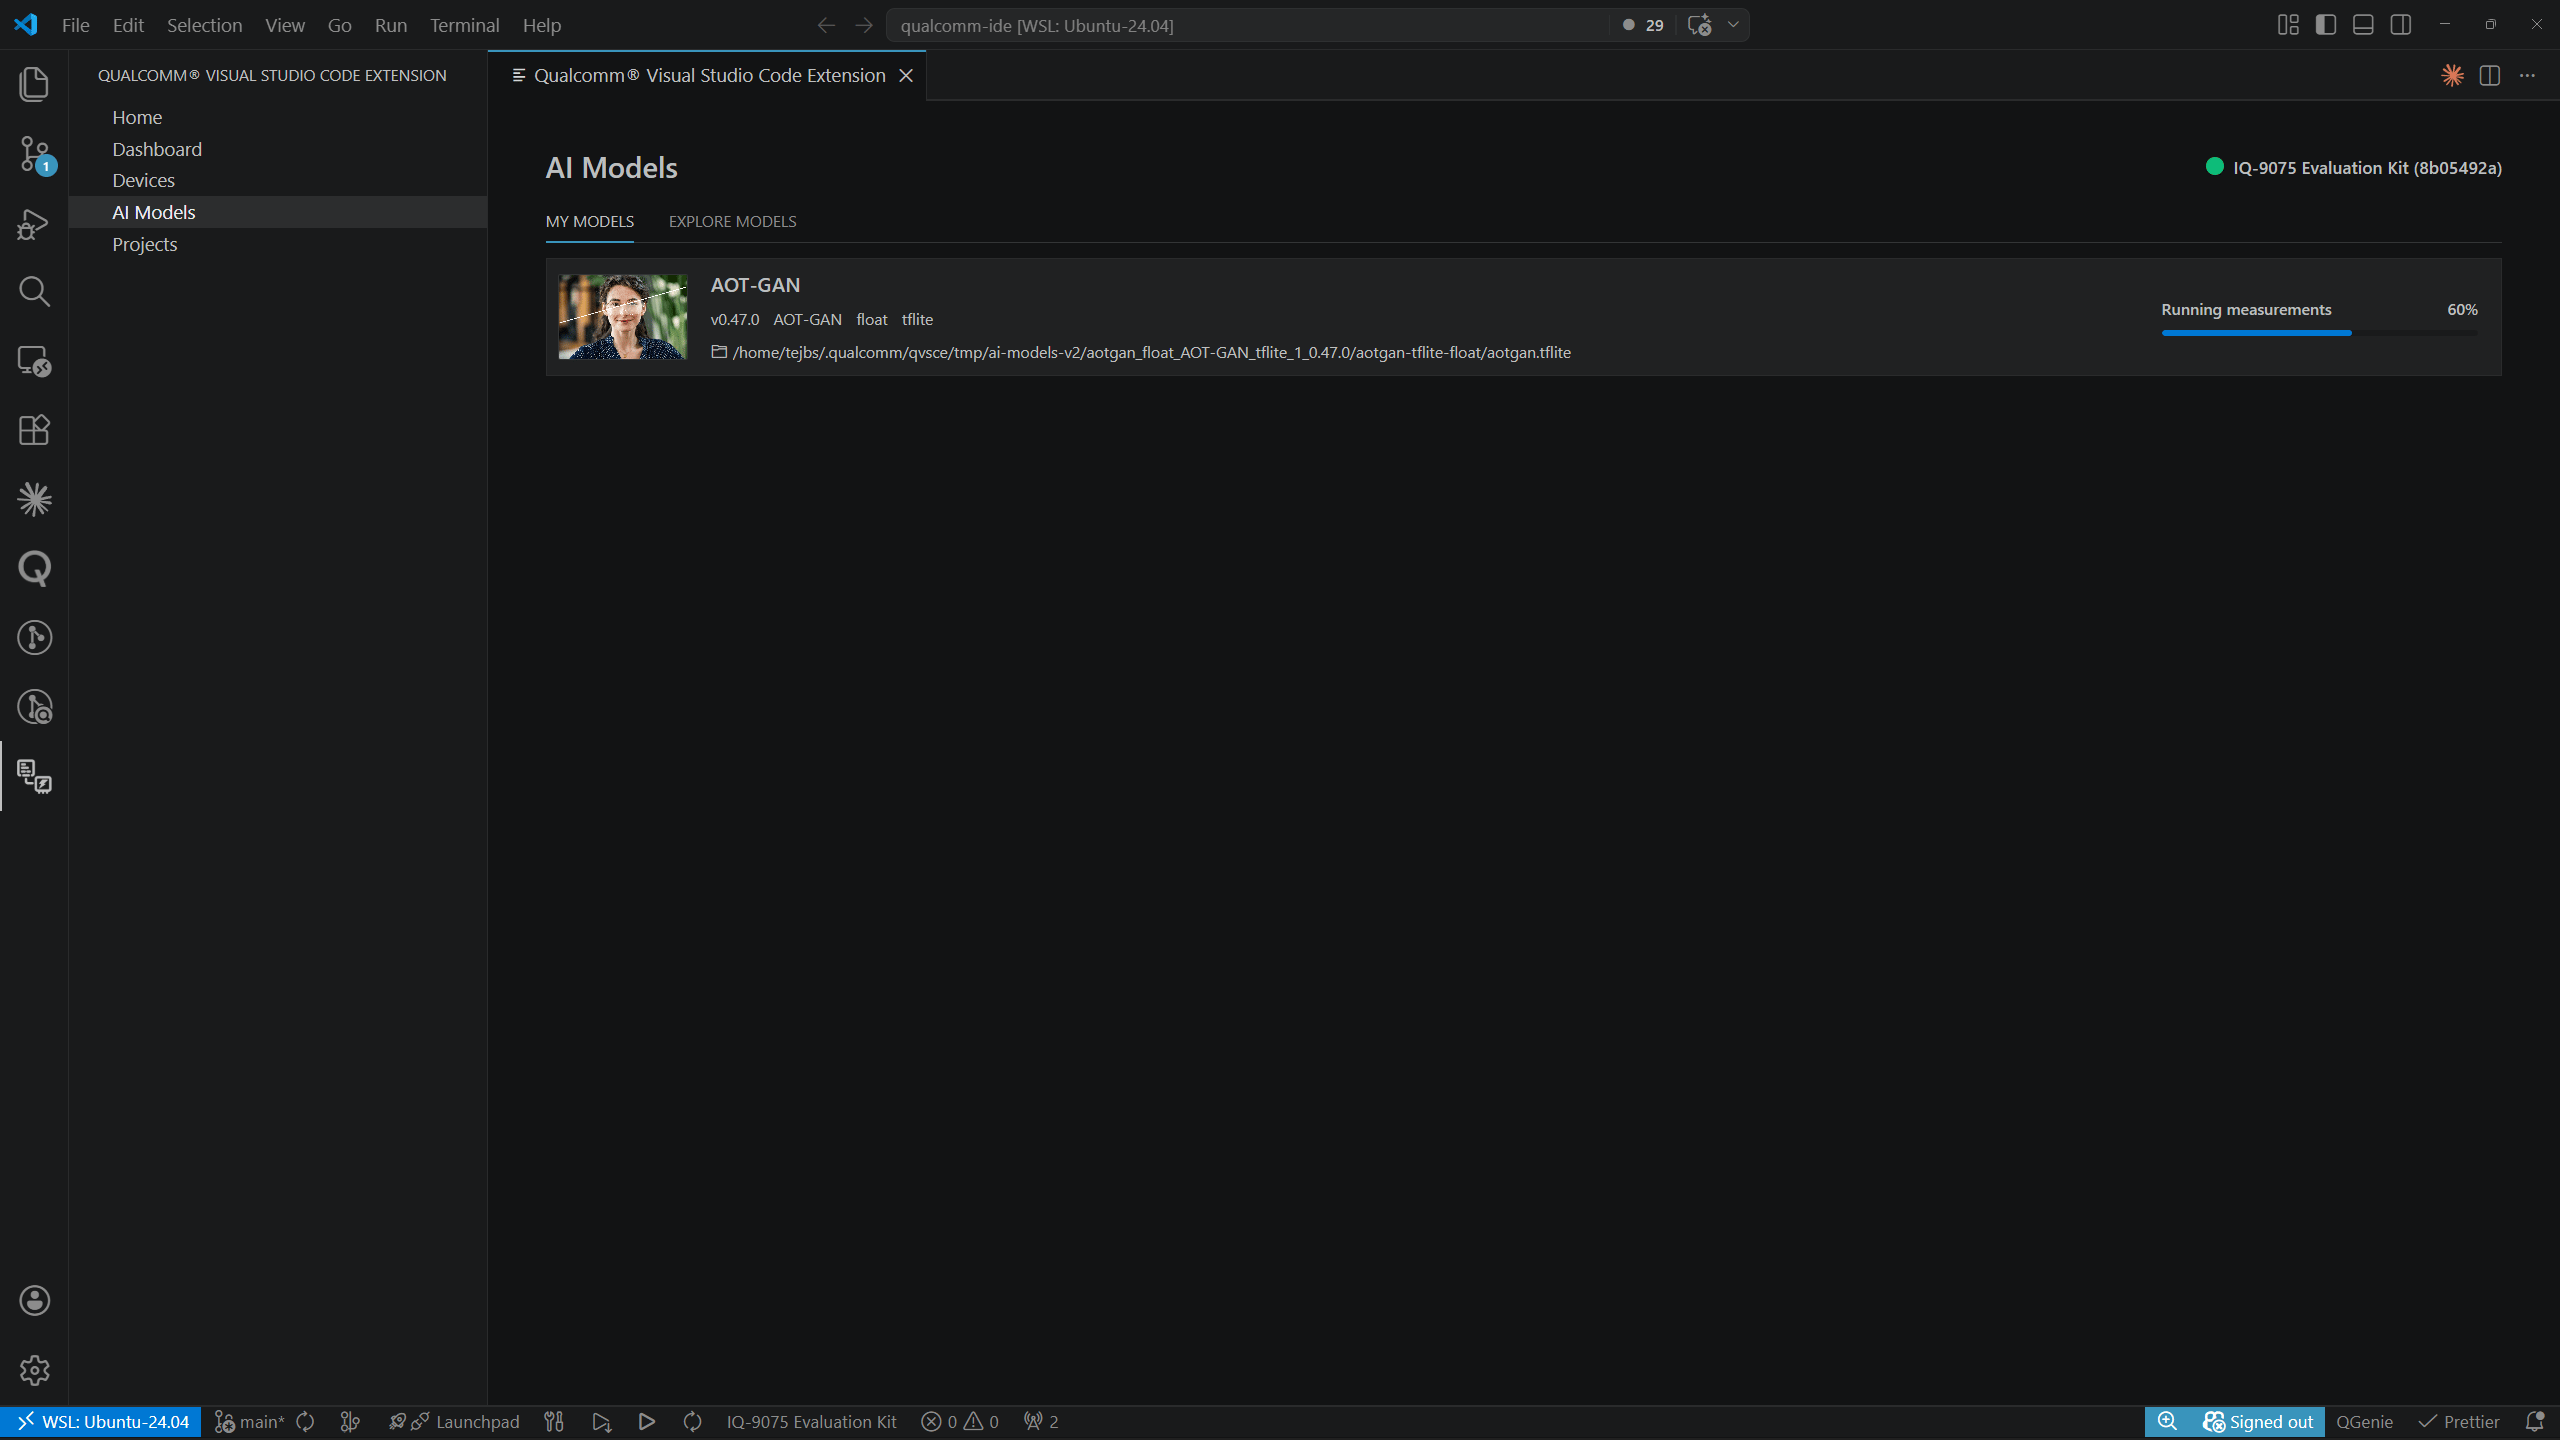
Profiling a Model
Each model row in MY MODELS has a Profile split-button. Click the dropdown arrow (▾) to choose from four options: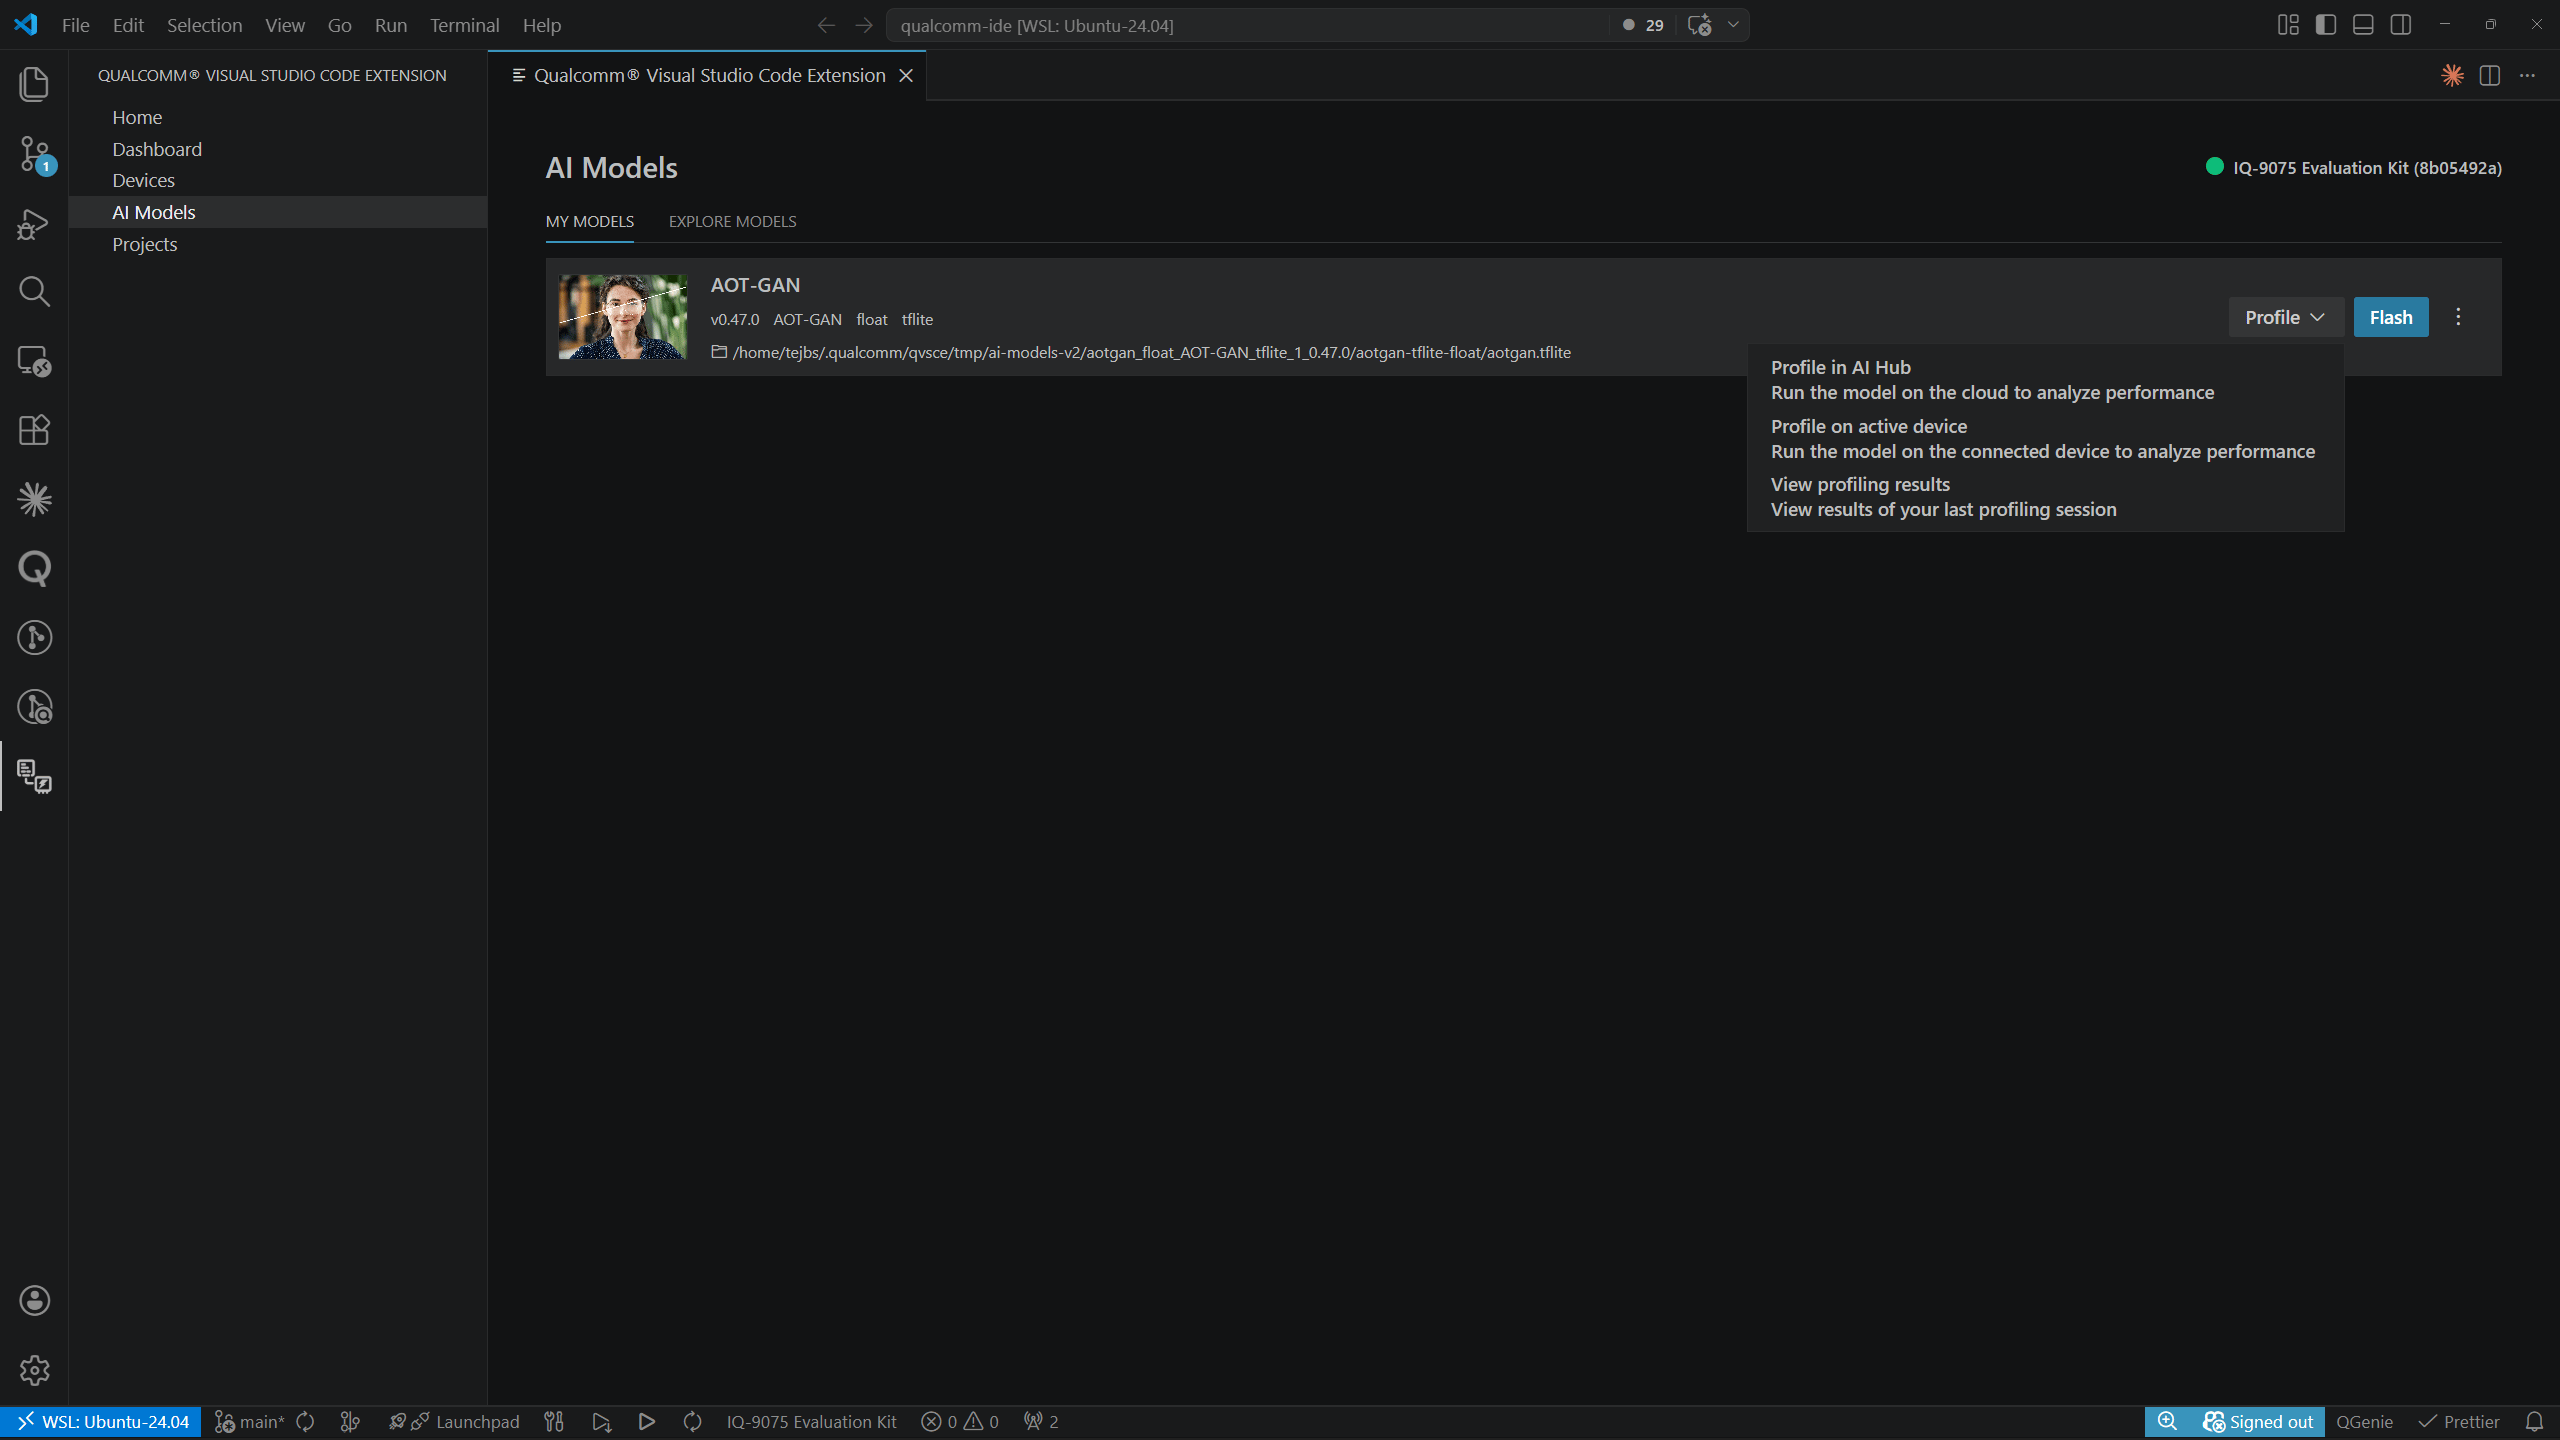
| Option | Description |
|---|---|
| Profile in AI Hub | Run the model on the cloud to analyze performance |
| Profile on active device | Run the model on the connected device to analyze performance |
| View profiling results | Open the profiling results page |
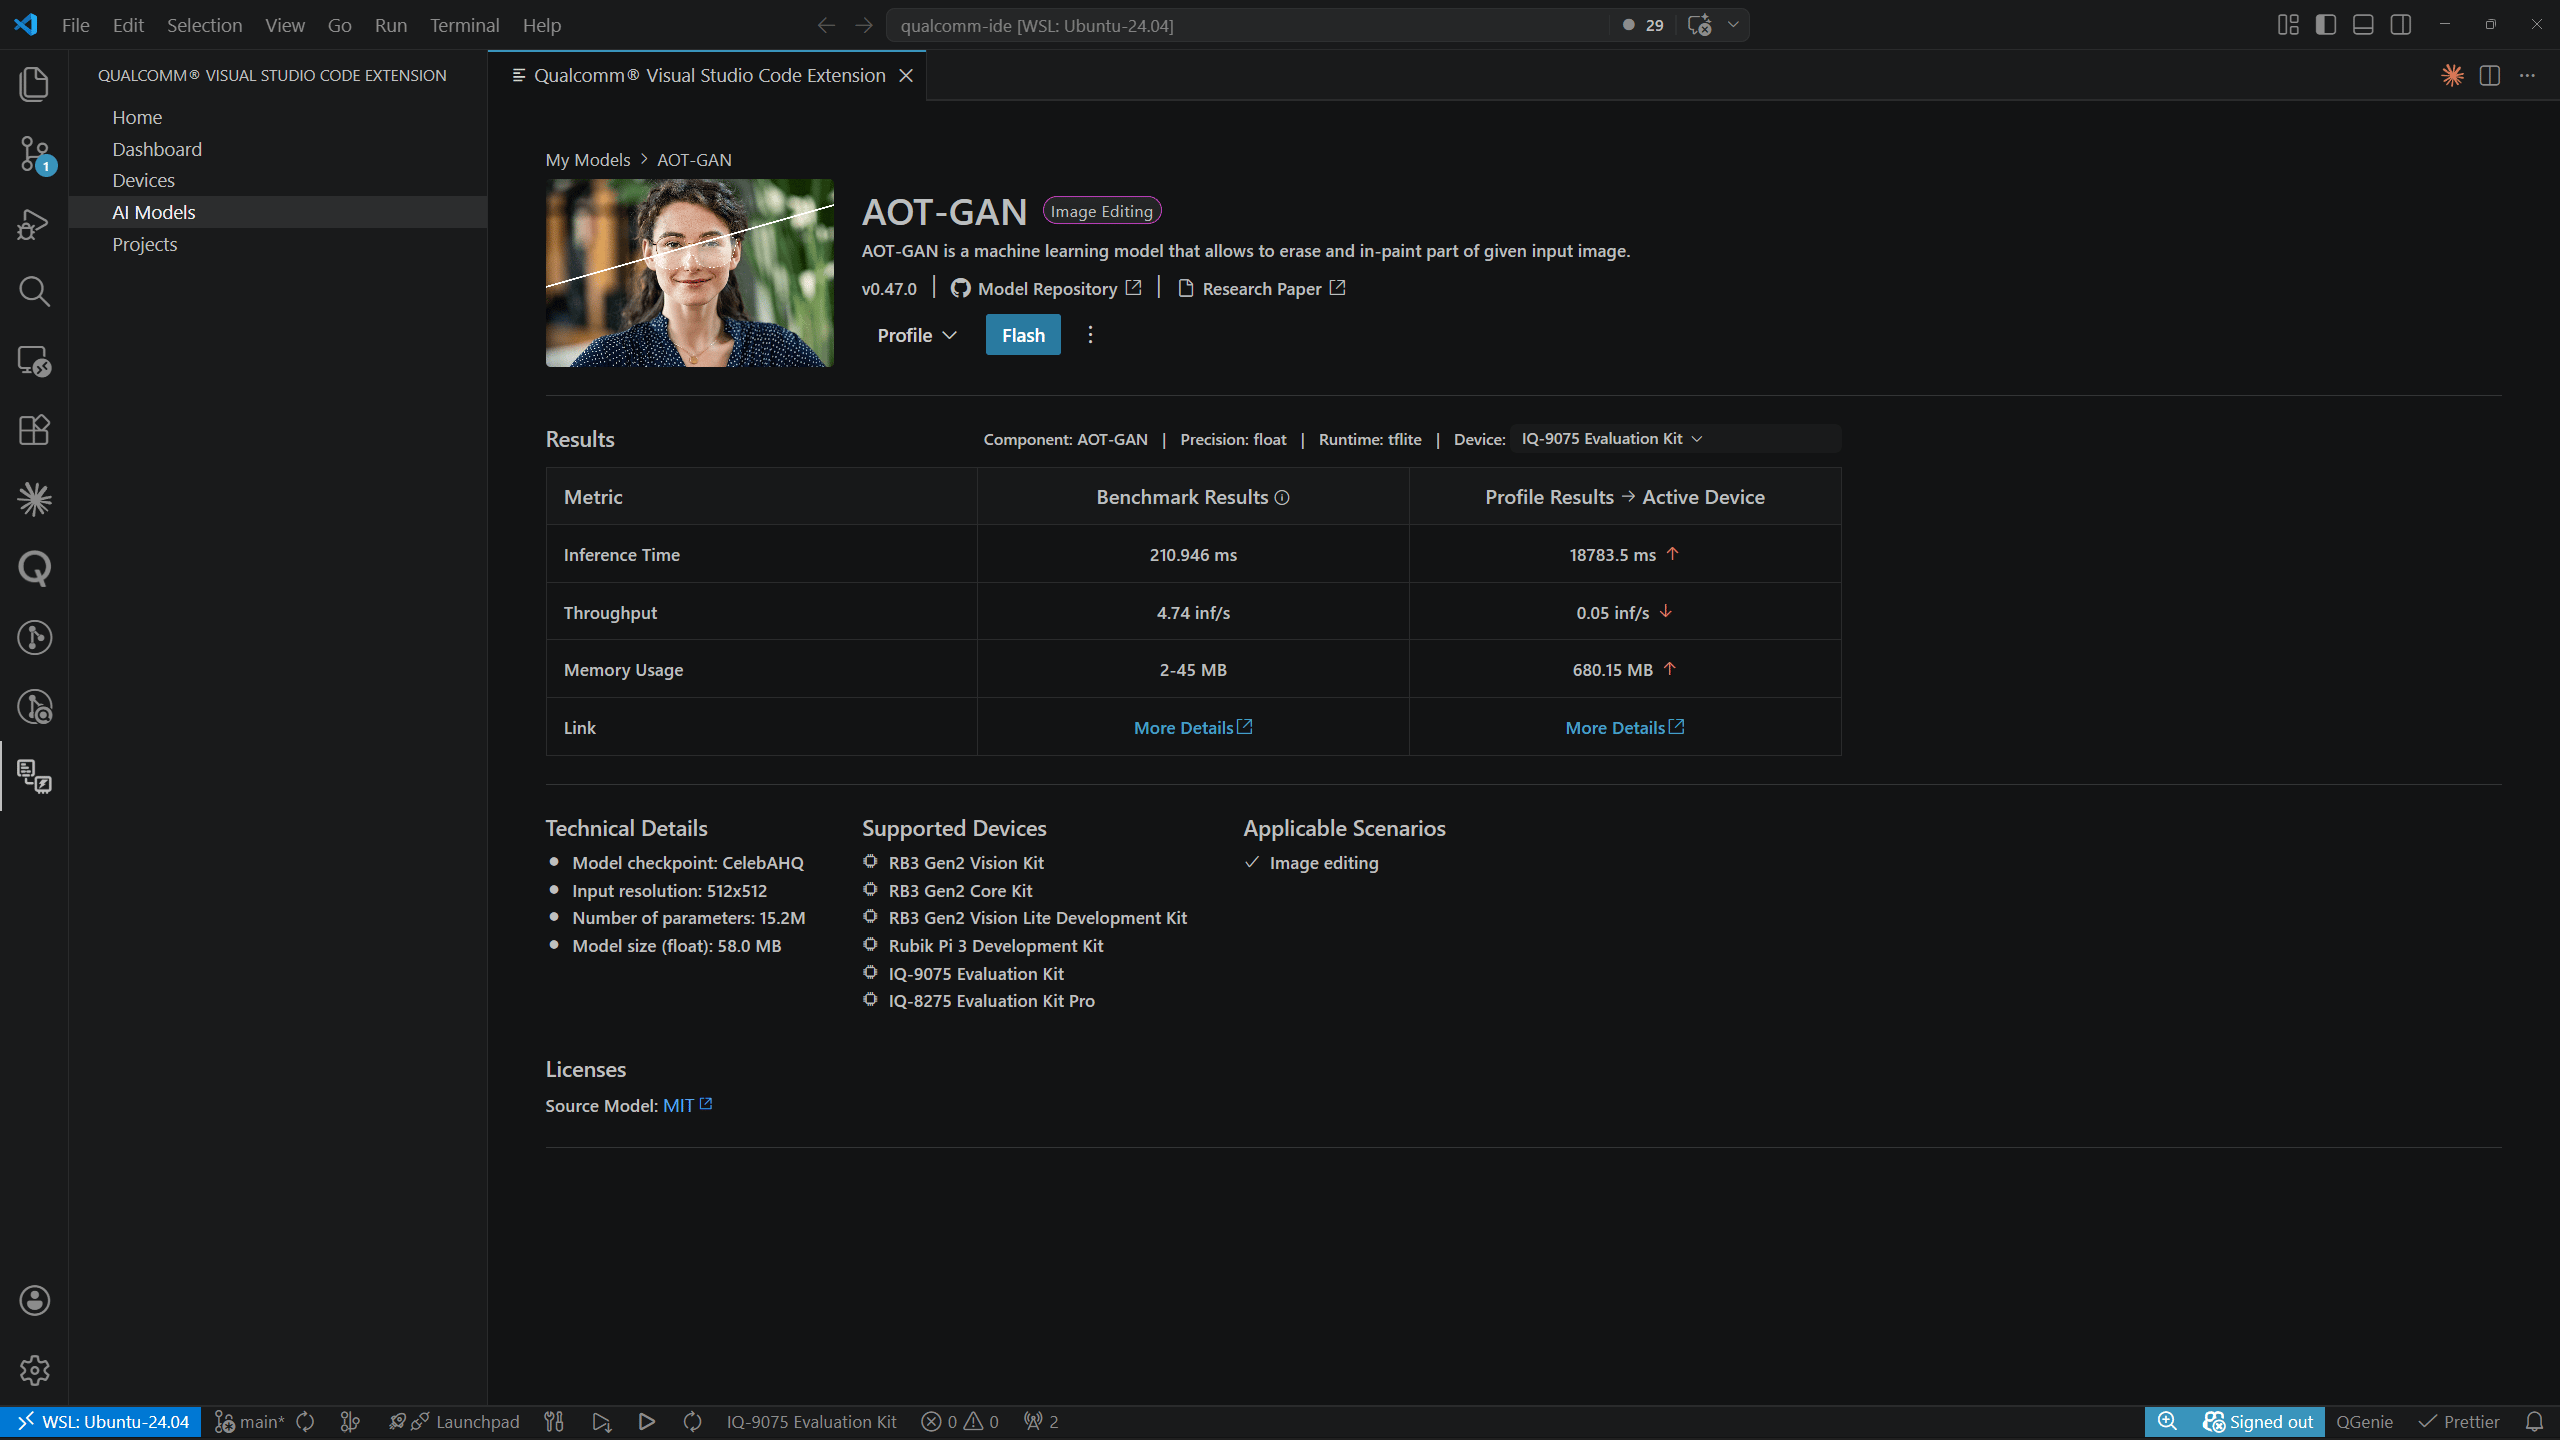
Profile on Active Device
Selecting Profile on active device starts local profiling.
An active device must be set before using Profile on active device. See
Devices for setup instructions.
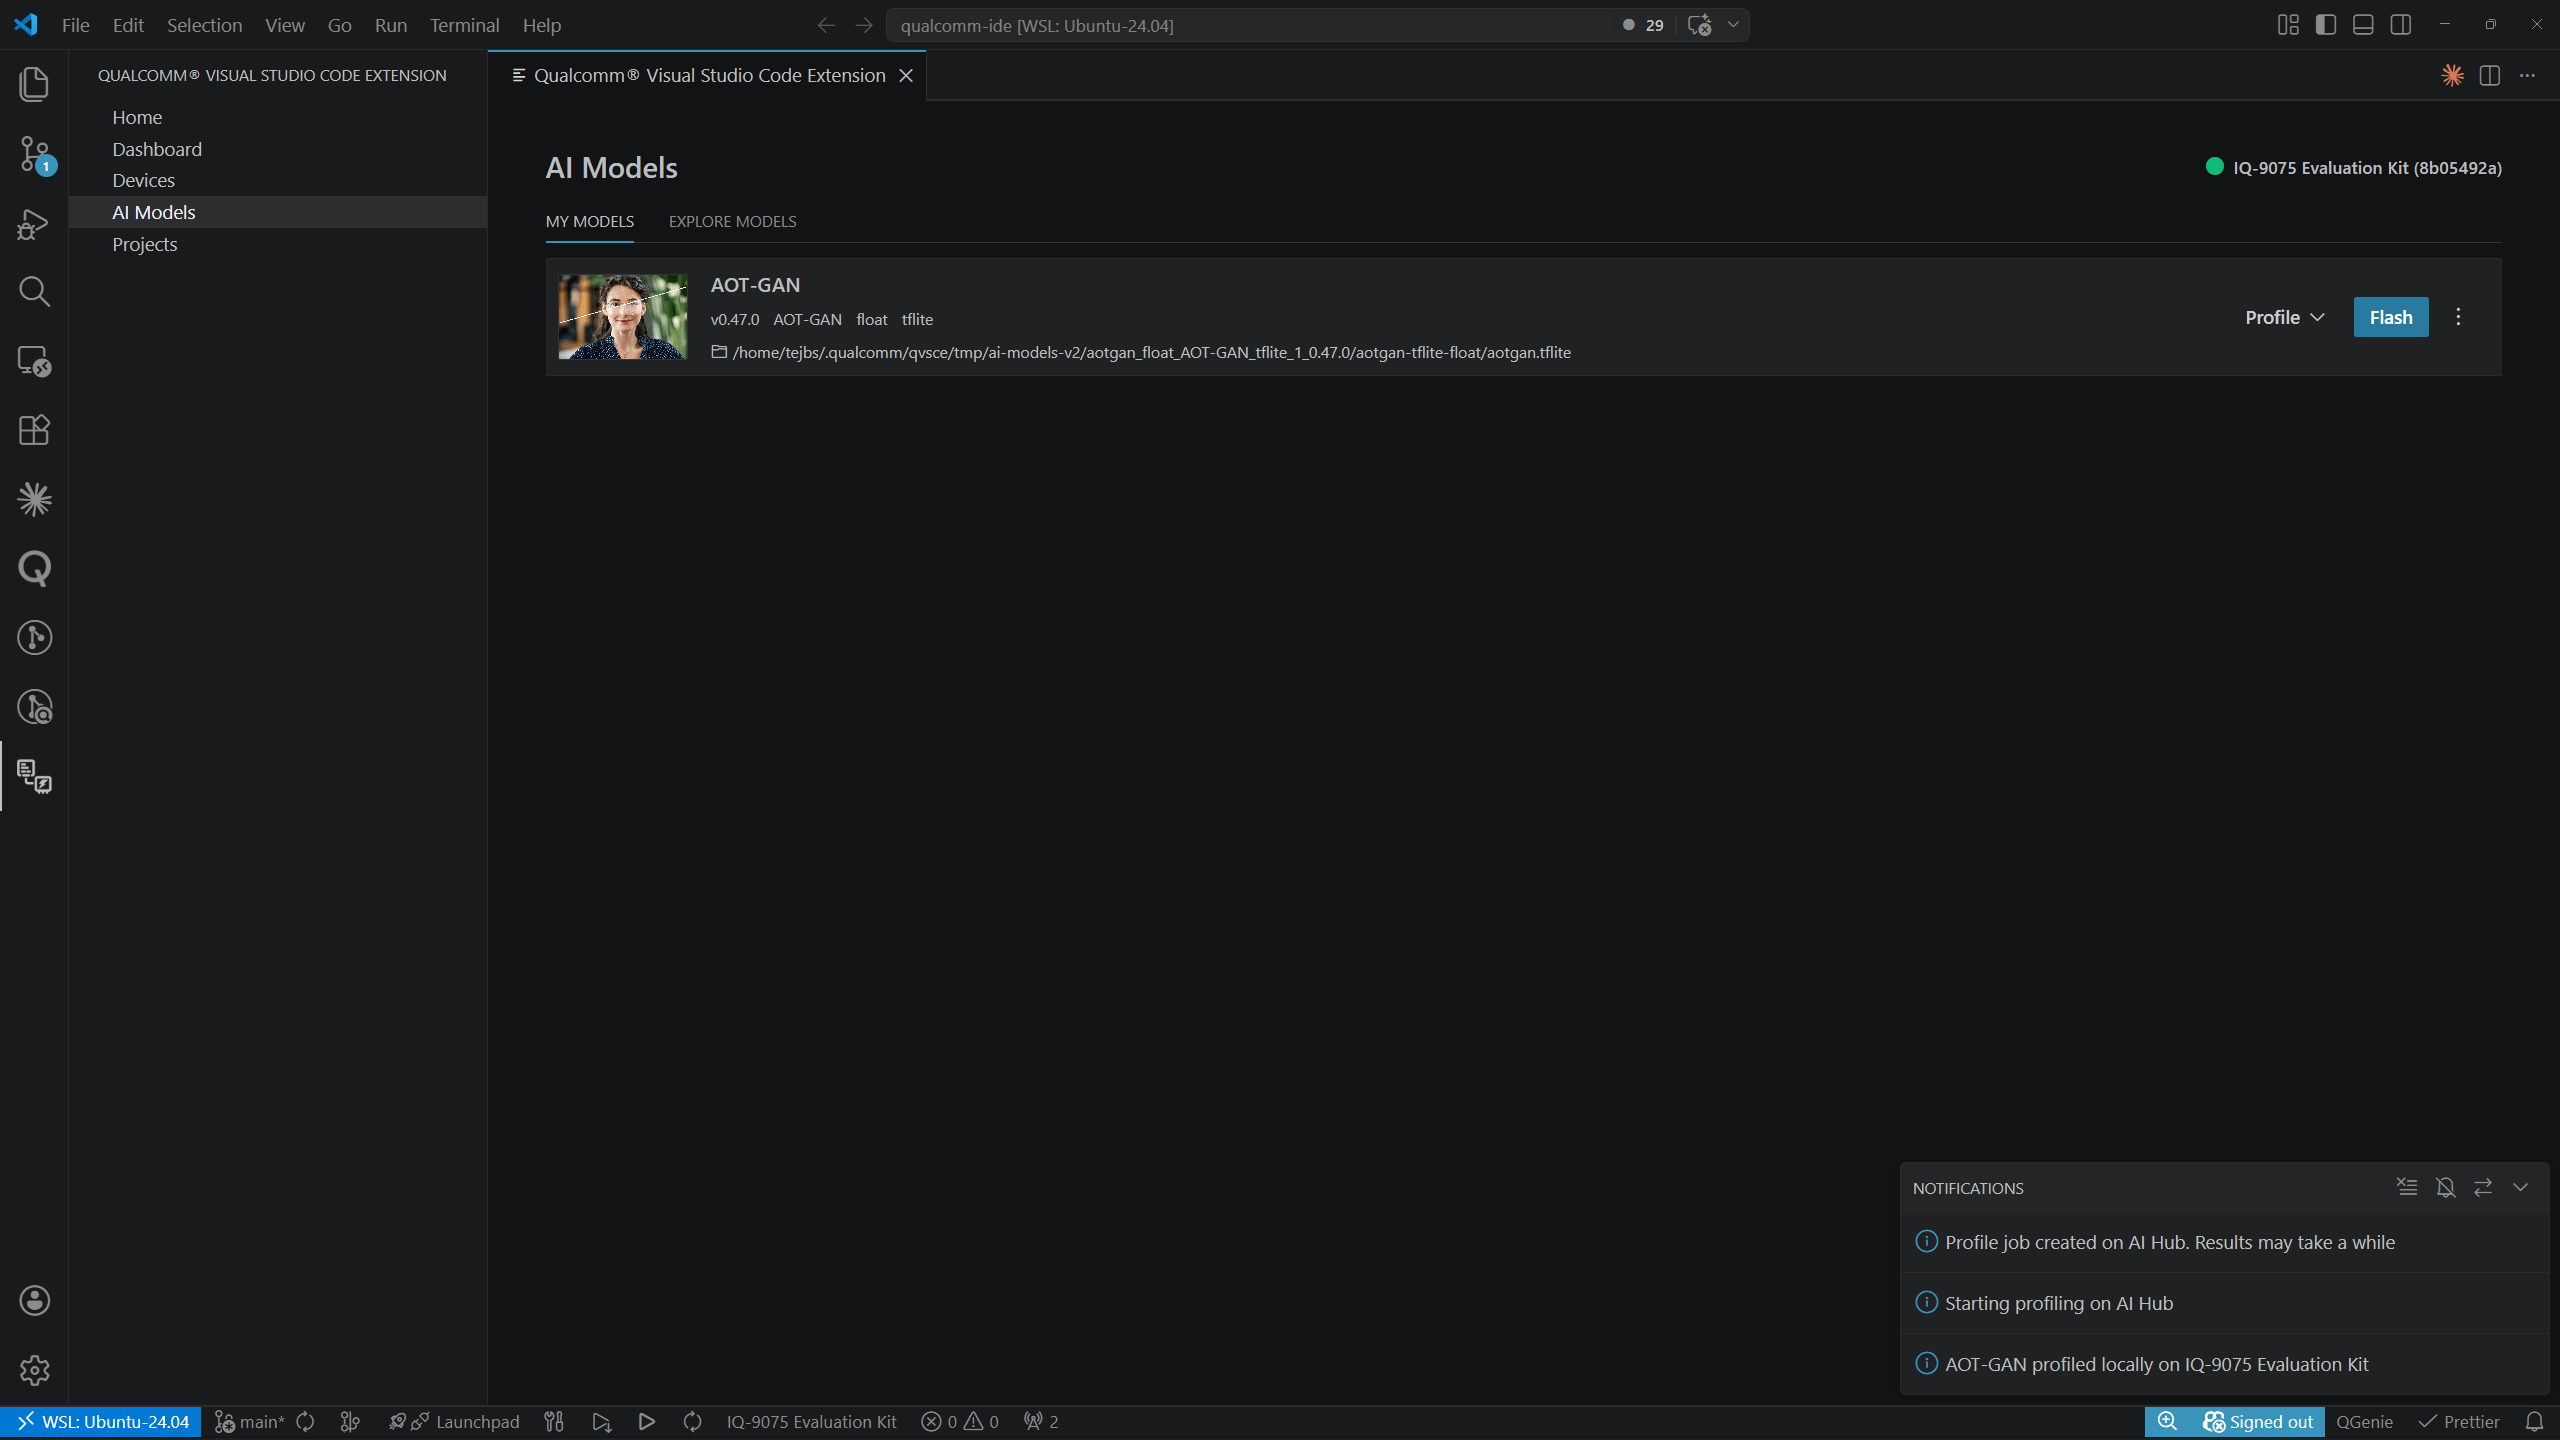
Profile in AI Hub
AI Hub Token
The first time you profile a model in AI Hub, the extension prompts you to enter your AI Hub token: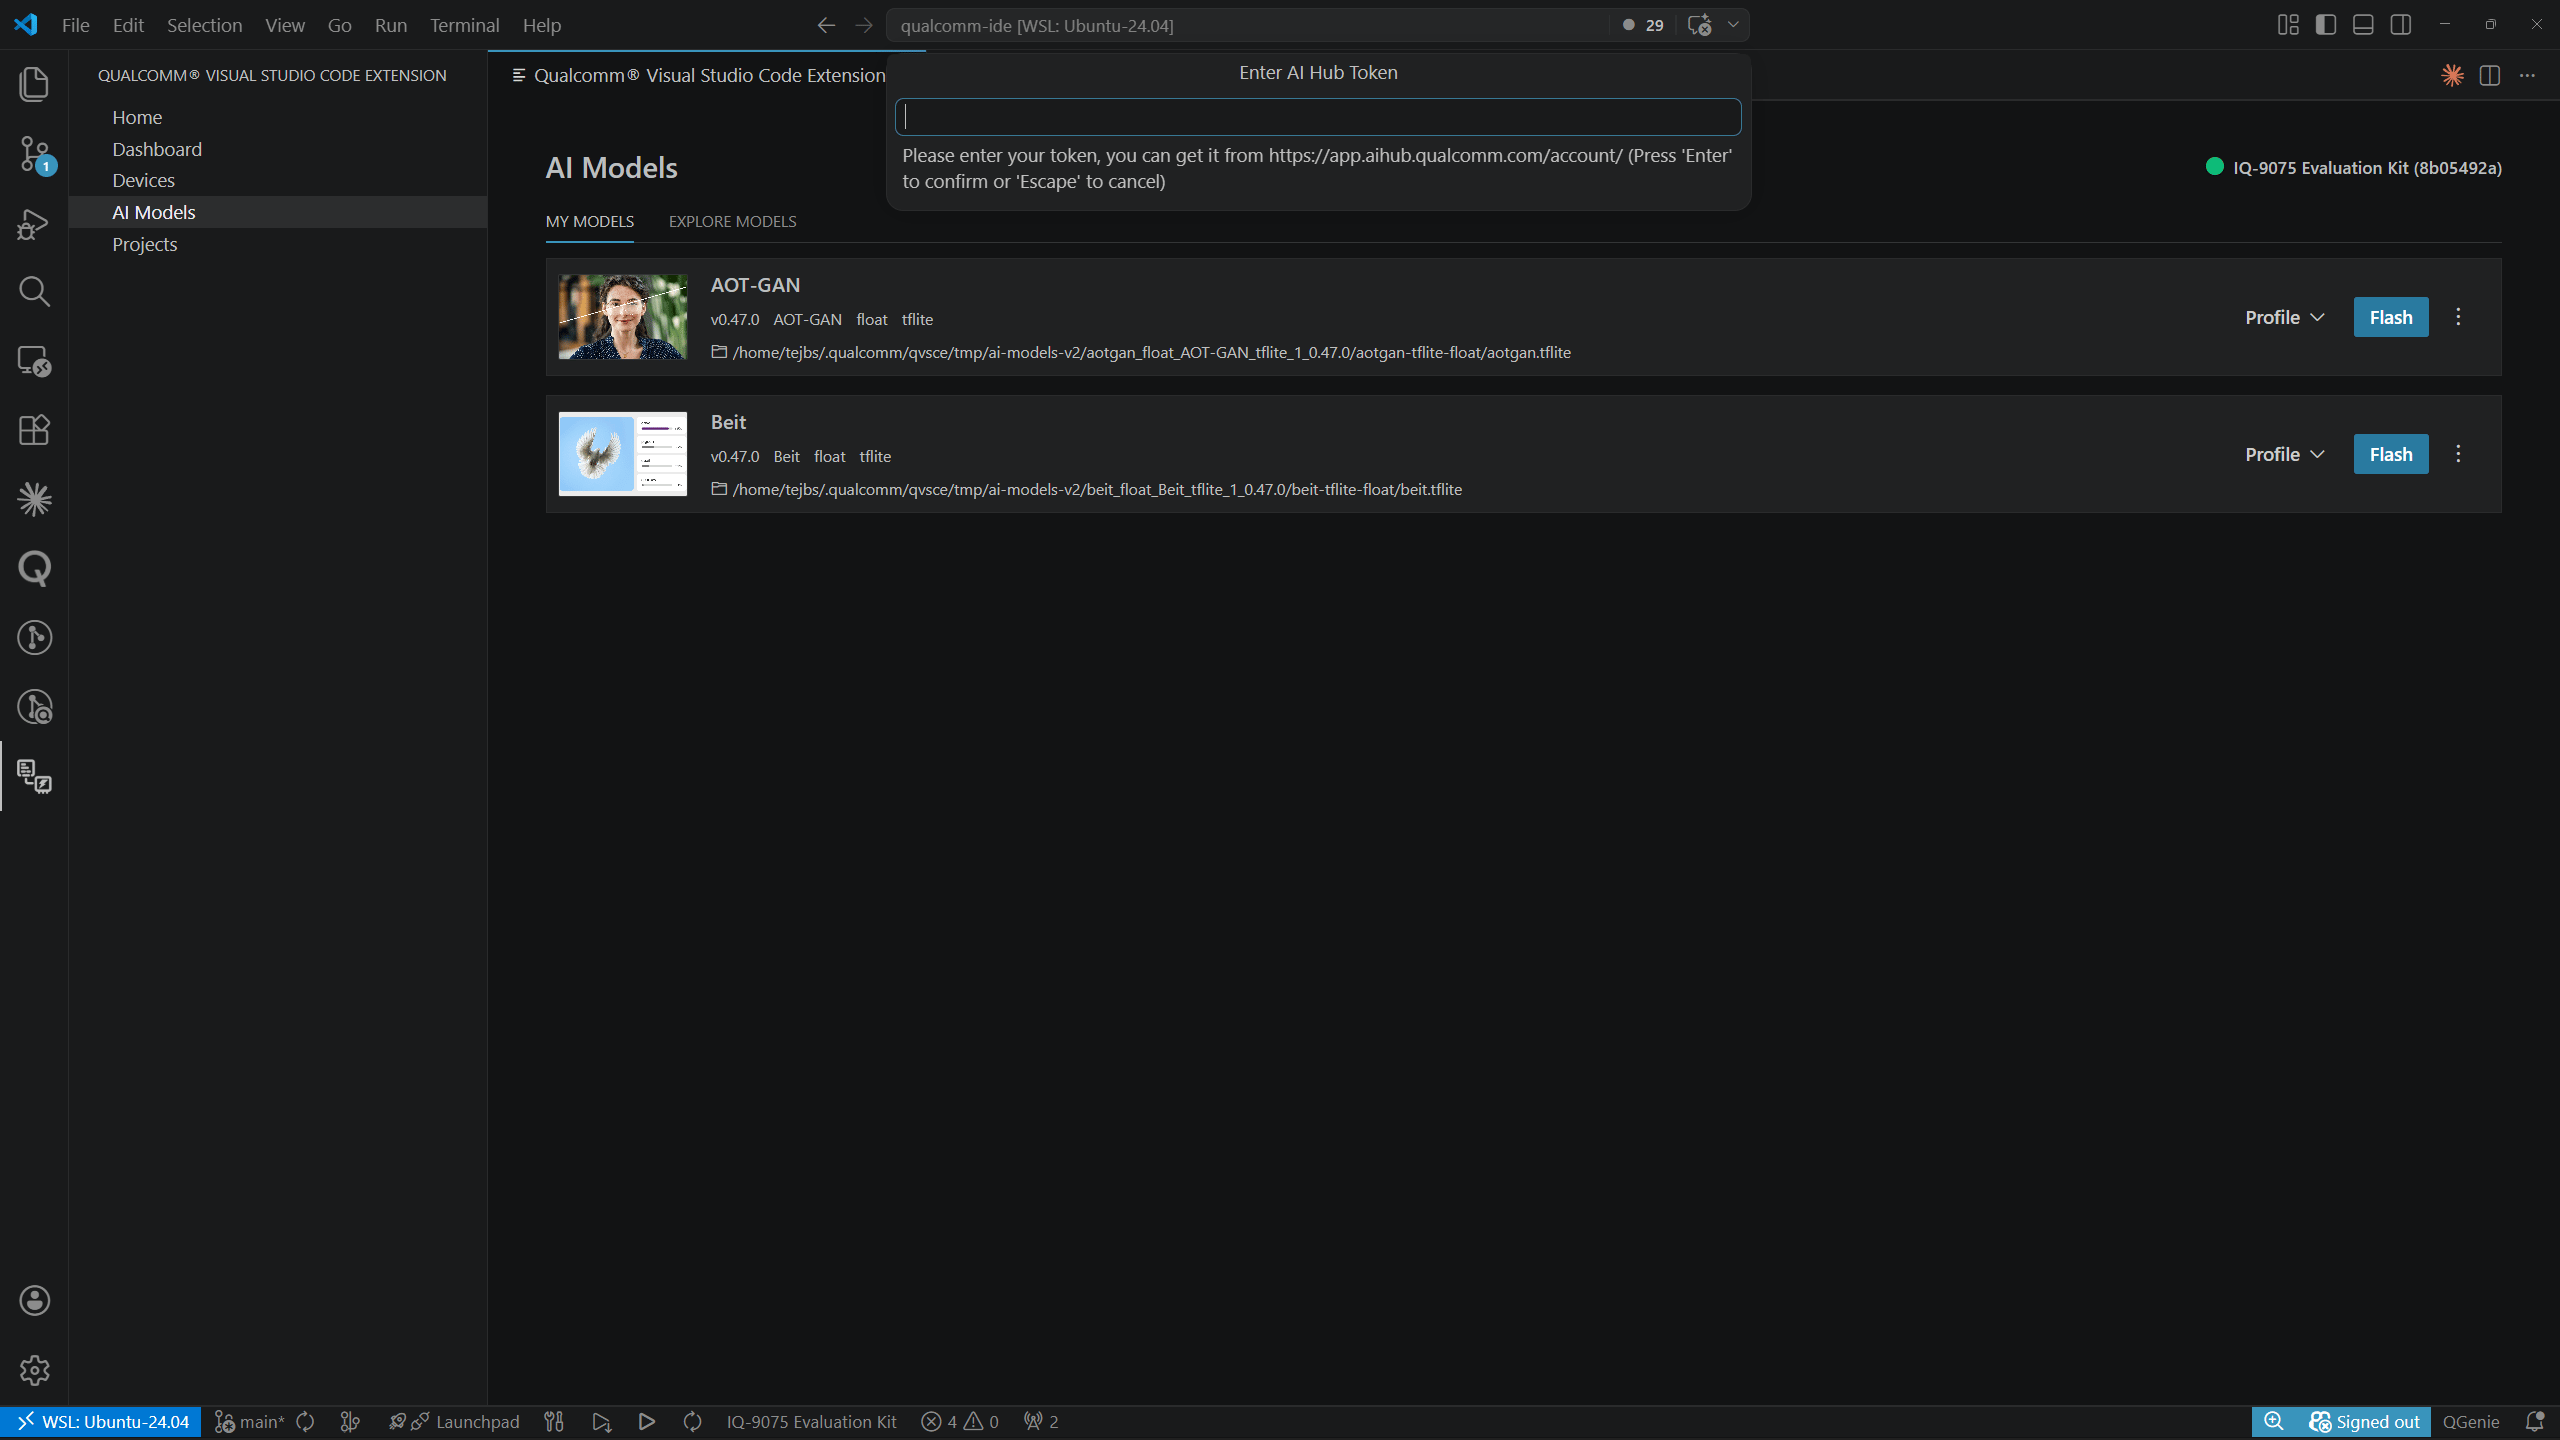

Viewing Profiling Results
Select View profiling results to open the results page from the model detail view. The breadcrumb showsMy Models > <Model Name>.
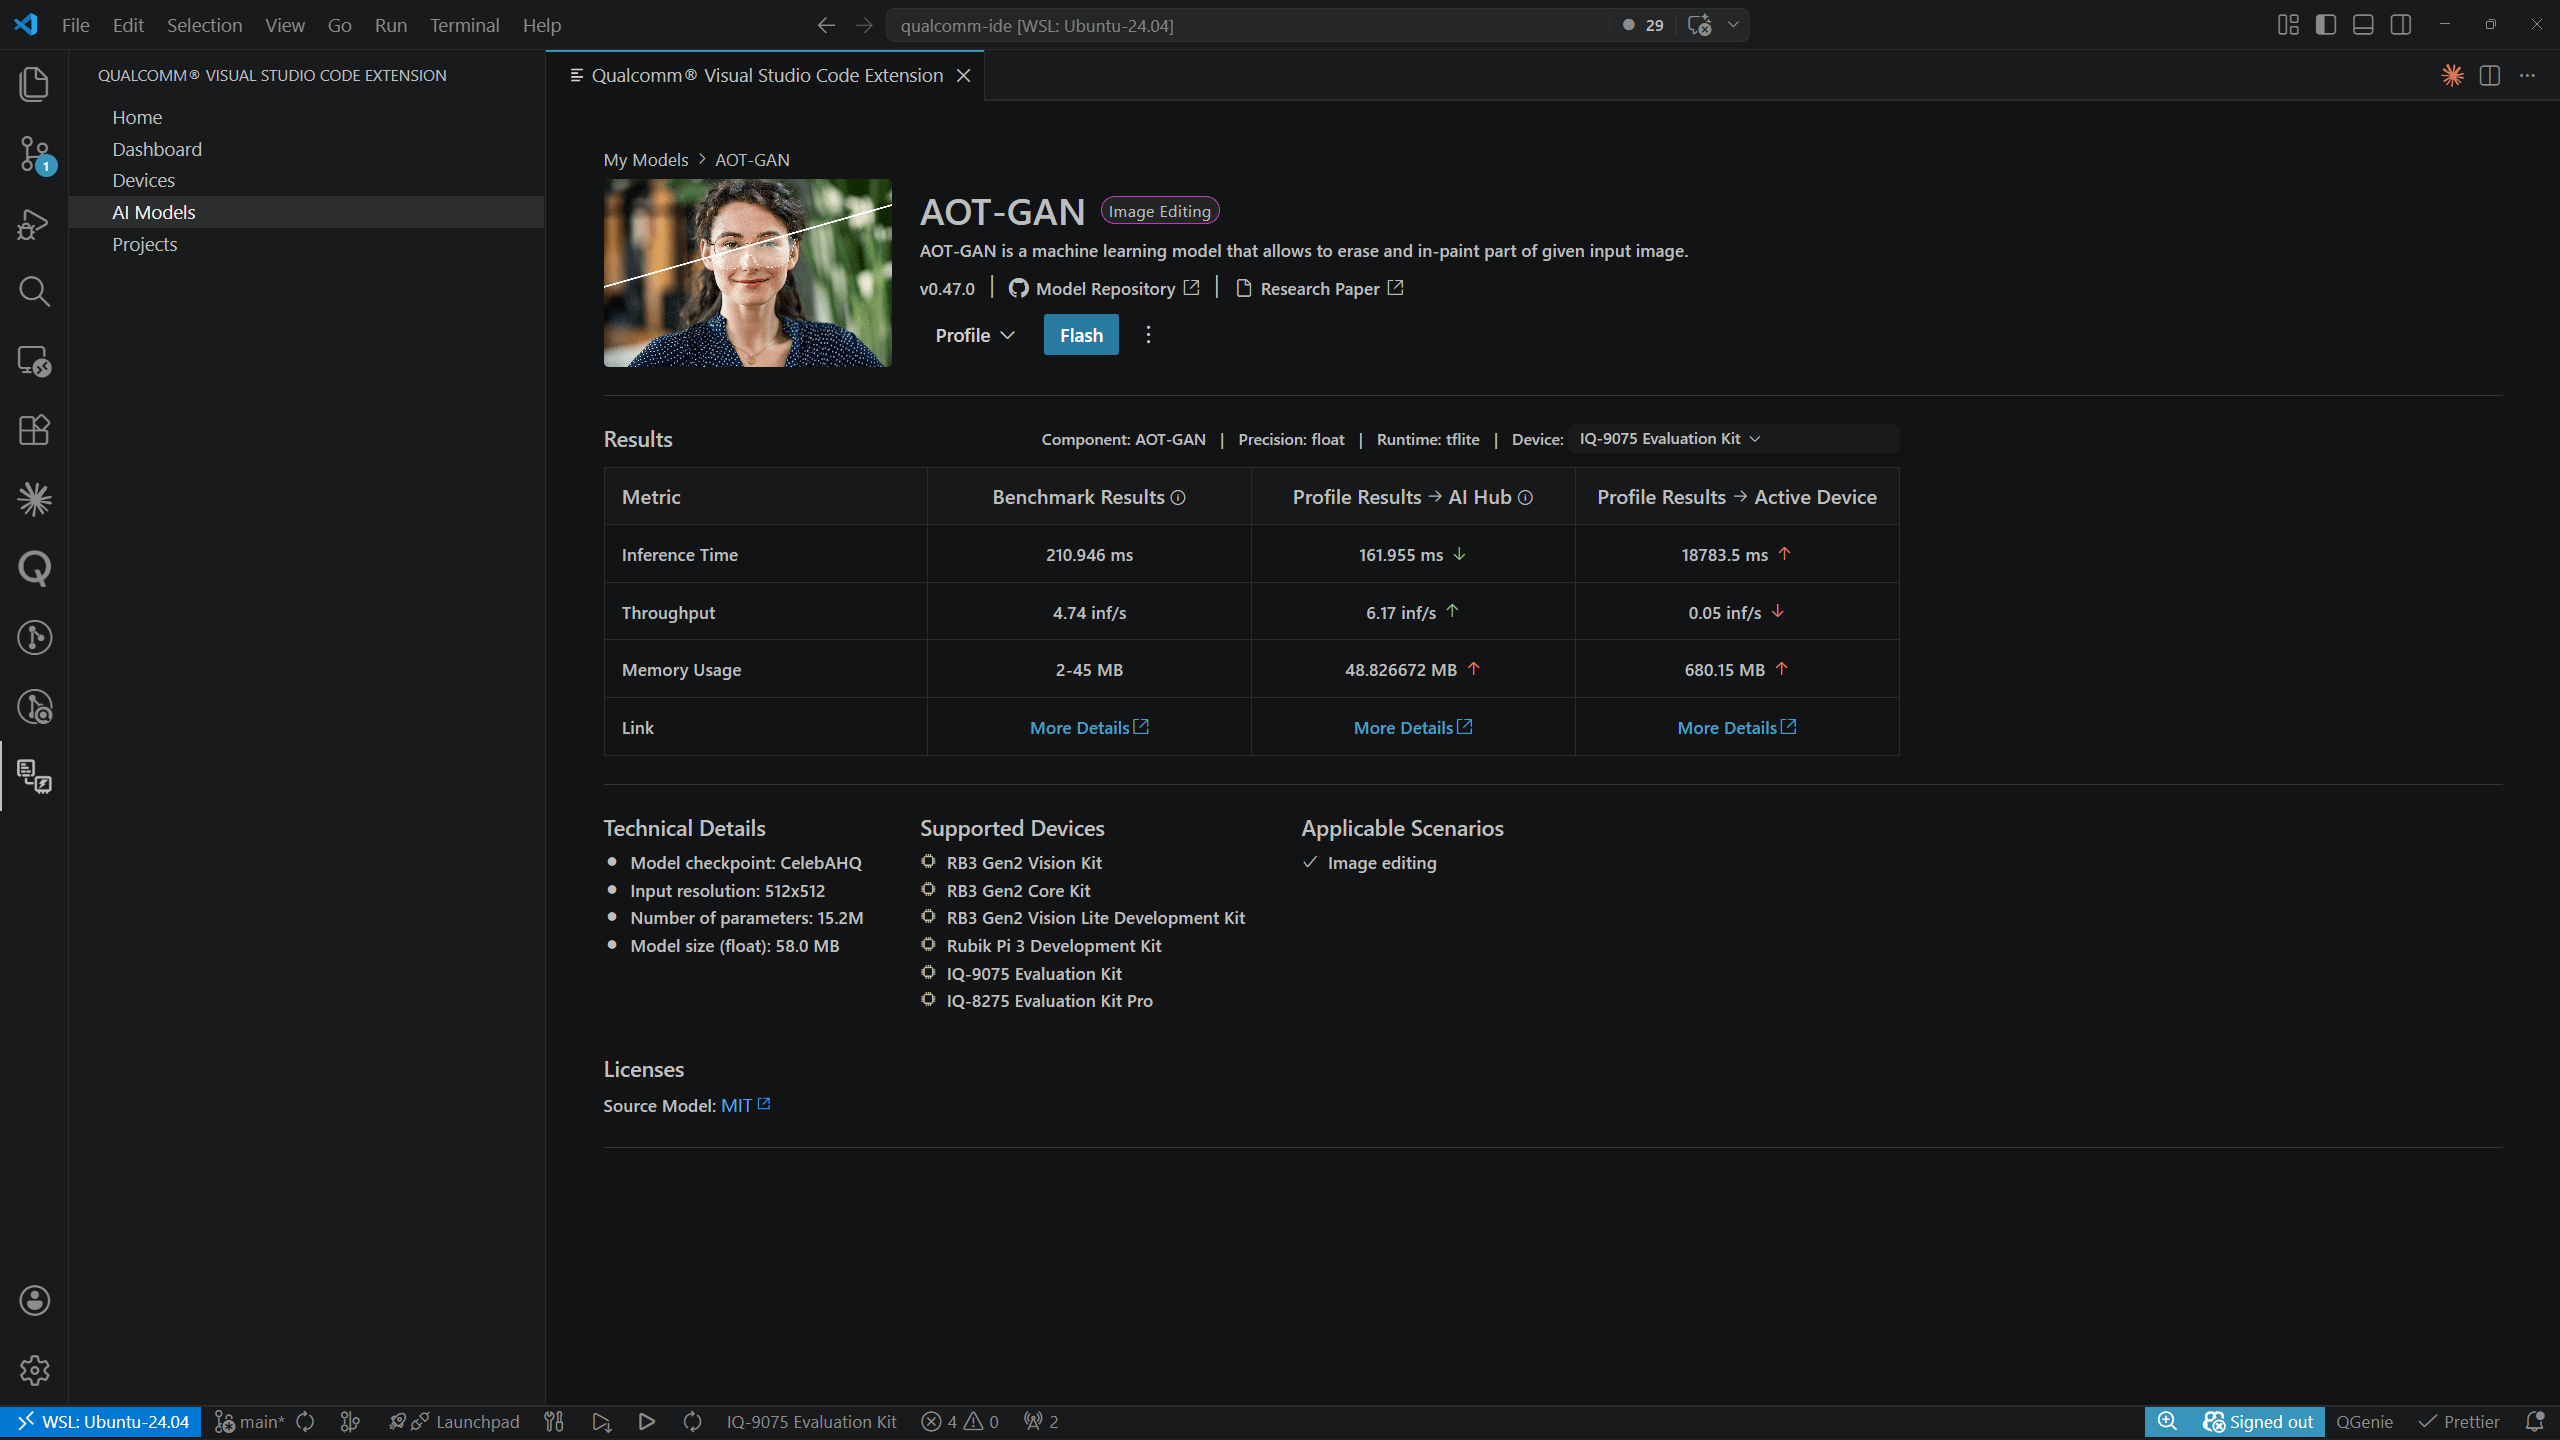
| Column | Description |
|---|---|
| Benchmark Results | Published AI Hub reference values for the model |
| Profile Results – AI Hub | Values from the cloud AI Hub profiling job |
| Profile Results – Active Device | Values measured on your locally connected device |
- Red — worse than benchmark
- Green — better than benchmark
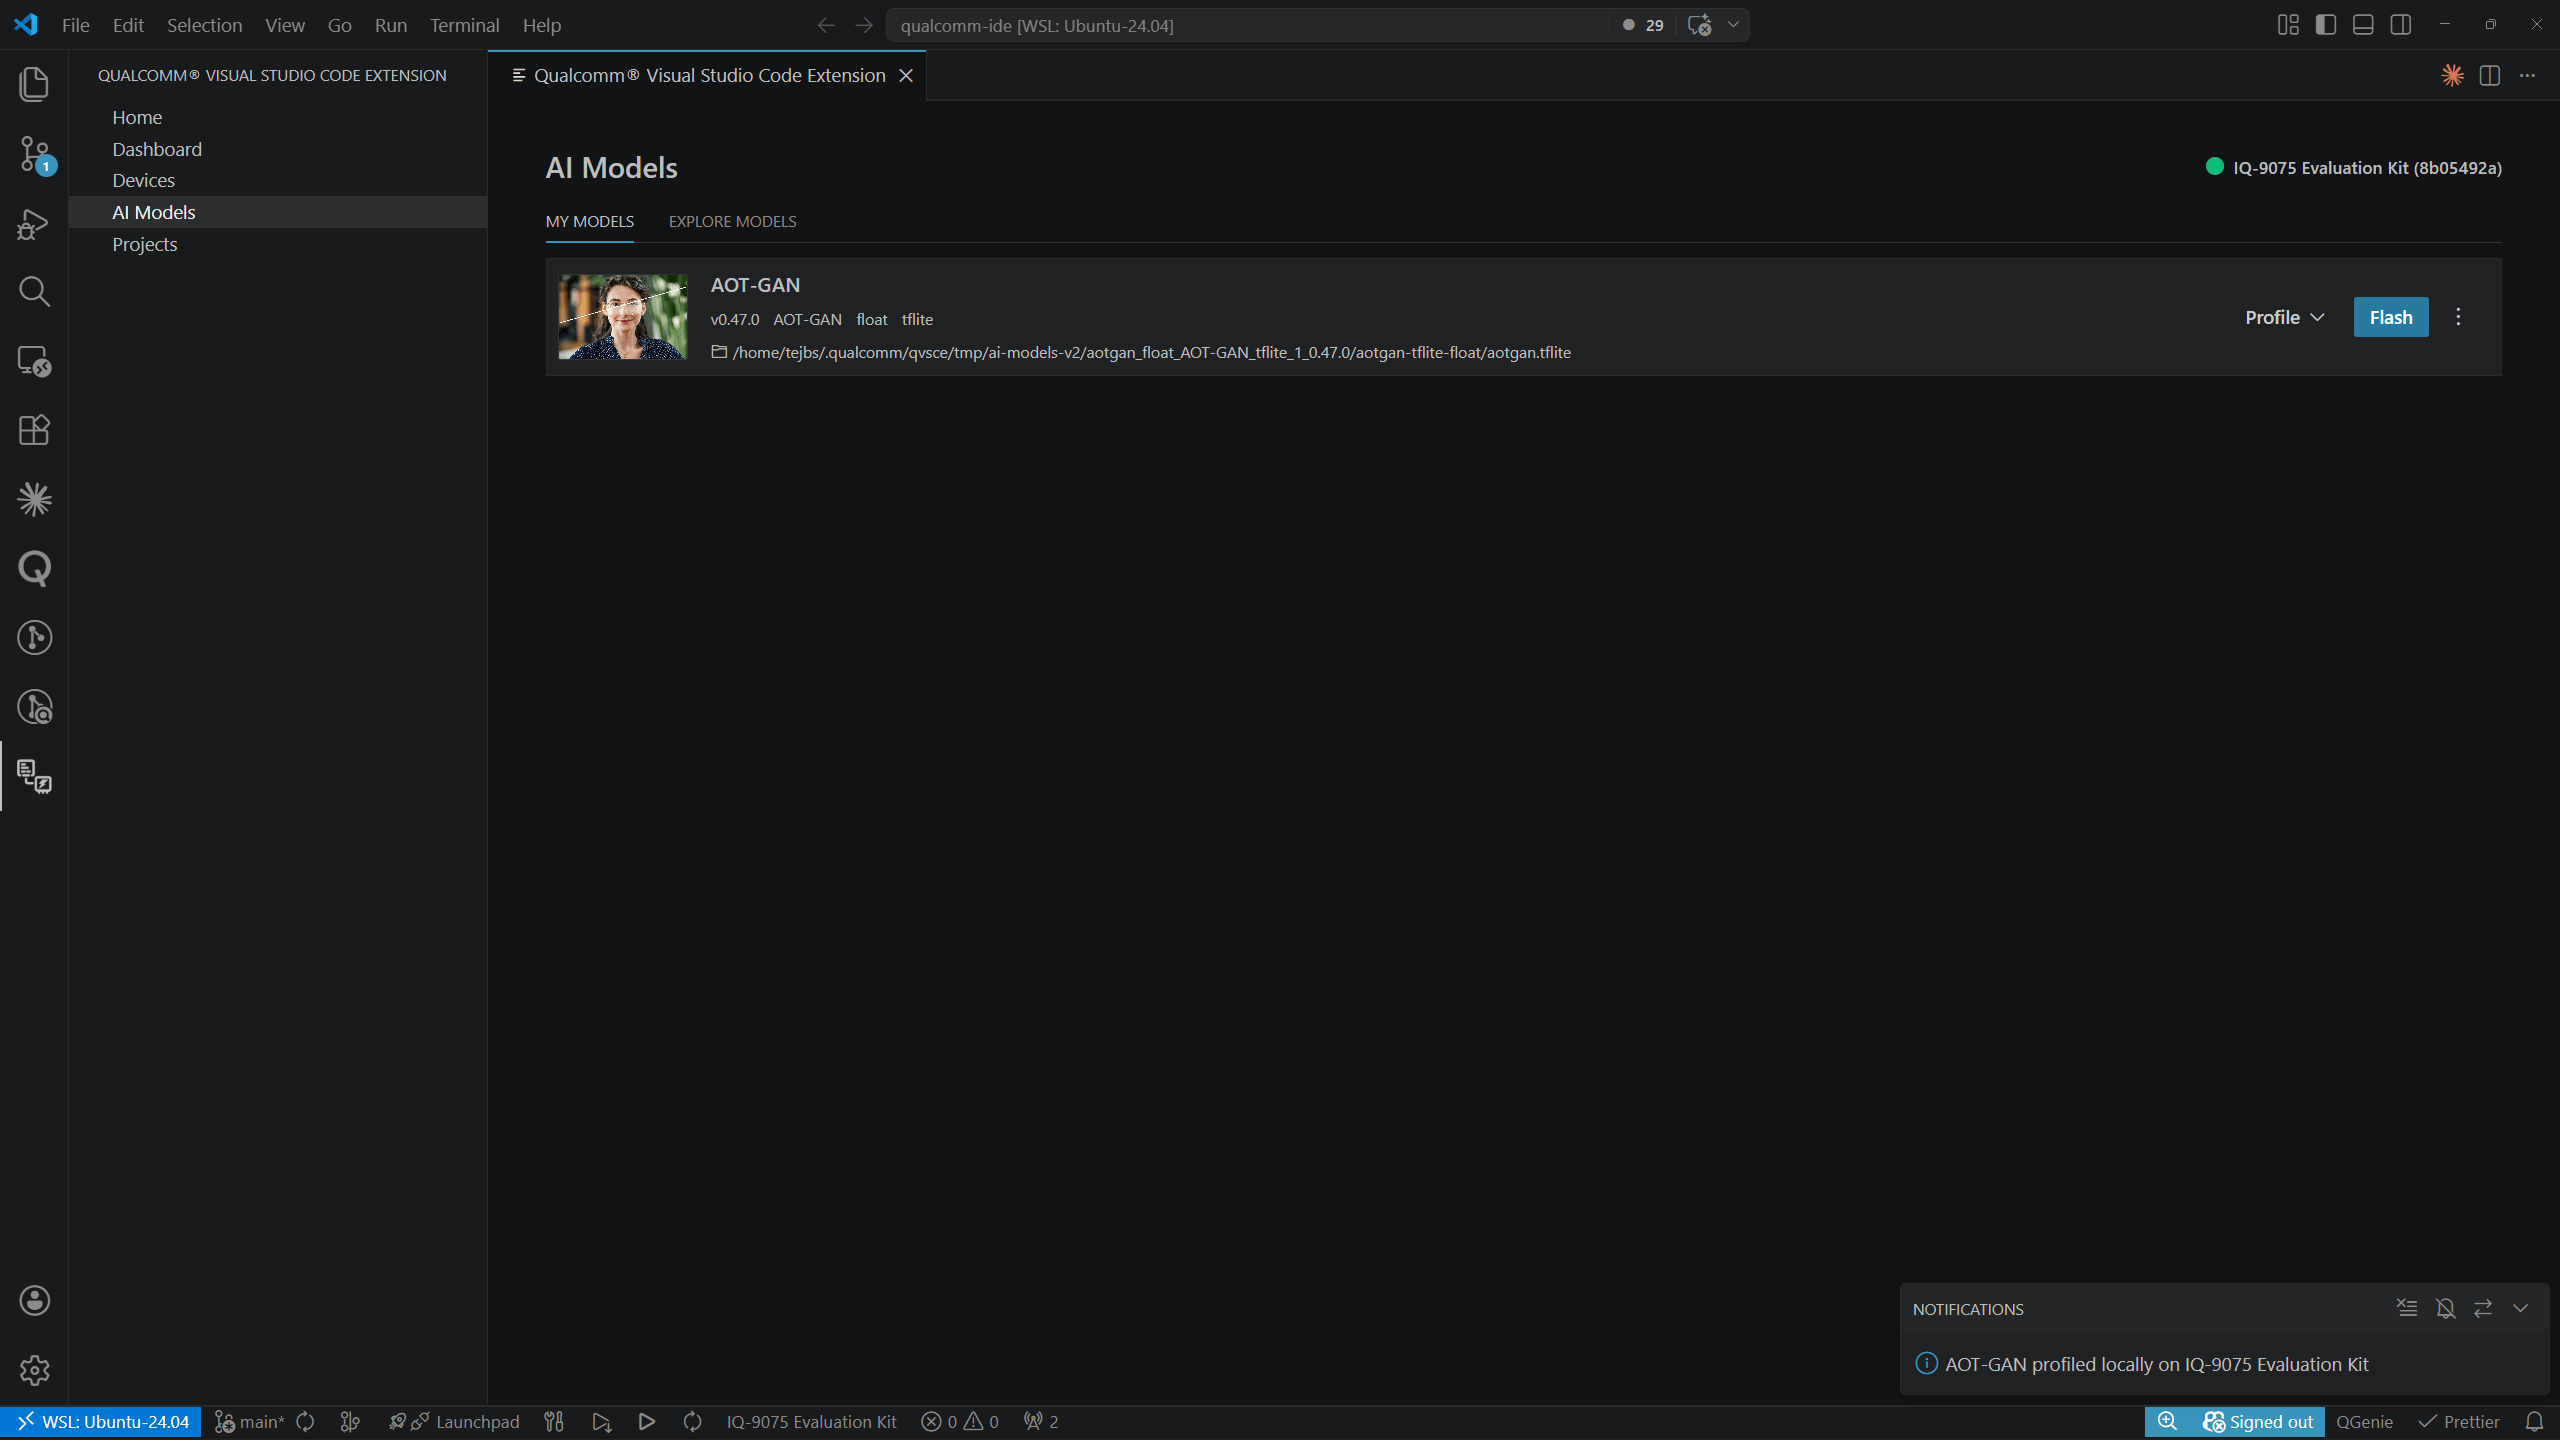
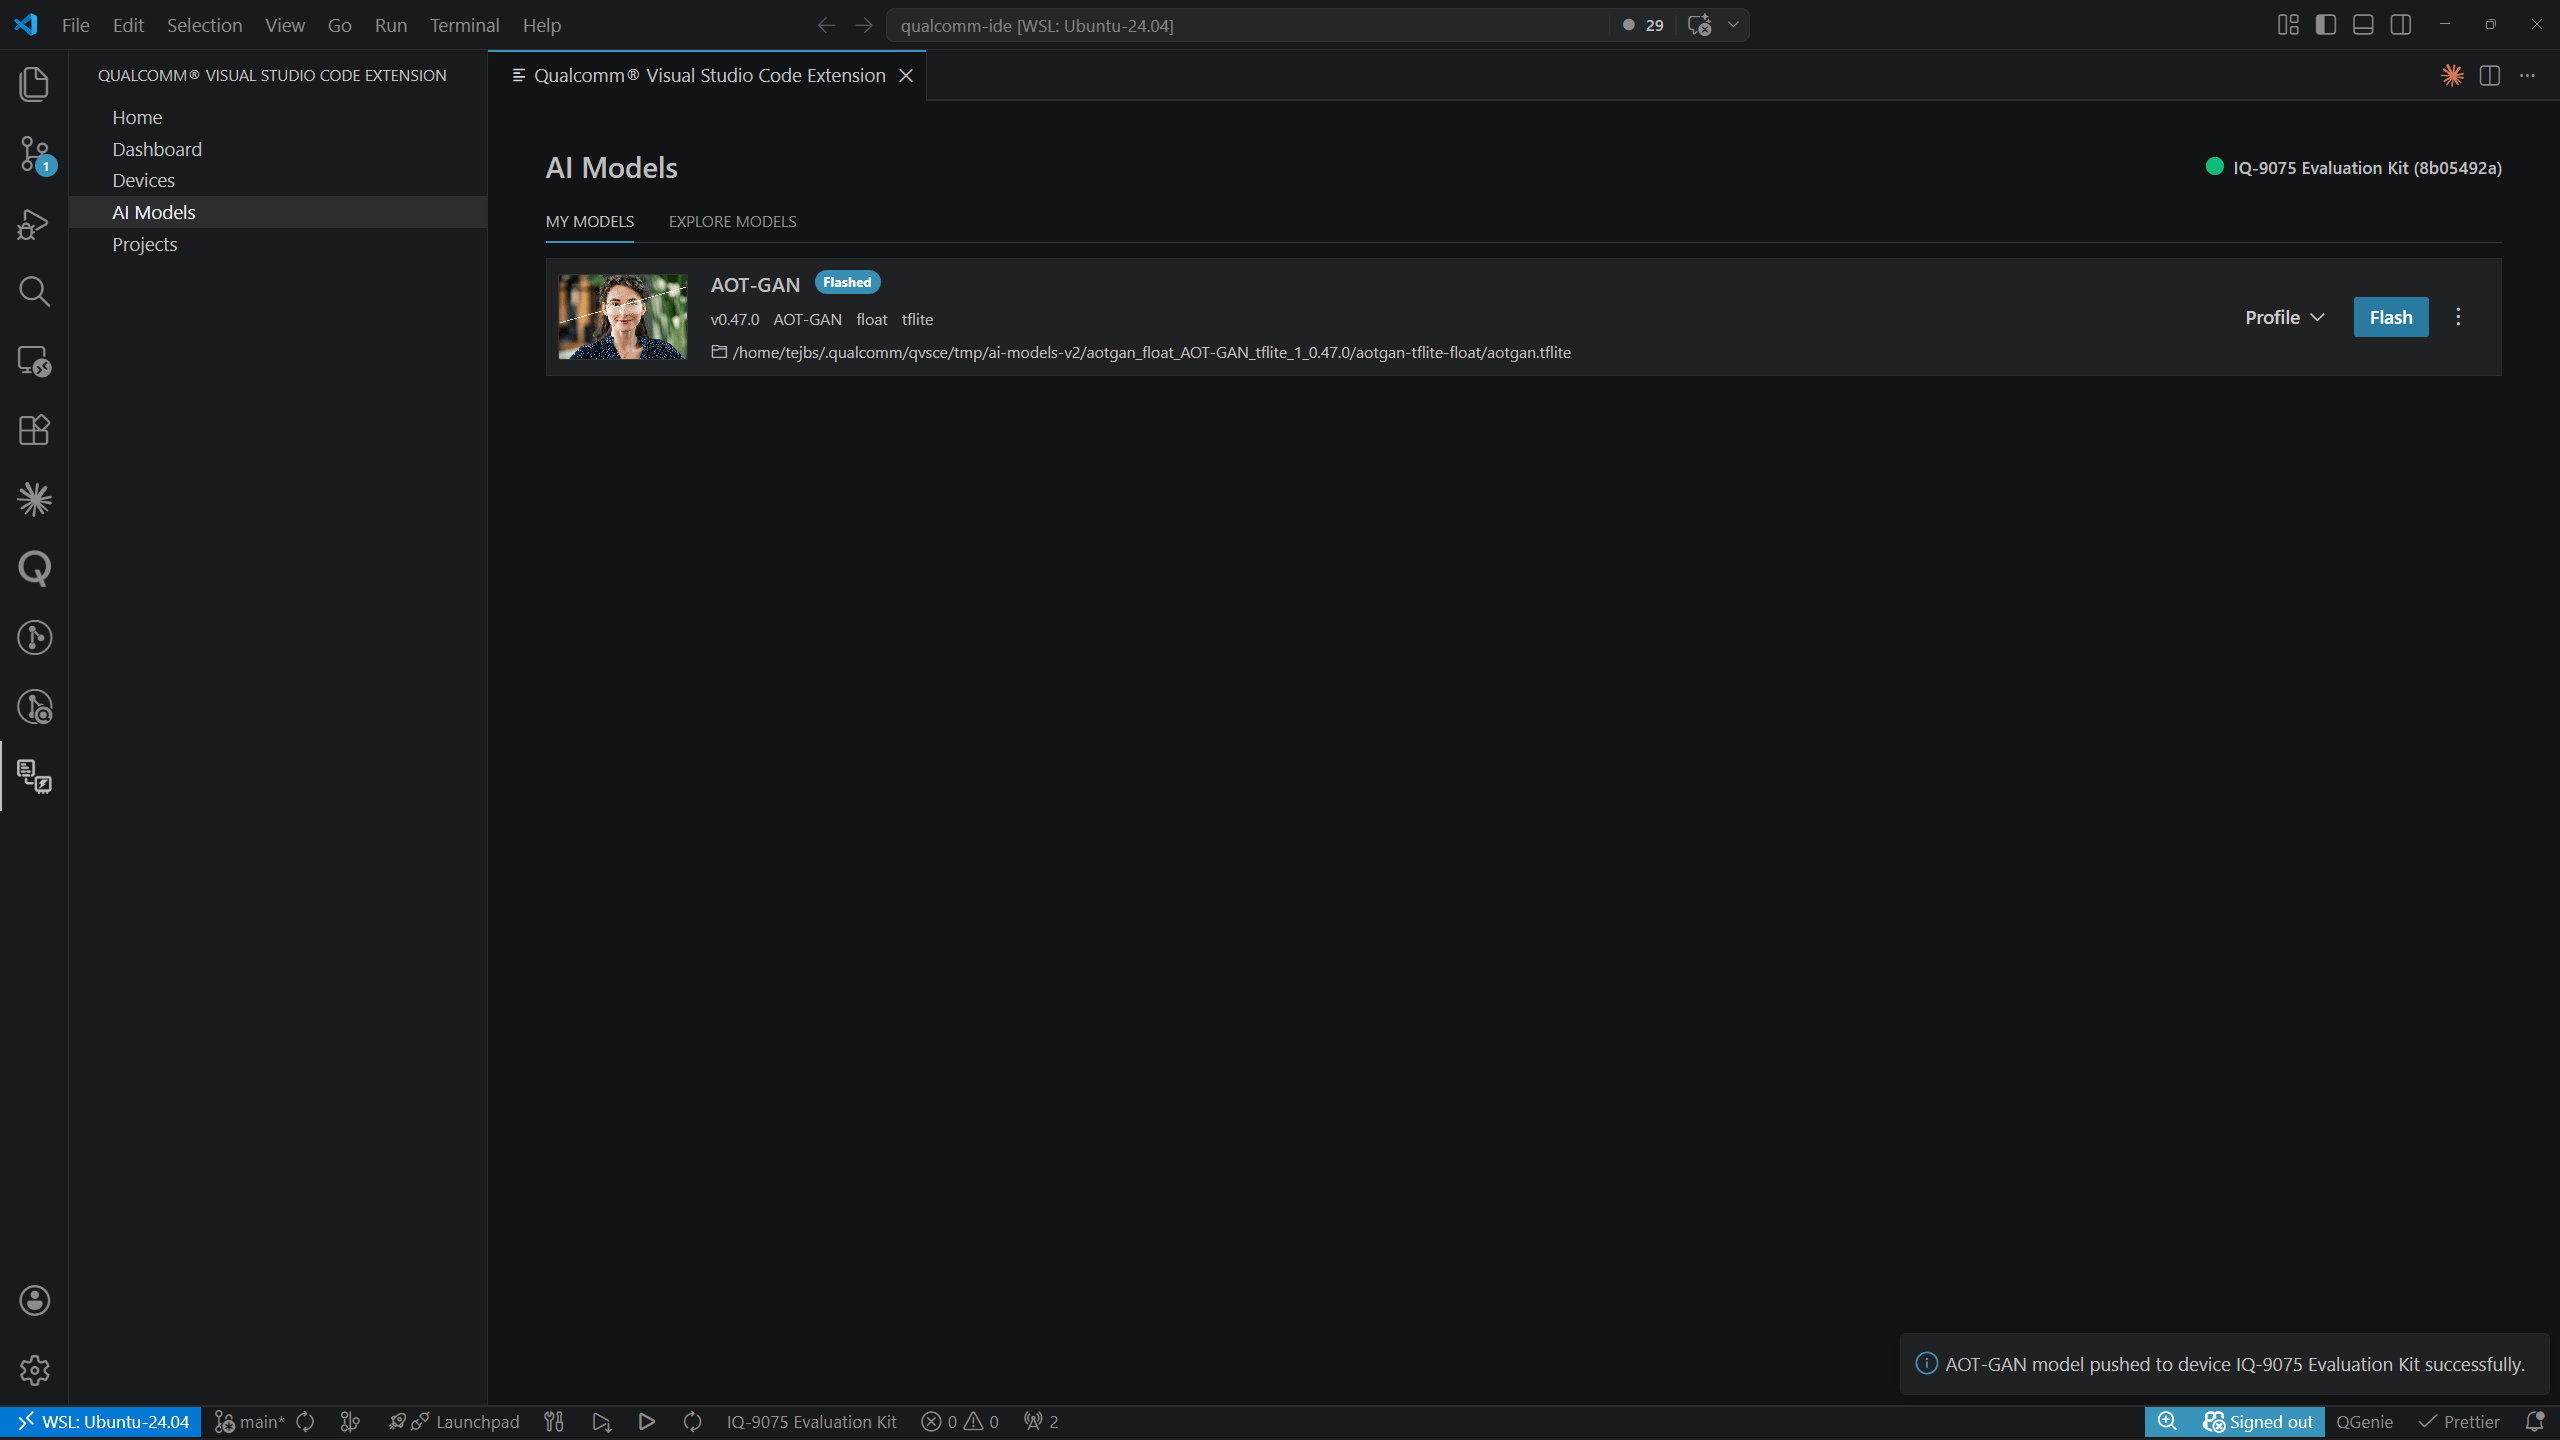
Flashing a Model to the Device
Click Flash on a model row in MY MODELS to push the model to the active device.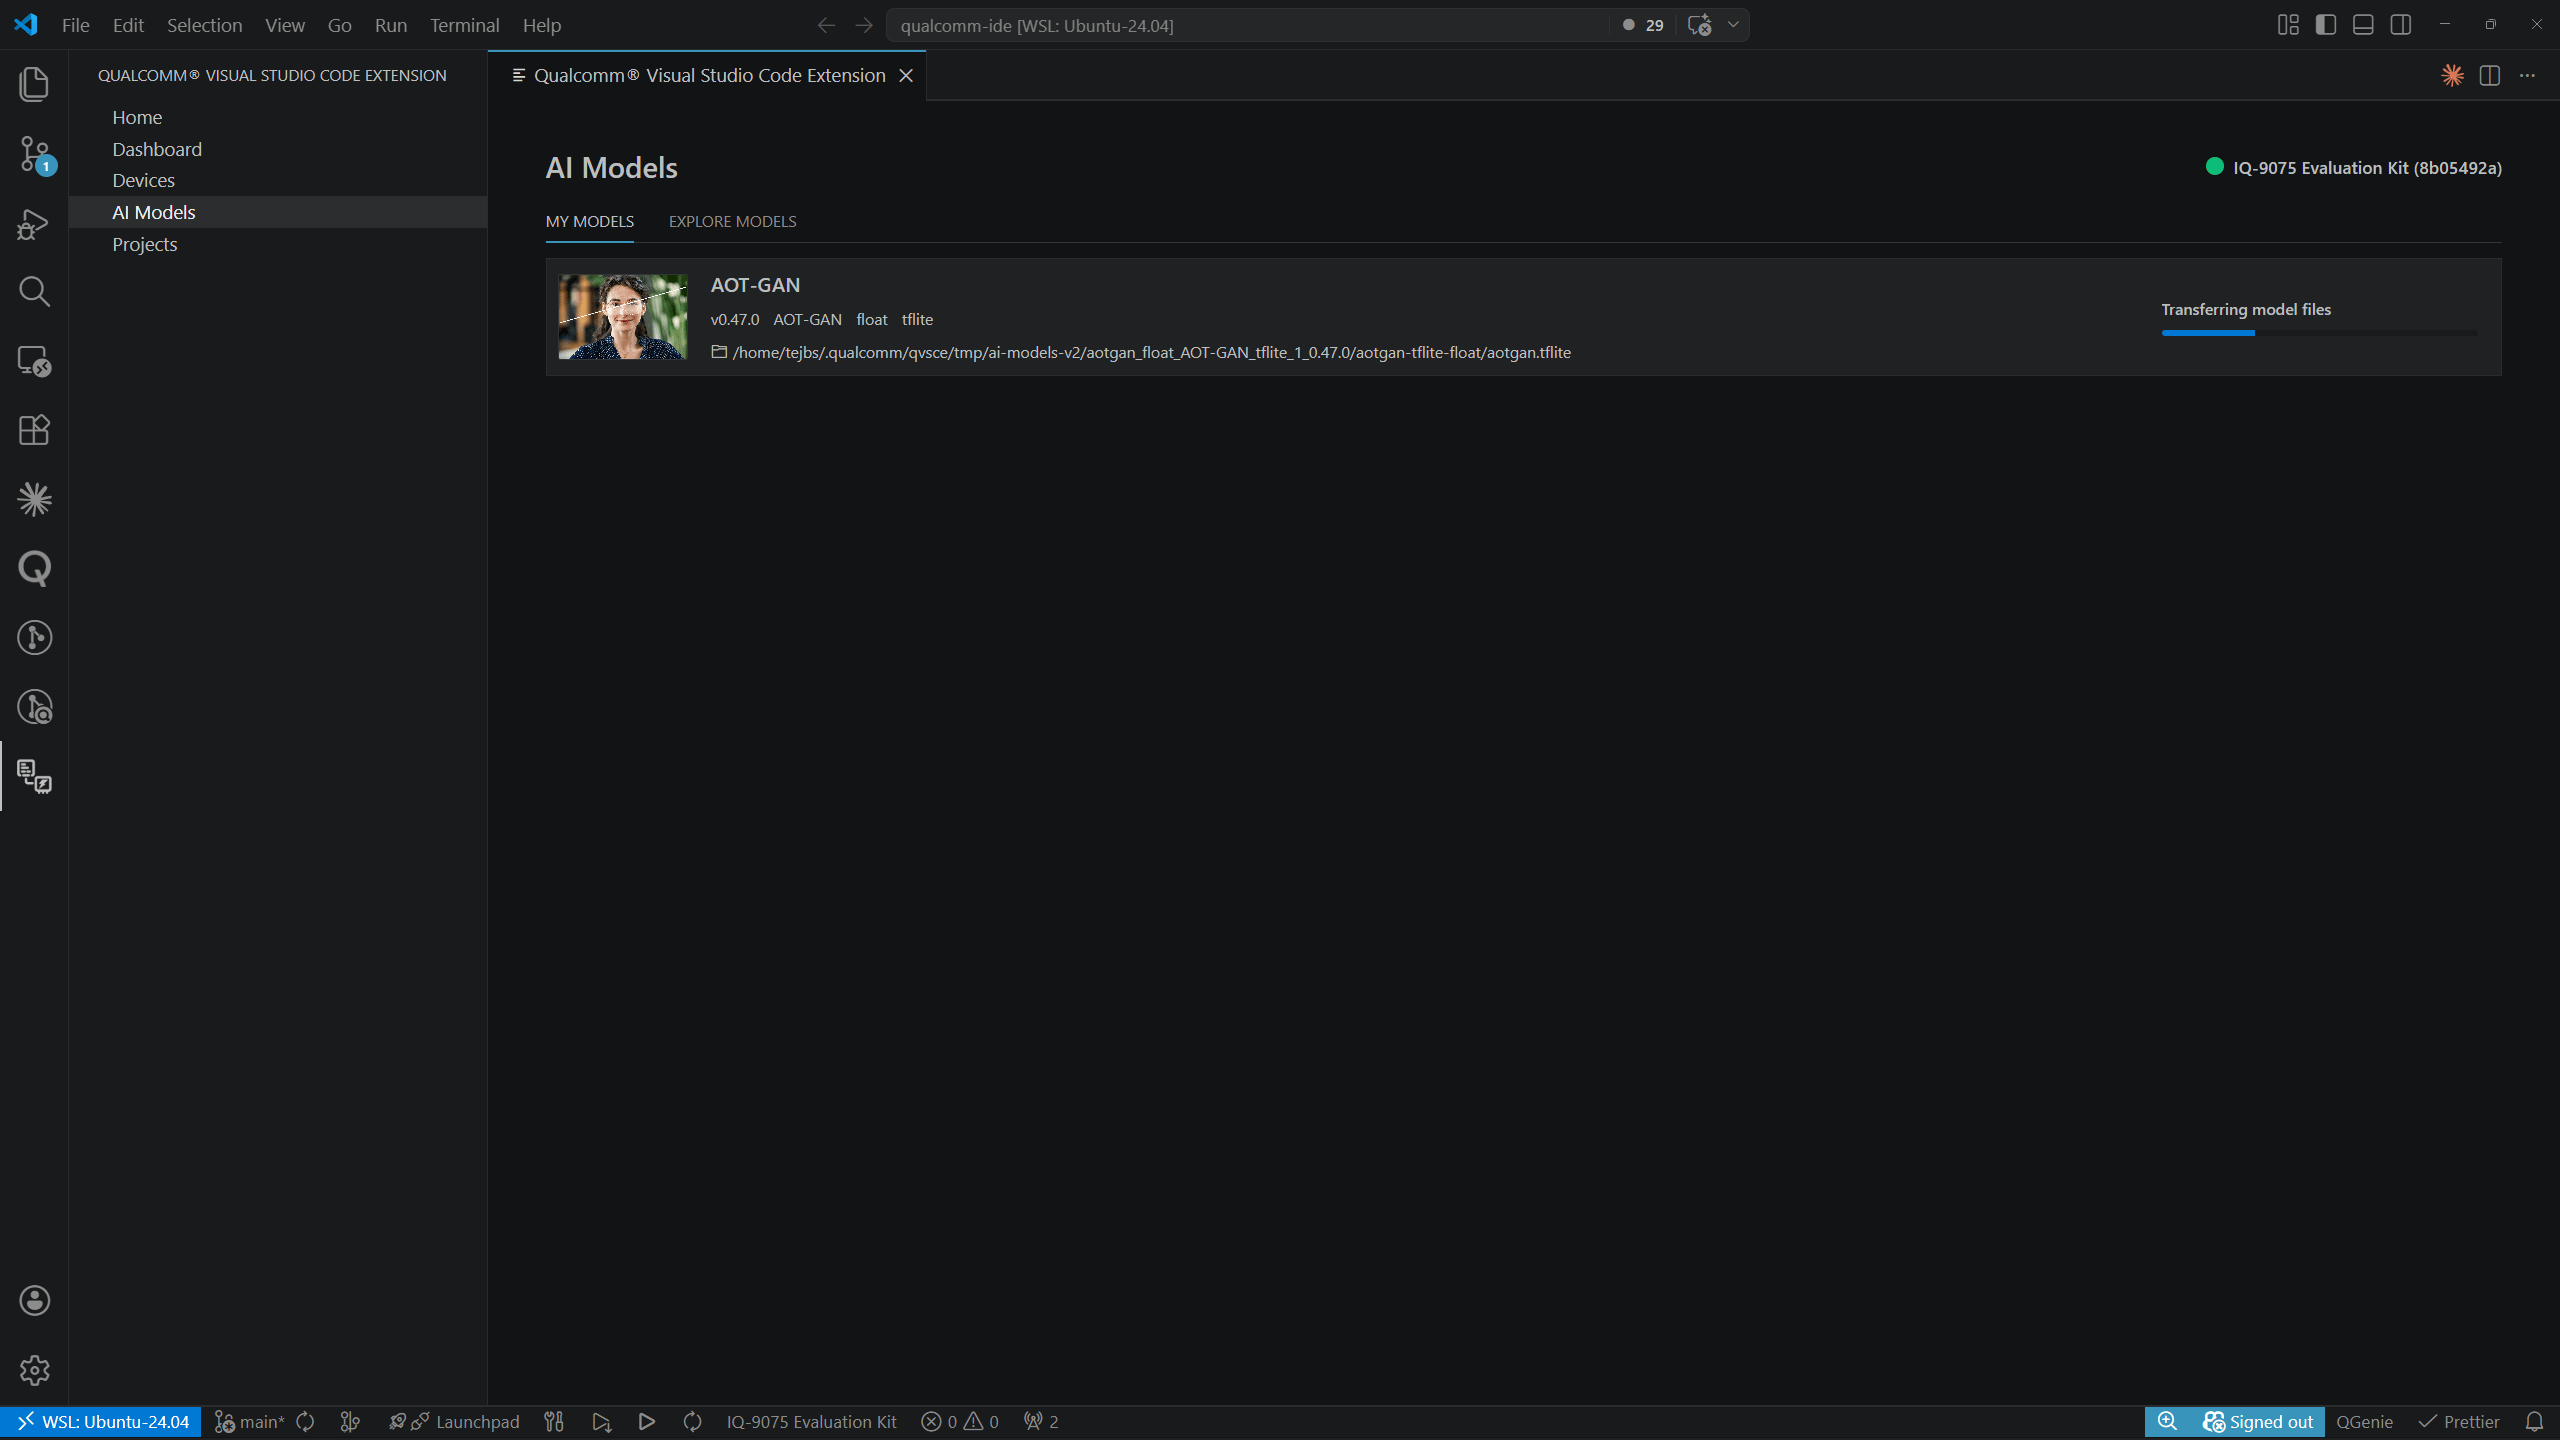
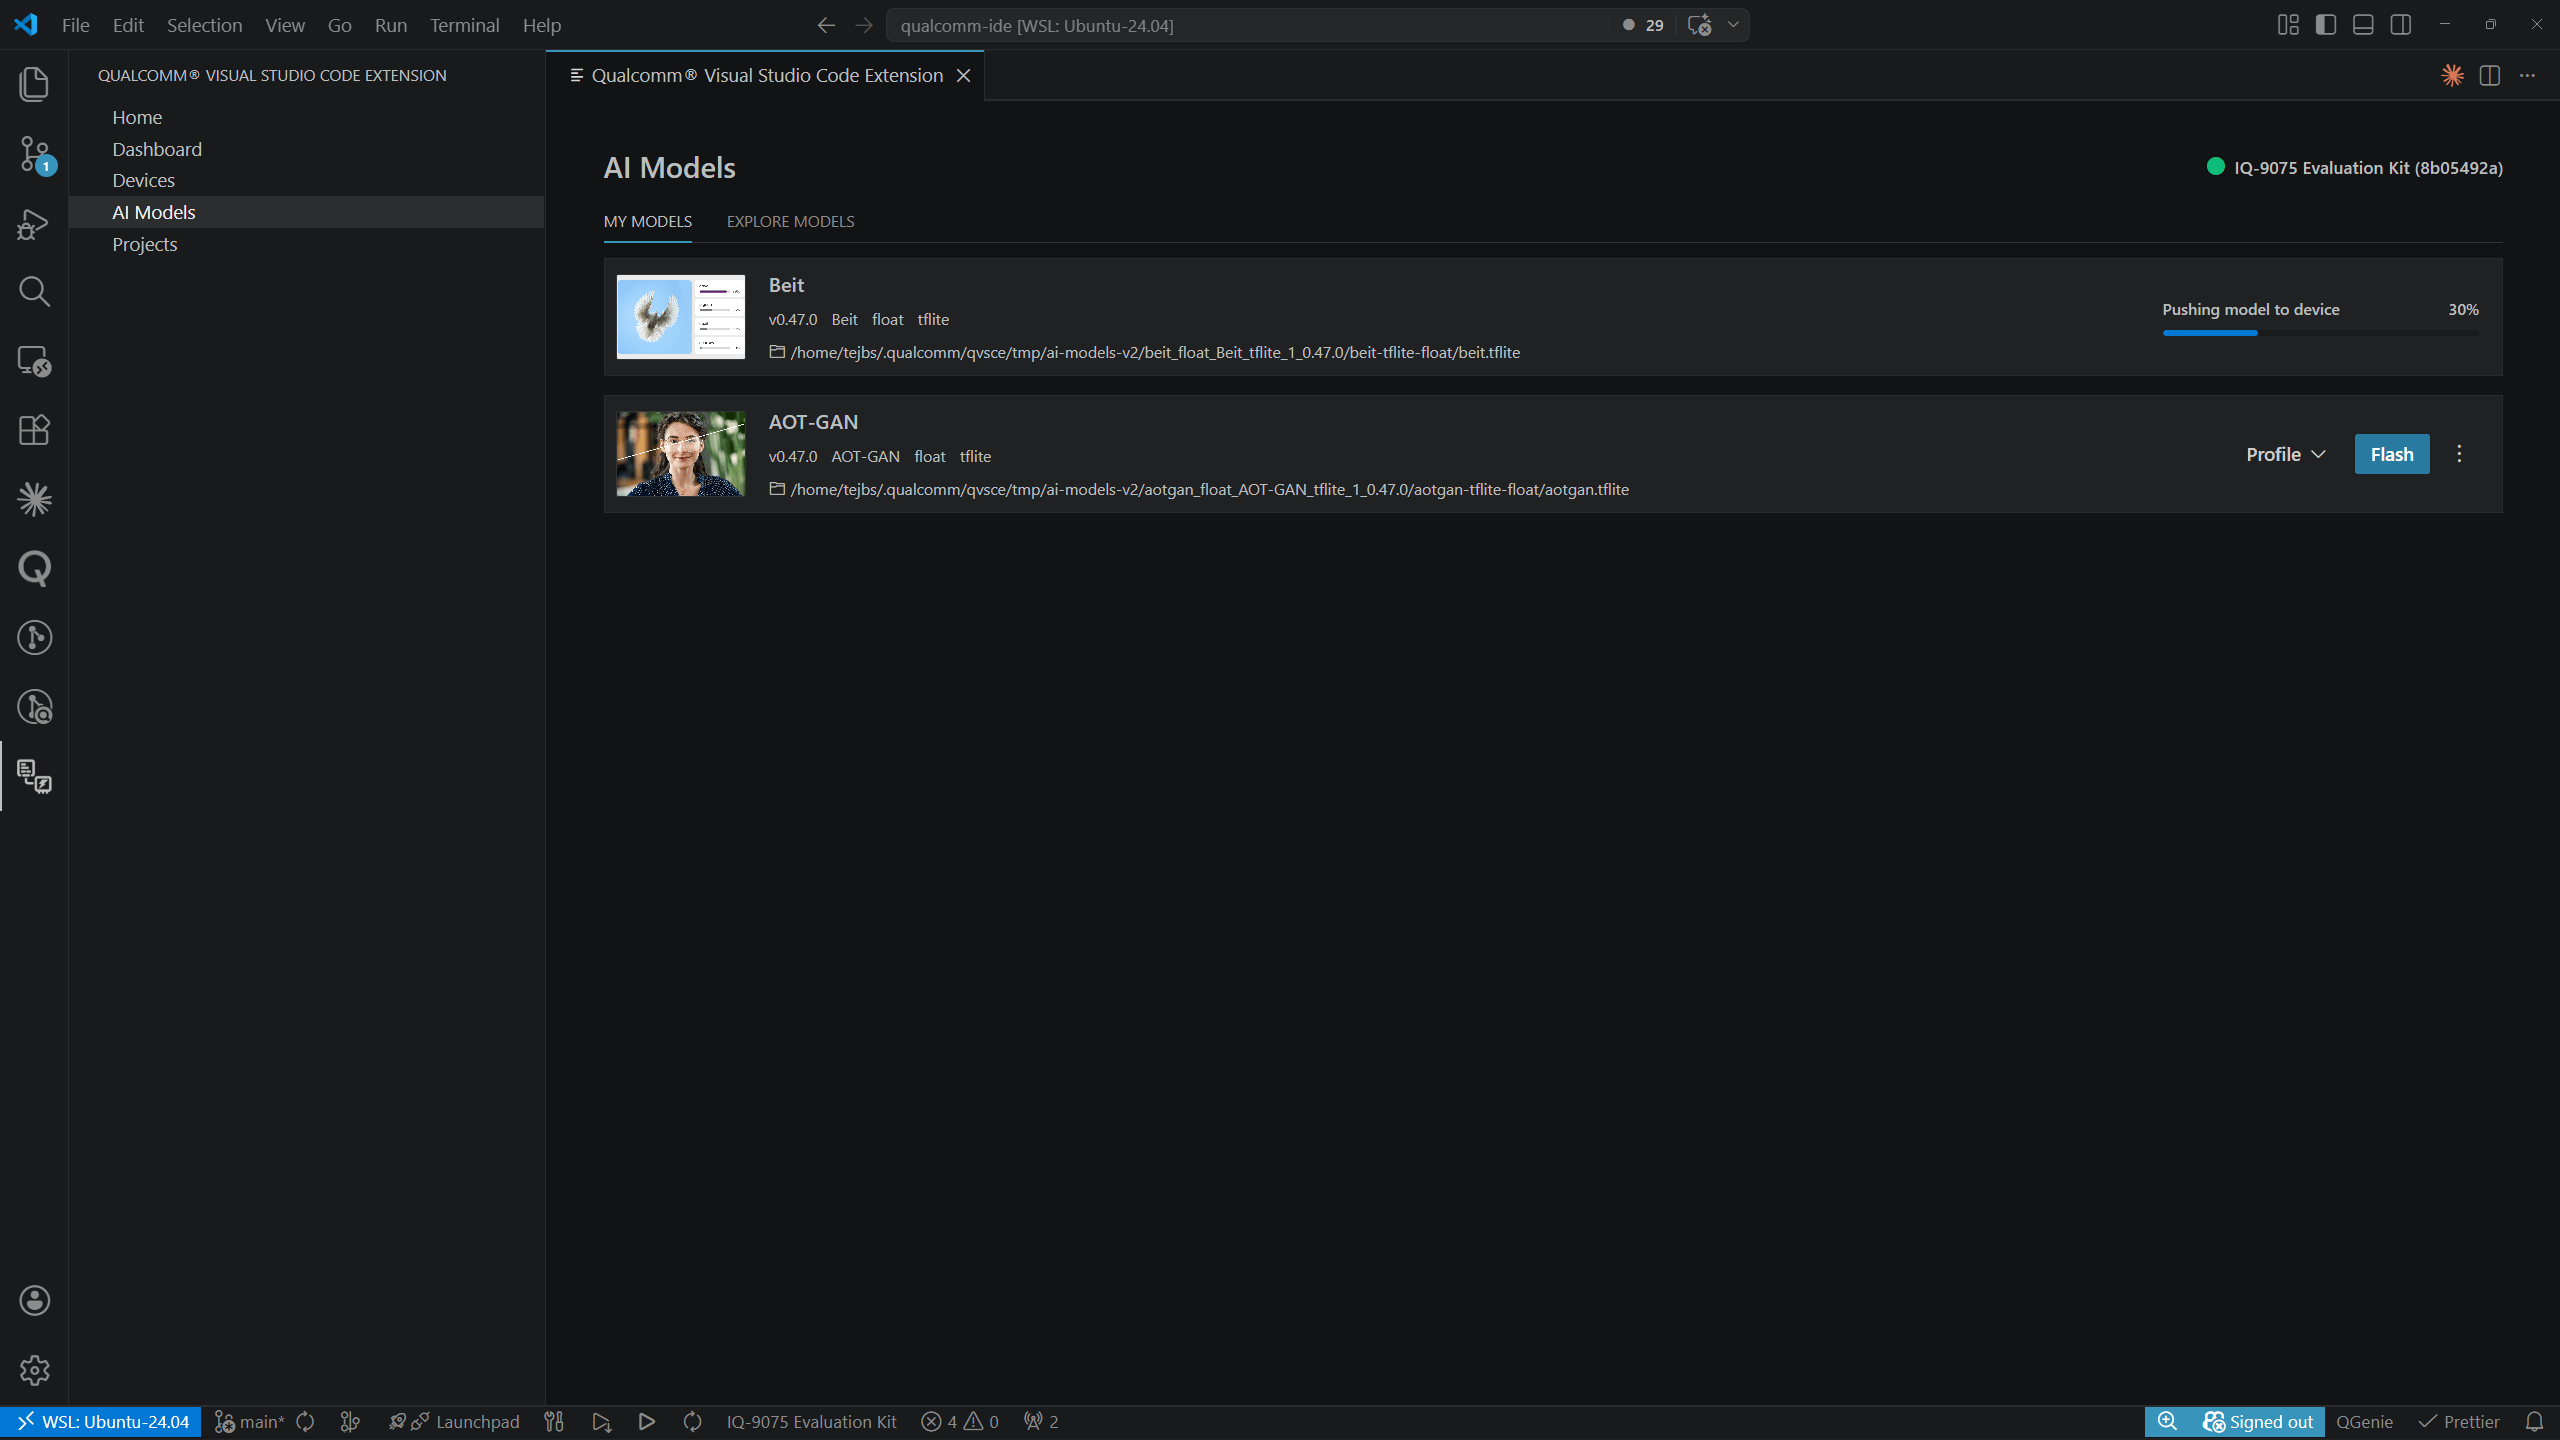
An active device must be set before flashing. The active device is shown in
the top-right corner of the AI Models page. See
Devices for setup instructions.
Removing a Model
Click the ⋮ overflow menu on the right side of a model row in MY MODELS and select Remove to delete the model and all its profiling results from the host.